Changing Motorcycle Fork Oil

A three legged Tiger.

Changing fork oil turned out to be pretty straightforward.  The most time consuming part is removing any niggly body panels so you can get at the forks themselves.   Make sure you loosen the top fork plug before you remove the forks as you need the forks firmly held while you do that and the clamps on the bike are designed to do just that.  Once you’re there, undoing the clamps that hold the forks means they’ll slide right out, so be ready for that.

The spring on the Tiger is a
progressive rate unit – it is
sprung tighter the lower it
goes.

Once on the work bench it was a matter of taking off the rubber fork protectors and cleaning up the unit.  I then slowly removed the top of the fork using a 22mm ratchet while keeping pressure on.  The book said the cap is under ‘considerable’ pressure from the spring, but with the fork fully extended it released quite gently.  With the cap off I removed a spacer, a washer and the spring slowly as the fork is full of oil.  Pulling the spring out quickly means you’re pulling oil out and making a mess.  With the parts out I inverted the shock assembly and poured the old oil out into a measured container to see how much was in there and what condition is was in.


The oil came out looking pretty dark – the new stuff was completely transparent.  Since the previous owner didn’t appear to change the oil in the engine, I doubt fork oil ever got looked at; this stuff has probably been in there a while.  There was no corrosion in or on the forks themselves or on the internal components, so after a cleanup I poured 710ml of new fork oil into the fully compressed fork.  I had to raise the fork to install the spring, washer and spacer and then put the cap back on snug.  I later tightened it to torque specs when it was reinstalled on the bike.

Spring number two gave me about 660ml of oil after a good emptying.  The first one was at about 650ml.  It got refilled to 710mm of heavier 15 weight fork oil to reduce the floatiness of the front fork and deal with my weight better.  I’m looking forward to feeling the difference when the snows clear.

If you’ve got a bike with fairings I’d guess a fork oil change would take you an easy afternoon of work.  If you’ve got a naked bike then this is a matter of removing the front wheel and brake calipers, loosening the top cap, loosening two clamp bolts on the triple tree and handlebar clamps and sliding the fork out.  Removing the cap and internal components and emptying the old oil would only take about ten minutes per fork.  Refilling a compressed, empty fork with the required amount of fork oil and putting it all back together another ten minutes.  Once you were familiar with the process on your naked bike it wouldn’t take more than an hour to do a fork oil change – longer if you have a lot of finicky fairings to remove.

The left photo is of the fork assembly off the bike prior to removing the rubber fork gaiter (which cleaned up nicely with warm soap water and then some Armourall).  On the right:  all back together again.  The front wheel got regreased and cleaned up.  The speedo housing was especially mucky.


LINK to the specs research I did on fork oil changes on this particular Triumph Tiger.

The other fork had about 650ml in it – pretty black considering it was clear when it went in.


from Blogger http://ift.tt/2jNmaae
via IFTTT

West Coast Siren Call

I came up with the idea of setting up motorcycles down south in rental storage units to access over the winter a while back.  This is just the sort of thing I’d do if I had that kind of disposable money laying around.


To set up San Francisco bike storage I’d need to get an Ontario bike down there and parked up in the storage facility.  The idea is to have a ready to go bike that I can fly to with minimal luggage.  I’d eventually be able to fly in to San Francisco with only a carry on bag, take a cab to the storage unit and be on two wheels in one of the best motorcycling locations in the world within a few hours of flying out of the snowbelt.  For the setup I’d take known, works-for-me gear for the ride and then hang it up in the storage unit along with the bike.  Flights back at the moment are one stop, seven hours and about $700 Canadian.


The weather is already closing in here.  We’ve had dustings of snow multiple times.  This would be one of my last chances to make the ride out west before the white wall of winter descends on us.  In trying to make good time to SanFran, I’d also aim to get a motorcycling bucket list item done:  an Iron Butt thousand miles in twenty-four hours:


Day 1:  Elora to Hampton Inn Portage IL.  Just under 500 miles over the border and to the edge of Chicago.  Make sure everything is ready for the big push on Day 2 (the Iron Butt 1000 miles in 24 hours).  Make sure everything is good to go on the bike, get in early, eat and rest up for an early departure.


Day 2:  Portage IL to Denver, CO.  Be on the road by 5am for the big push west.  Cross Chicago before rush hour picks up and then thump across the plains.  1027 miles in 24 hours.  Get in to Denver overnight and then 2 days at the Embassy Suites by Hilton Denver Stapleton.


Day 3:  Rest day in Denver.


Day 4:  Denver to Grand Junction.  Into the Rockies, 333 miles to the Hampton Inn Grand Junction.  A lower mileage day means this should be as much about enjoying the mountains as it is about making time.

Day 5:  Grand Junction to Ely.  429 mountain miles to Ely and the Ramada by Wyndam Ely passing through 3 national parks, so it should be a pretty ride.


Day 6:  Ely NV to San Francisco.  554 mile day to wrap up the trip.  Get into San Francisco late, park up the bike and put everything into hibernation mode.  Load up a carry-on bag with the essentials and take a cab to the airport.  Retrace the four thousand plus miles back in five hours.


I should be able to take the bike out, park it up and be back home within a week, then I’ll have a bike on-call on the West Coast.


For this trip I need something that can cover big miles effectively but is still a useful tool on twisty roads.  The big Triumph Tiger 1200XRx is a long distance capable bike that fits a big guy like me.  It’s also easy to maintain (shaft drive, fuel injection) and comes with many long distance handy abilities like long suspension to soak up bad roads and luggage for the long trip.


A big Tiger in this format costs just over $24k Canadian.  It’s a pretty thing, I saw the new ones in the flesh at the Triumph Tiger ATLAK meet up last summer.  Many magazines describe the bike as very large, but I didn’t find it overwhelmingly so.  In fact, I was surprised at how svelte it was for a 1200cc adventure bike.


But there are some things about the big Tiger that I’m not a fan of.  I’ve never gotten excited about the big aluminum panniers thing on adventure bikes, or any bike for that matter.  I like the colour matched lucifer orange ones on my old Tiger.  I think the aluminum ones look half assed and unfinished, and I get to pay hundreds more for the privilege of having them because others think they’re a fashion item.


The other issue is a recent BIKE Magazine review in which their Tiger developed a number of electrical issues.  Whatever is waiting for me on the West Coast would need to work when I opened that storage unit roller door.  The Tiger is also a reasonably sensible choice, but it’d be nice to have something a bit more come-hither waiting for me in San-Fran.


For surprisingly similar money there is something that I’d describe as more of a dream bike:  the Kawasaki H2 supercharged demon bike in sport touring form.  The H2 SX is an efficient, powerful, supercharger-chirping-as-it-breaks-the-sound-barrier thing of beauty.  It weighs about as much as the big Tiger but produces prodigiously more power and looks like a Japanese super model.


On top of that it has beautifully designed and colour matched panniers that practically disappear into the stunning looks of the bike, rather than looking like tacked on, low-rent metal boxes.


Having the SX sitting in a storage unit in San Francisco would be a constant West Coast siren call.  If I wanted to go far, it could handle it, if I wanted to canyon carve in and around San-Fran, it’d do that to.


As much as I love adventure bikes for how well they fit me, I think I’d have the Kawasaki super model waiting for me on the west coast.  It’d be a blast to ride on the trip out there and would fit in with Californian bike culture much better.

from Blogger https://ift.tt/2Fe996b
via IFTTT

If you had £70k to spend on a car, which would you choose? Much more than a car!


£70k?  Yikes, that’s $121,026 Canadian!  If I can opt out of the dick swinging options above, here’s how I’d spend my hundred-and-twenty-K on things with four wheels, and two:


Mazda 2019 MX-5 RF GT
$44,870 CAD
That’s a GT model with bells and whistles.  Put me on a twisty mountain road in this and your typical knuckle dragger in one of Top Gear’s choices and I bet I’m the first one to the end… and I won’t be sending it in for service and repairs every five minutes – and it looks spectacular!


RAM ProMaster Van
$44,625 + $15,375 upfit = $60,000
If you’ve read this blog before you know I’ve got a Guy Martin/van obsession that often coincides with a mid-Canadian-winter psychotic episode (I’m getting close now) involving escaping south with a bike in the back for a chance to get on two wheels again.  The Ram’s a funky van.  I’d keep back another $15,000 to upfit it into a long distance camper/bike hauler/multi-use vehicle.


That puts me at about $105,000 Canadian with two new, very different vehicles.  What to do with the other sixteen thousand?

Suzuki DR650SE
$6000 (!)
They’re on sale at the moment and a rock solid piece of off the tarmac ready kit.  It’ll keep up with traffic on the road (unlike the KLX250 didn’t) and take me anywhere – including expanding the short Canadian riding season by tackling the odd bit of snow.  I might look into some enduro competition with it too.  It’s be a rough and ready option in situations where I’d be worried about a more road ready bike.


I’ve still got ten grand to play with and I’ve already had more fun than any of the try-hard Top Gear choices.  Time for something really frivolous that’ll be as fast or faster than any of Porsche/Renault/Lamborghini nonsense that kicked this off.

’08 Suzuki Hayabusa
$7000
The first thing I stumble across on Kijiji is a $7000 ’08 Suzuki Hayabusa.  Odd that Suzuki is the only Japanese manufacturer I’ve never owned and I’ve got two on the list this afternoon.


I’ve got a thing for orange bikes, and this one looks a peach – older rider, low mileage for the year and well looked after.


I’d hold back the other three grand just to make sure this is faster than anything on Top Gear’s list because I like to be Tom… Petty.


If I had £70k to spend on a car?  I’d buy a nice car, a useful van and two awesome and very different motorcycles!  Why be dull?

from Blogger https://ift.tt/2SwkkM3
via IFTTT

Elspeth Beard’s Lone Rider

I just finished Elspeth Beard’s Lone Rider on Kindle.  In the early 1980s Elspeth rode around the world on her already well used BMW.  I’m a big fan of neuro-atypical voices in writing being one myself.  As a dyslexic (who I also suspect is on the ASD spectrum) who struggled in school, Elspeth isn’t your typical writer’s voice, and the book is all the better for it.


From her struggles with family and friends when preparing for her around the world ride decades before it became a television opportunity, to her honest observations of what it was (is?) like to travel solo as a woman, you get a sometimes painfully transparent look at the emotion and effort stirred up by such a massive undertaking.  The repeated machismo she runs into in the motorcycling community in 1980s London is frustrating.  What’s more frustrating is that it hasn’t changed as much as it should have in the past thirty years.


The way that Elspeth describes the eccentricities of her dad and herself, I suspect they both live somewhere on the ASD spectrum (something I empathize with).  This atypical way of thinking, in addition to her dyslexia, gives her descriptions of the cultures she is riding through a degree of perspective and originality missing in other travel books.

Travellers tend to throw on the rose coloured glasses when describing India, ignoring the difficulties of trying to move across a continent with well over a billion people on it.  Elspeth’s experiences, exacerbated by her gender, along with her brutal honesty, give you what is probably the most accurate description of riding in India you’ll ever read; no rose tinted glasses on here.  From the fumbling sexual advances of men stuck in the middle ages to breath taking child cruelty, Elspeth’s wide open eyes see it all and she doesn’t shy away from telling you about it.


I would highly recommend this book if you enjoy motorcycling, travel writing and/or feminism and aren’t frightened off by people who think differently.  It doesn’t read like your typical motorcycle travel book, but Elspeth wasn’t just riding, she was also elbow deep in keeping an already old, high mileage 1970s BMW running through sandstorms, biblical rain and everything in between.  If you have any mechanical sympathy at all, Elspeth scratches that itch too.


As much as I enjoyed the travel writing, what I missed most at the end of the book was Elspeth’s unique way of seeing the world.  Her struggles understanding people and dealing with bureaucracies, especially with her wit and dry humour, are often hilarious, disheartening and hopeful all at the same time.


I’d urge you to give this book a read, it’s available on Amazon as an ebook for less than ten bucks Canadian.  When the movie comes out in a couple of years, I hope they give it the nuance and depth it deserves.  Elspeth provides a voice and insight into a lot more than just her gender.

from Blogger https://ift.tt/2PCH61c
via IFTTT

Perseverance & Patience

Steady on, it’s not that bad.  I shall persevere!

The never ending tale of Concours carburetors continues.  My most recent attempt was to check the fuel amounts in each bowl and then reinstall and test (I’m getting very quick at this).

Once again the old Connie coughs and backfires and dies on throttle application.  The removals and re-installations have upset the old connectors between the carbs, which have developed a gas leak, so the whole thing came off (again) and is now apart on the work bench (again).


I contacted the local Kawasaki dealer for parts last weekend, but they’ve been radio silent.  The parts I need were easy enough to find, but maybe 22 year old carb bits aren’t sexy enough to warrant a timely reply.  Maybe I should have ordered them online, in spite of a number of magazines lamenting people’s lack of support for local motorcycle dealers.  Had I ordered them online they’d probably have been here by now.  Instead I’m left wondering if I can even get these parts.

The goal now is to take each carb apart, double check float depths and ensure all the internal jets and such are properly installed, then it’ll all go back together again with new connecting pieces and go back on the bike (again).  With any luck I’ll get some sort of clue that I’m moving in the right direction.  That’s been the most frustrating part of this process.  I make changes and there is no change when I fire it up.  Whatever the problem is, I haven’t come close to touching it yet.  At least a fuel leak is an obvious and easy fix.


Any day now…


The Blueing of the Ninja part 2

I spent some sweaty hours this weekend de-blacking the Ninja.  The coolant got flushed as I was waiting for paint to dry.  With the fairings off I got more done than I intended.  I stripped the tank and repainted it, my first attempt and recovering the stripped back to blue paint.

Original Kawasaki Paint codes courtesy of Color Rite

I was able to find a metallic blue that would work with the Ninja original Candy Plasma Blue.  Going on it looks almost identical, but it dries a darker blue, a more royal blue, though since it’s metallic it pops like the original factory metallic paint does.  The paint I found was Rustoleum’s Metallic Cobalt Blue.  It’s readily available, I found it at Homedepot.

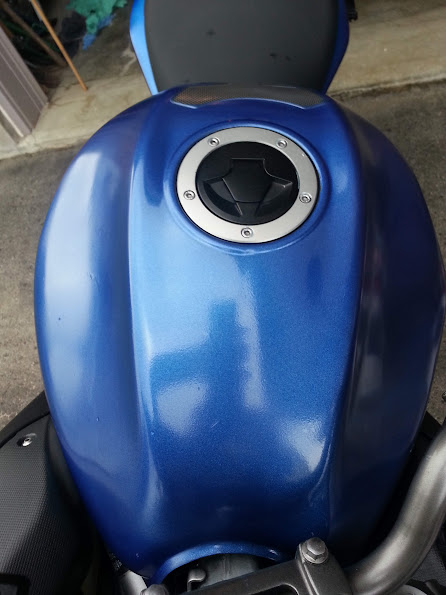
After laying a couple of coats of the new blue, I followed it up with a couple of coats of a gloss clear coat.  The picture of the tank on the right shows you what kind of finish you can get out of these basic tools.  It won’t satisfy a perfectionist, but at under $20 to paint the front fender and tank, it will satisfy your accountant.  I waxed it once everything set (I let it sit for half a day), and it looks pretty sharp.  I’ve driven it 200kms so far this week since and no scuffs or scratches on the paint, so it’s pretty tough too, even after an impromptu ride through a driving hail/thunder storm.

I could agonize over stockness here, but I don’t think I will.  The vision I’ve got for the bike isn’t stock anyway, but it’s a far cry from the flat black bike I started with.  I’m still working out the orange for the frame.  I’ve got a gloss red and a gloss yellow and intend to mix my own.  The only oranges available seem to be traffic cone inspired (see the pics below), I’m going for a burnt orange as an opposing colour to the royal blue.

From the pictures you can see that the blues are mighty close, though the camera does flatten the differences a bit.  When you’re up close you can see where the new paint is slightly darker, though just as rich and metallic.  With the clear coat on top it’s silky smooth to the touch and polishes up nicely with wax.  I’ve been riding in rain all week and everything now beads off where it used to just get wet and sticky on the flat black.

The back end is still stock blue, the tank is the new metallic cobalt  blue
This is a closeup of the seat fairing – the front is the new blue, the back is
the old blue – pretty damn close – matches the spring nicely too
The headlight and front fairing is stock blue, the front wheel
fender and tank are the new blue
Another angle on the tank.  I taped off the filler cap and silver surround,
it came off clean.  I wiped any overspray before clear coating everything

After and before – the metallic blue covers up the bruises well, and where
the bike was already blue, you’ve got a strong undercoat that supports
the top colour.  It took a couple of extra coats to cover the bruises.
While I’ve got the fairings off to do the frame, I’ll have another go at the blue on the big front fairings.  It’s a time consuming, tiring process taking that black off, so the fairings might be a while longer before I get them done, then I can finally call my beaten up black bike blue again.

Appalachia

What a ride down the Appalachians would look like next summer (for the solar eclipse!)

https://goo.gl/maps/6h2J4cJoXhz

Elora, ON

4 h 19 min (286 km)
Entering the United States of America (New York)
4 h 19 min (286 km)
Entering Pennsylvania
3 h 11 min (224 km)
State College, PA
37 min (40.0 km)
Entering Maryland
Entering West Virginia
Entering Virginia
Passing through West Virginia
Entering Virginia
2 h 59 min (233 km)
Entering Tennessee
1 h 15 min (82.9 km)
Deals Gap
Cherokee, NC
54 min (51.1 km)
Entering Virginia
8 h 6 min (553 km)
Lexington, VA
Entering West Virginia
Entering Virginia
Passing through West Virginia
7 h 3 min (539 km)
Entering Pennsylvania
Williamsport, PA
3 h 38 min (274 km)
Entering New York
3 h 38 min (274 km)
Batavia, NY
Entering Canada (Ontario)
3 h 44 min (243 km)
Elora, ON

https://en.wikipedia.org/wiki/Appalachia


https://goo.gl/maps/JeeomohGEPv

with hotel stops

http://www.blueridgemotorcycling.com/destinations/#interactive-map

http://ironhorsenc.com/
might be good for a couple of days in the Smokey Mountains.

home

6 h 29 min (447 km)
1.  Clearfield, PA
5 h 27 min (390 km)
2.  Inn at Mountain Quest
6 h 41 min (518 km)
3.  Knoxville, TN
1 h 34 min (94.2 km)
3.5   Deal’s Gap – Tail of the Dragon
2 h 25 min (162 km)
4.  Ashville, NC
8 h 26 min (581 km)
5.  Harrisburg, VA
5 h 39 min (437 km)
6.  South Williamsport, PA
7 h 3 min (496 km)
home

Scrambler

I’m enjoying the Ninja and I hope to track day with it this year at some point, but I’m also keen to expand my two wheel experience.  To that end it would be nice to have a bike that is a bit more drop friendly and willing to go off paved road.  In keeping with my ’70s heritage I love the idea of a scrambler: an all-rounder that is stripped and ready for everything from road to off it.

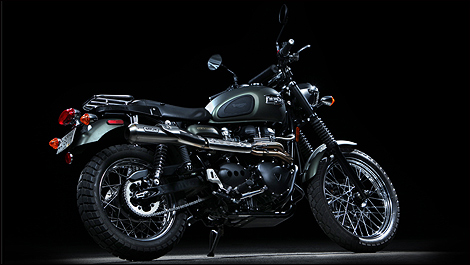
Triumph makes a Scrambler model based on ‘stripped down desert bikes with high exhausts’ (that don’t get blocked in dirt, mud and water).  But if you head over to the Triumph page you get the sense that the new Scrambler is more a hipster man purse than a scrambler in the real sense.

I was hooked on adventure bikes but I’m finding them a bit much.  I got an ADV magazine I hadn’t seen before recently, and after reading the third straight piece about how adventure touring had produced a mystical understanding of reality I threw up in my mouth.  What used to be a Mondo Enduro style lark has turned into pretentious evangelism.  Why do people always have to fuck up what they love with hyperbole?  A DIY scrambler that I can get muddy and fall off of without worrying about plastic is my latest crush.  The video at the bottom with whacky Auzzies giving it the welly in mud is much more my thing.

Building a scrambler by stripping down a street bike and readying it for anything is an appealing project.  I found a 1986 Yamaha YZ Radian for sale.  The Radian is a naked sport bike with a detuned engine with better mid-range power, ideal for working in less than ideal traction situations.  This particular Radian seems well cared for and is only going for about $1000 (Canadian).

I’d strip off the fenders, shorten the seat to a single, lighten up the bike (which is already pretty light) and swap out the lights for LEDs.  I’d also throw some frame sliders and upgrade the shocks for heavy duty use and cover the fronts with dust covers.  I think I’d keep the cool chrome, analogue instruments.  The muffler would get the high mounted low profile scrambler treatment and last but not least would be some somewhat knobbly tires that would work both on road and off road.

With all those changes I think I could strip the bike down to about the 400lb mark. 

Metzeler Tourance tires,
look the part
and go everywhere!


The point of a scrambler is to ride it anywhere and not worry about it.  It hearkens back to days before motorcycles were penned into tiny niches by marketing types more intent on selling a lifestyle choice than a machine you could make your own.  At the very least, it’d be hard for me to make it look like a week long trip has provided me with enlightenment on something so low brow.


Some Scrambler Links:

How to build a scrambler (EXIF)

Aftershock (The Bike Shed)


Aftershock – Sydney from Sydney Cafe Racers on Vimeo.


It’s Better In The Wind – Short Film from Scott Toepfer on Vimeo.

Extending the Canadian Motorcycle Riding Season: Snow Bikes!


The idea of a snowmobile conversion for a motorcycle keeps popping up everywhere this winter.  Timbersled makes just such a thing.  It’s seven grand Canadian for the system plus another fifteen hundred for the fitting kit.  The Husqvarna FE501S is a road legal dual sport bike that the kit fits.  They can be found for about twelve grand.  It’s a rich man’s game but that doesn’t stop me from dreaming about it.  For about twenty grand Canadian ($14,900 US) I’d have a year ’round off road specialist that would also get down the road when needed.  The thought of pulling up to a RIDE spotcheck in a blizzard on a plated version of one of these makes me quite happy.  Officer: ‘Uh, what’s that?’


The KLX250 I tried a while back was so slow with me on it that I felt unsafe on roads.  I couldn’t coax it to 100km/hr which meant I had a row of traffic behind me even on country back roads.  The Husky weighs less and has almost three times more horsepower.  Keeping up with traffic on back roads would not be a problem.  Those capabilities mean it’d carry me and some camping gear deep into the countryside in the summer while also being snow-bike convertible in the winter, all for twenty five hundred bucks less than a BMW GS.


A new snowmobile costs sixteen grand or more and only works for a few months of year if you’re lucky.  From that point of view a road ready enduro bike with a Timbersled system looks like a more useful and cost effective approach to riding in the snow (and everything else). 


Timbersled Snow Conversion System
http://ift.tt/2hAnqZr


The Husqvarna FE 501S Dual Sport Motorcycle
http://ift.tt/2hAplNC
http://ift.tt/2iRnSaX
http://ift.tt/2hAddfP
http://ift.tt/2iRdn7t


In the snow!

In the desert!

On forest trails!  All on the same bike.

via Blogger http://ift.tt/2ijz0wh

MotoGP Technology and Motorcycle Dynamics

Neil Spalding‘s MotoGP Technology is a dense read.  I got it in September and I’m still only two thirds of the way through.  I read a bit, then chase down details so I make sure I’ve got the concepts understood.  This approach isn’t very efficient, but it is thorough, and I’ve got fuck all else to do motorcycle wise over this long, cold, Canadian winter.

I’ve been an avid watcher of MotoGP for seven years now, including riding down to the last Indianapolis MotoGP race in 2015, but this book has made me literate in the mechanics of grand prix bike racing in a way that I never was before.

I’ve also spent a fair amount of time coming to terms with motorcycle dynamics and especially how these bizarre machines move around corners.  From watching Keith Code and reading Twist of the Wrist 2, I’ve tried to understand the inputs I need to make to control a bike effectively.

After all the team histories that kick off MotoGP Technology, Spalding goes after the various technical tricks that make a grand prix bike move like a jet plane, at least in the hands of the maestros.  The last chapter was on reverse rotating crankshafts, which led to a look at the complex gyroscopic effects happening on race bikes.  Spalding suggested looking up Eric Laithwaite and gyroscopic procession, which led me to this!

As Professor Laithwaite describes it, the spinning weight already has a path it wants to follow, he simple lets it follow it.  In doing so what was suddenly a difficult to lift weight becomes effortless.  There are a lot of gyroscopic forces happening on a motorcycle in motion, and Spalding addresses this in the later chapters of the book.

Curiously, considering it’s 2020 and we have computer technology that can accurately model complex physics, it arises in the book that what’s happening on a motorcycle in extreme cornering is more a matter of educated conjecture than known fact.  Our best guesses are still what drives our understanding of the complexities of motorcycle dynamics, which is an incredible thing to realize.

As has often happened when reading MotoGP Technology, the suggestions for finding online resources to better understand a problem lead to other online resources that weren’t necessarily part of the original search (which might be part of the reason why it’s taking me so long to read the book!).  In talking about gyroscopic forces acting on the bike I ended up stumbling across this information packed piece by CanyonChasers.net on how to ride more quickly safely:


Recently I’ve become increasingly frustrated by the sheer amount of shitty media there is online, but this is a good example of a well edited, erudite video that doesn’t waste my time with other people’s inanity.  Just because the majority of people online are a waste of time (read any comments anywhere), doesn’t mean there aren’t gems out there.


Speaking of which, Neil Spalding’s MotoGP Technology is super current (just got updated in the summer), written by an expert with decades of experience and insider knowledge, and delves deep not only into recent MotoGP technical history, but also into the physics that this technology is up against.  If you’re interested in taking your understanding of one of the most extreme sports on earth to the next level, MotoGP Technology will help you get there.

With mysterious physics happening underneath them, what do MotoGP riders do?  They drift 250+ horsepower prototype racing machines… with their elbows AND knees on the deck!  MotoGP Technology will take you a step closer to wrapping your head around this genius.


from Blogger https://ift.tt/2U8BOPJ
via IFTTT