The winter closed in on us quickly and relentlessly, but that means macro ice! All photos taken with a Canon T6i digital SLR using the Canon STM macro lens.


from Blogger https://ift.tt/2XLlS5X
via IFTTT
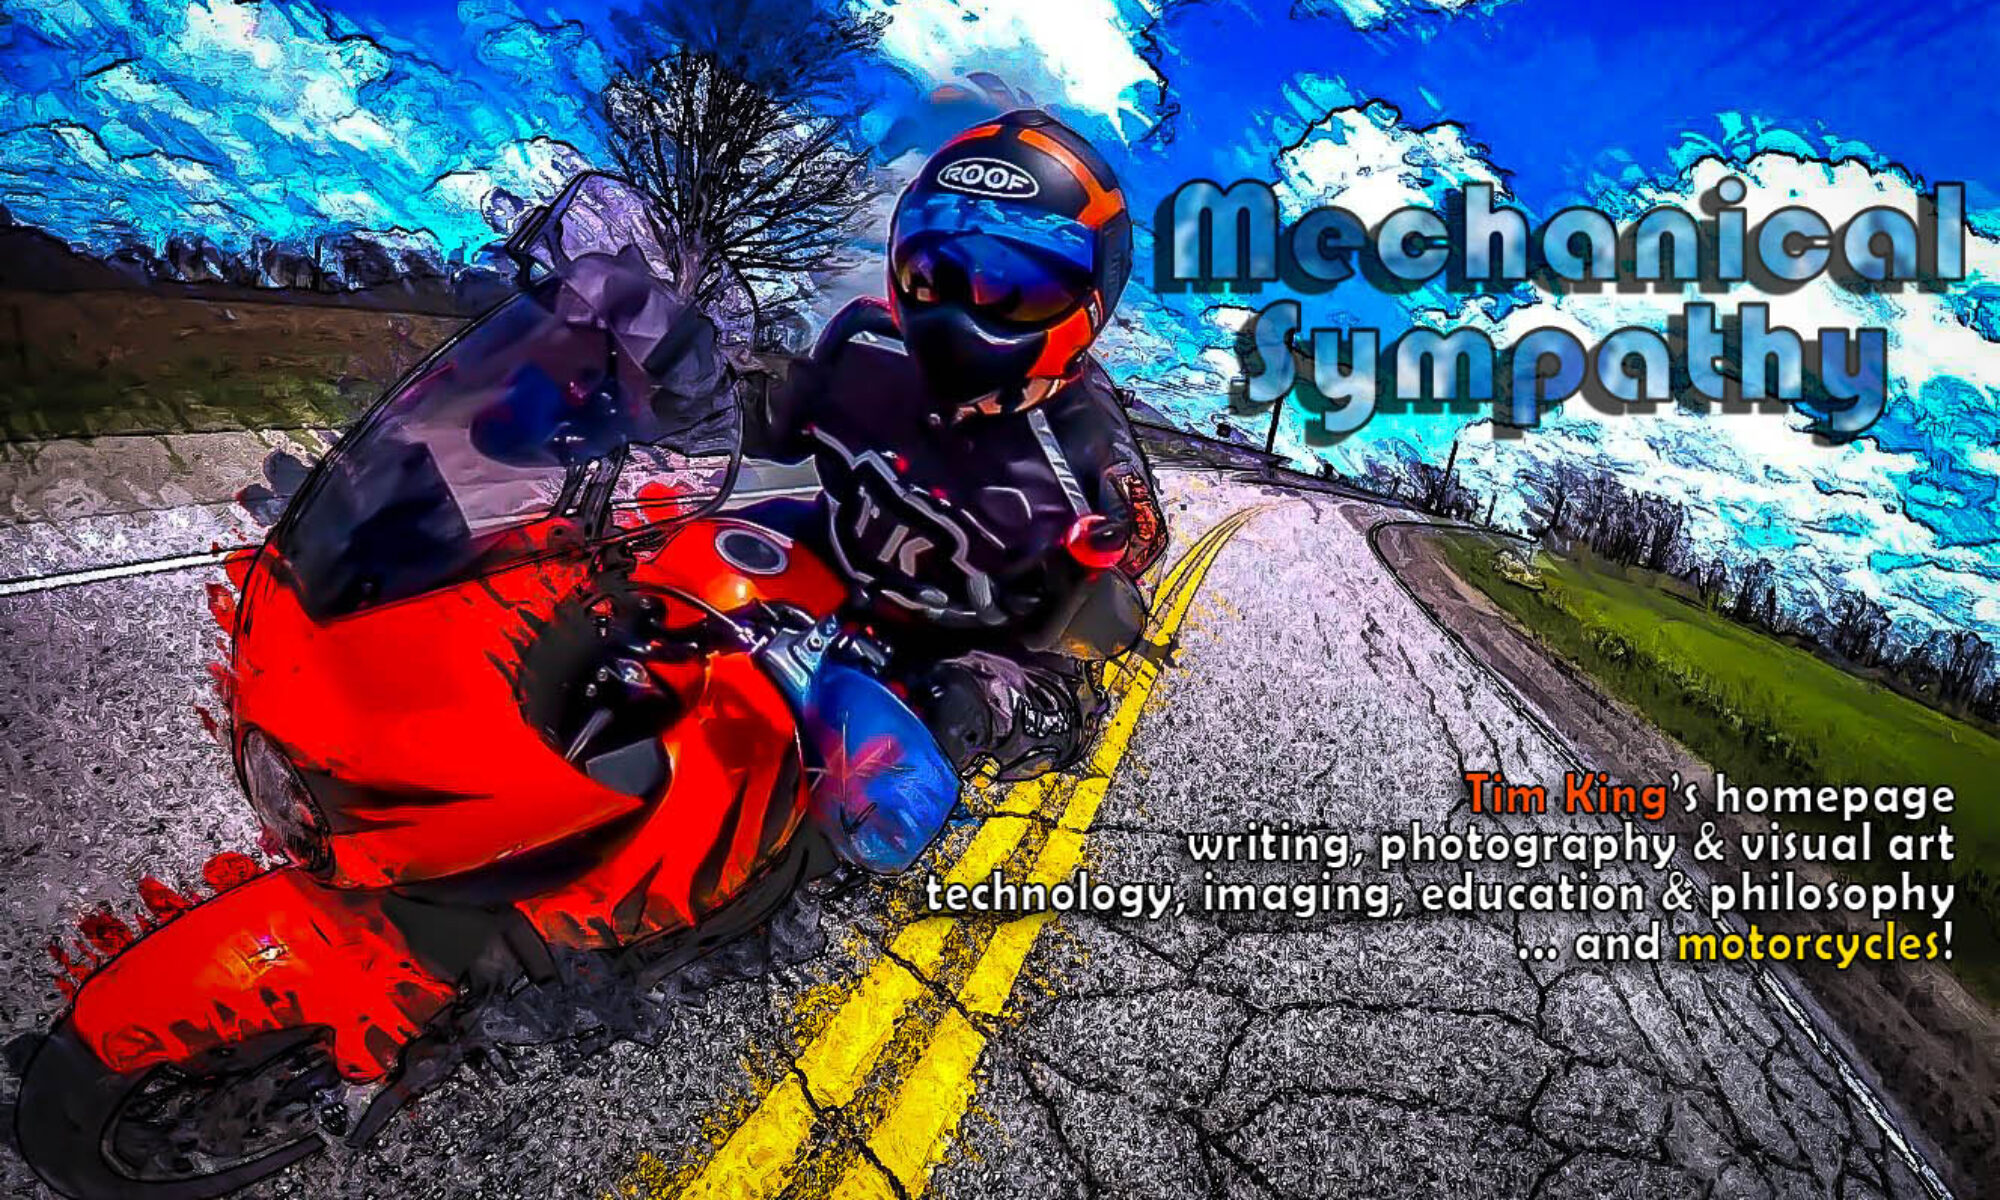
Tim King's homepage with images and writing about technology, education, visual art and motorcycles!
The winter closed in on us quickly and relentlessly, but that means macro ice! All photos taken with a Canon T6i digital SLR using the Canon STM macro lens.
from Blogger https://ift.tt/2XLlS5X
via IFTTT


from Blogger https://ift.tt/31Un72W
via IFTTT
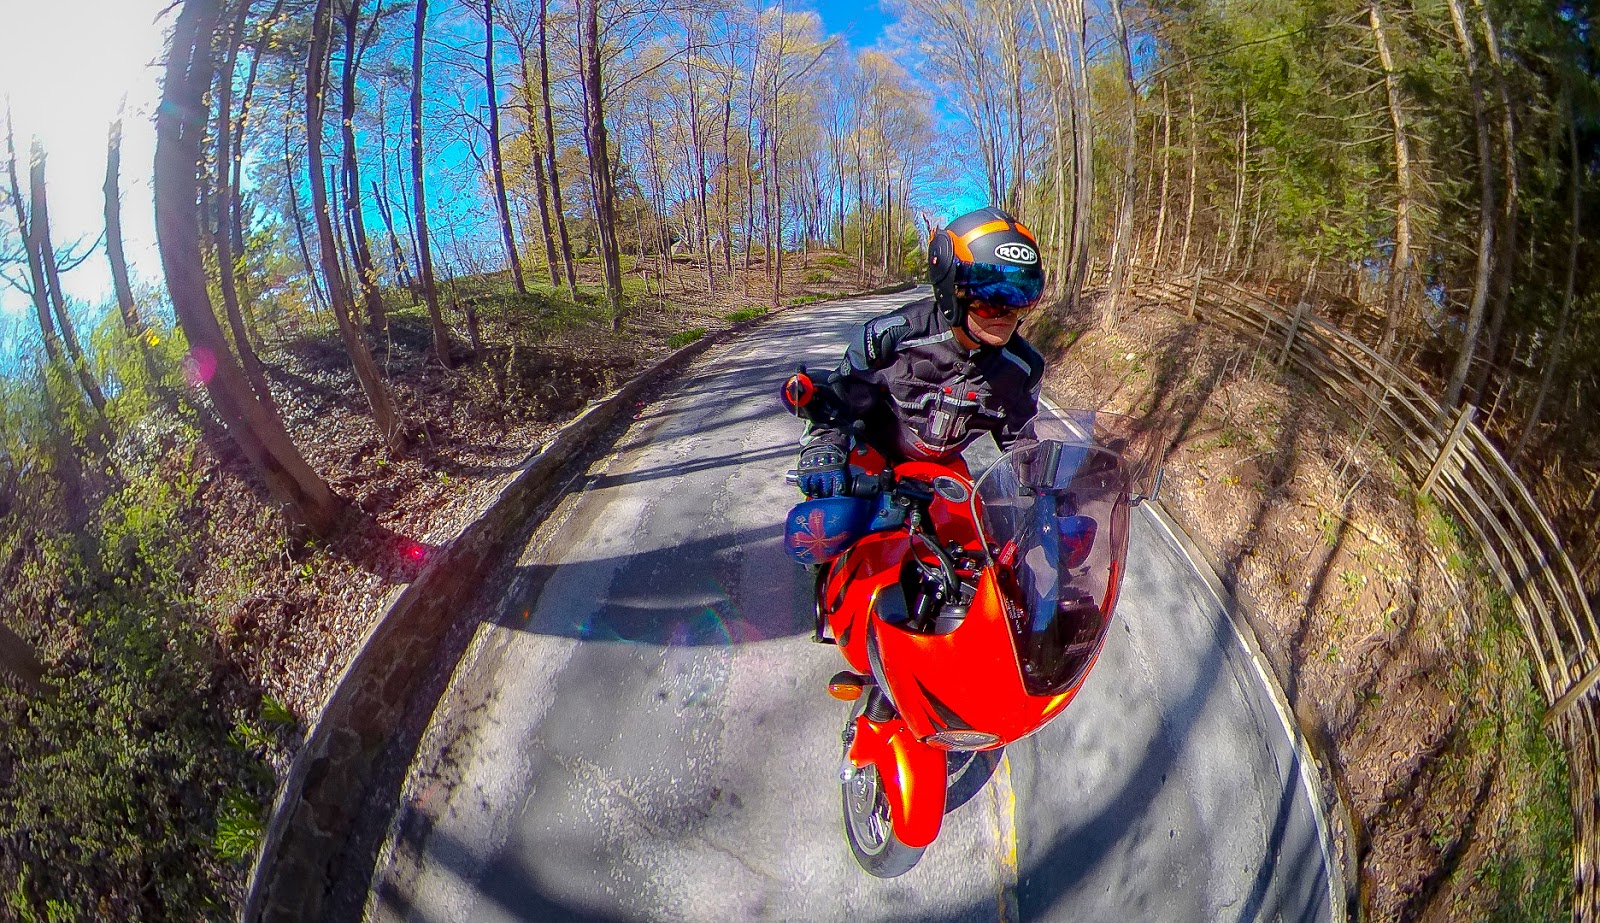
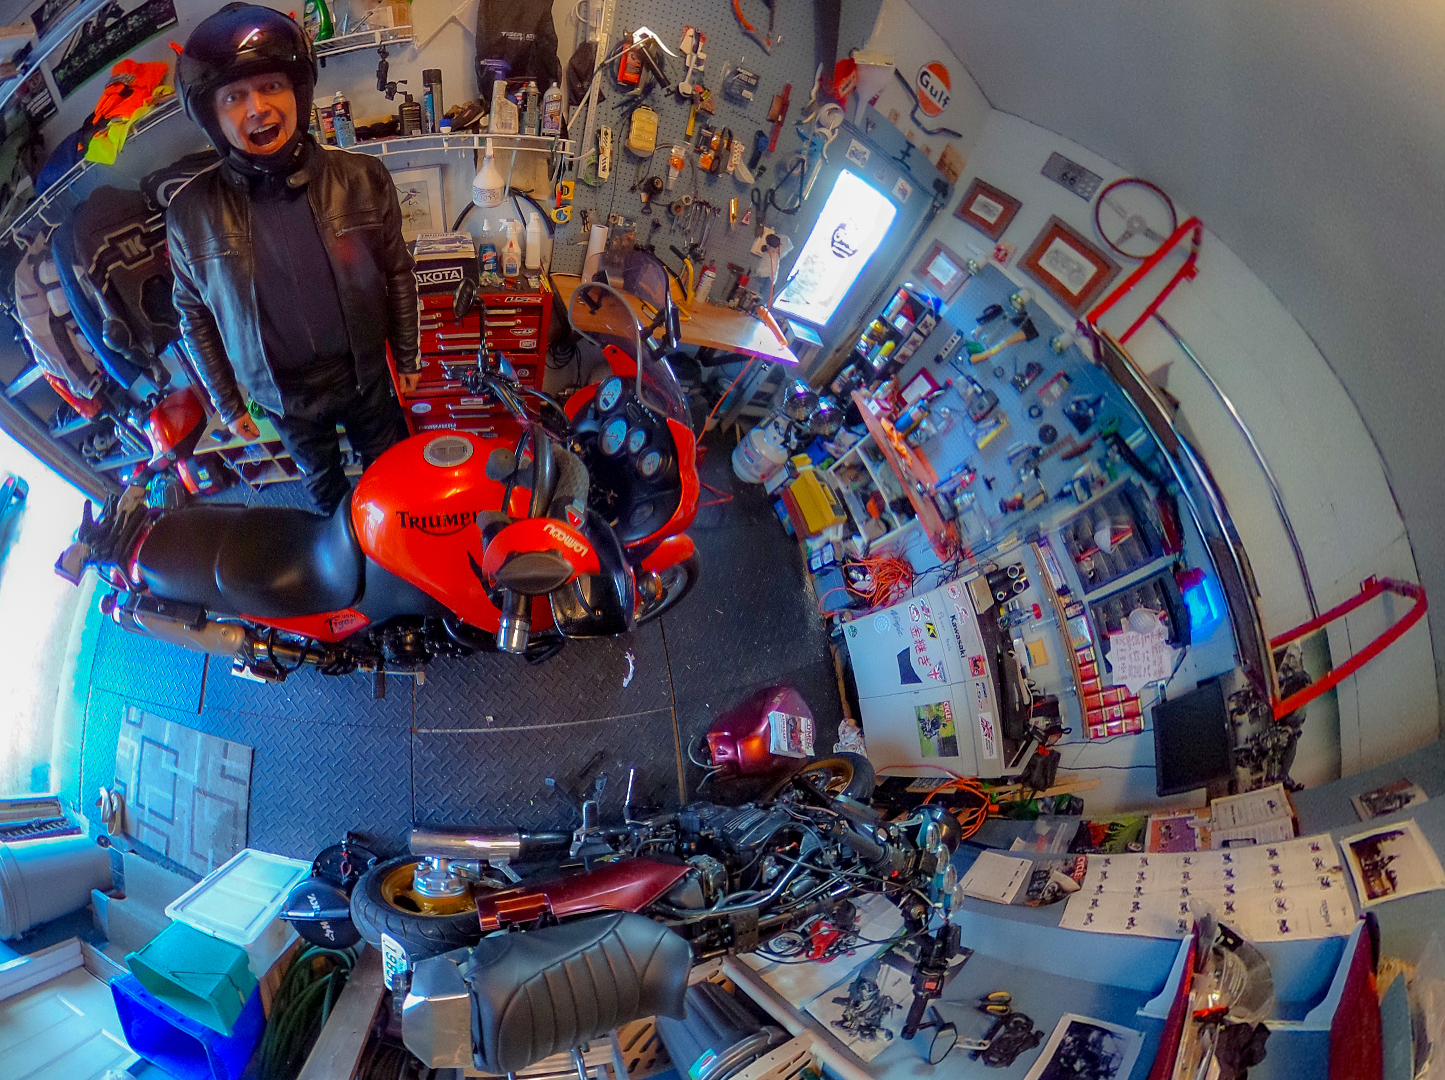
Taken using a Ricoh Theta V 360° camera attached to a flexible gripper tripod on an extended threaded rod. The Theta V lets you take a remote 360° photo every 4 seconds, so you’ve got a good chance of catching something good. When I get back I plug in the camera and look through the shots for something catchy. Here is a how-to if you want to capture your own 360° on-bike photos.


from Blogger http://bit.ly/2Mprd0u
via IFTTT
The kingfisher logo comes from a tatoo I designed way back in the Naughties and got put on my leg. I did it shortly after returning to England for the first time since I’d immigrated when I was eight years old. It’s a European kingfisher of the kind I used to see when I was little. It reminds me of where I came from.
I took a photo of the tatoo and then photoshopped it into the logo as it is now. Kingfishers are a triple threat: they can fly like missiles, swim like a fish and move about on land. A good metaphor for the kind of photography and art I like to do (the technically difficult kind).
| I took the glow from the original photo out of the middle of the bird… |
The headers for all my blogs are made in Photoshop from images I’ve created…
| Tim’s Motorcycle Diaries (my Triumph Tiger photoshopped into colour matched text) |

Previous TMD logos went through a series of evolutions, as did the Mechanical Sympathy logo…
The Dusty World logo (my oldest blog) has been stable for a number of years…
from Blogger http://ift.tt/2zpOjIK
via IFTTT
From a ten day stay over in Iceland on our way to the UK this past summer (July, 2017). We travelled for three days around the south east travelling as far as Vik and then did a week with family friends up and over the north coast to Akureyri and beyond and then back to Reykjavik. All in all it was well over 2500kms in ten days.
Photos shot with the shiny new Canon T6i Rebel with a variety of lenses. 360 photos done with a Ricoh Theta. The full album is here.
| The black sands of Vik. |
| A sea of puffins. |
| Seljarlandsfoss. |
| Gulfoss. |
| The mid-Atlantic ridge. Þingvellir, the viking parliament. |
| Viking Rafting on a glacial river (taken with a little, old waterproof Fuji camera that died shortly thereafter due to the incredibly cold water). |
| 12:35am (half an hour after mid-night – this was as dark as it ever got) |
| Hverarönd |
| Climbing Hverfjall |
| Reykjavik street art |
| Humpbacks in the Arctic Circle by Húsavík |
| Þjóðgarðurinn Snæfellsjökull |
from Blogger http://ift.tt/2pXOdbN
via IFTTT
With winter reluctantly letting go of our necks, I’ve been able to sneak the odd ride in amidst the ongoing ice rain and snow. I recently got a Ricoh Theta V. This has the same camera and resolution as the previous (and much cheaper) Theta S, but has much better in camera processing that allows it to take 4k video and make photos without as much lag. What that means for the ongoing on-bike photography experiment is that I’m able to capture photos faster and catch moments that might have been missed before. I mainly focus on still photos doing this, but I’ll eventually get around to taking some 4k video as well.
For the past month or so I’ve been able to sneak out between wintery blasts and catch some early on-bike shots using the mounting rig I built last year (a flexible octopus gripping tripod and an extended threaded rod that allows me to place the camera further away from the bike). Here are some shots from the ThetaV:

 |
| Perhaps telling, I thought I’d grabbed the ThetaV but realized after I has the ThetaSC. No real difference in photo or lens quality. For on-bike shooting I’d suggest the cheaper and lighter SC, unless you’re big into 4k video. |


Photos in this set run from March 24th to April 13th. Even last weekend I was still seeing patches of snow in ditches, though last Saturday was the first time I got back from a ride and didn’t have to wash all the salt and crud off the bike before putting it away. It’s still fleece and leathers season if you’re riding in Canada in early spring.
As always, Photoshop and Lightroom do a good job of picking out details that can often be quite dark when they come off the Theta. I typically screen grab images at about 1080p after framing them in the Ricoh software, which lets you move around within the image and find the best angle. I’ve been able to collect higher resolution images off a 4k monitor. The software for the Theta is very screen focused. It’d be nice to have a maximum resolution option for print.
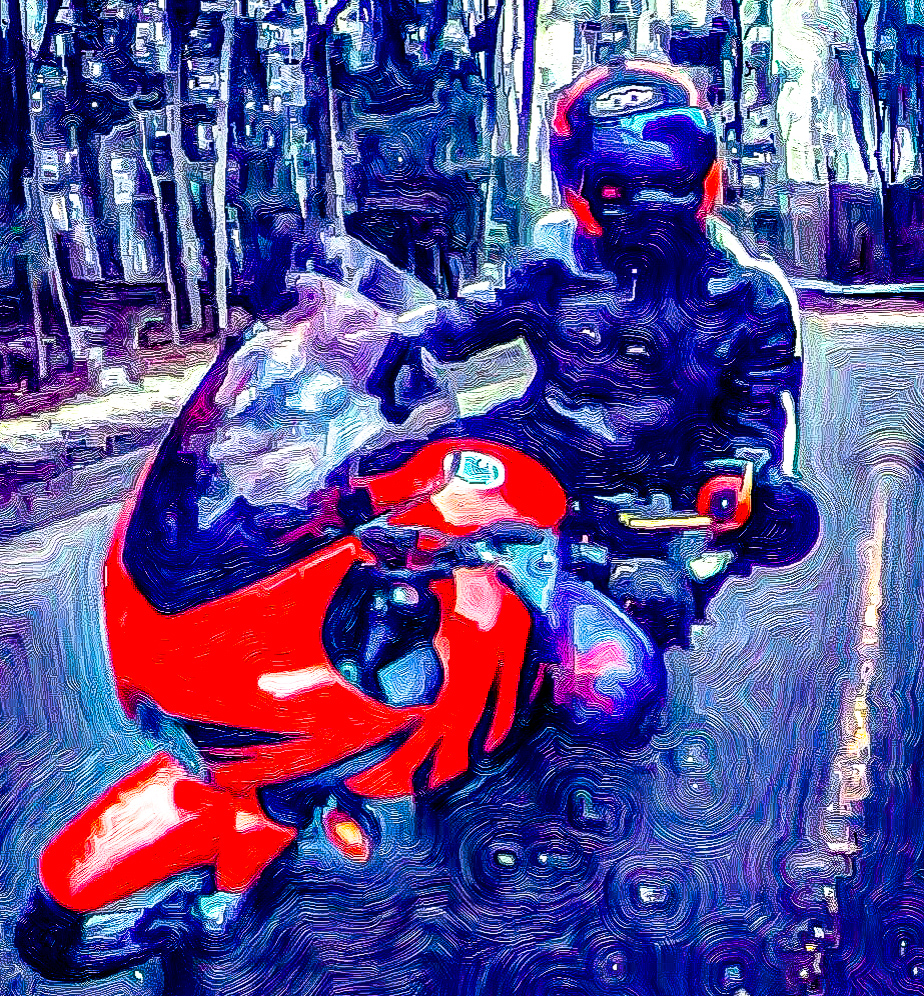
In addition to the photos, I’ve got some more digitally abstracted shots that head more into art than photography. I still think this is a great way to catch the dynamics and immediacy of riding. I’d love to be able to test the process in more extreme riding conditions, like at a track day.


from Blogger http://bit.ly/2v6ZJBh
via IFTTT
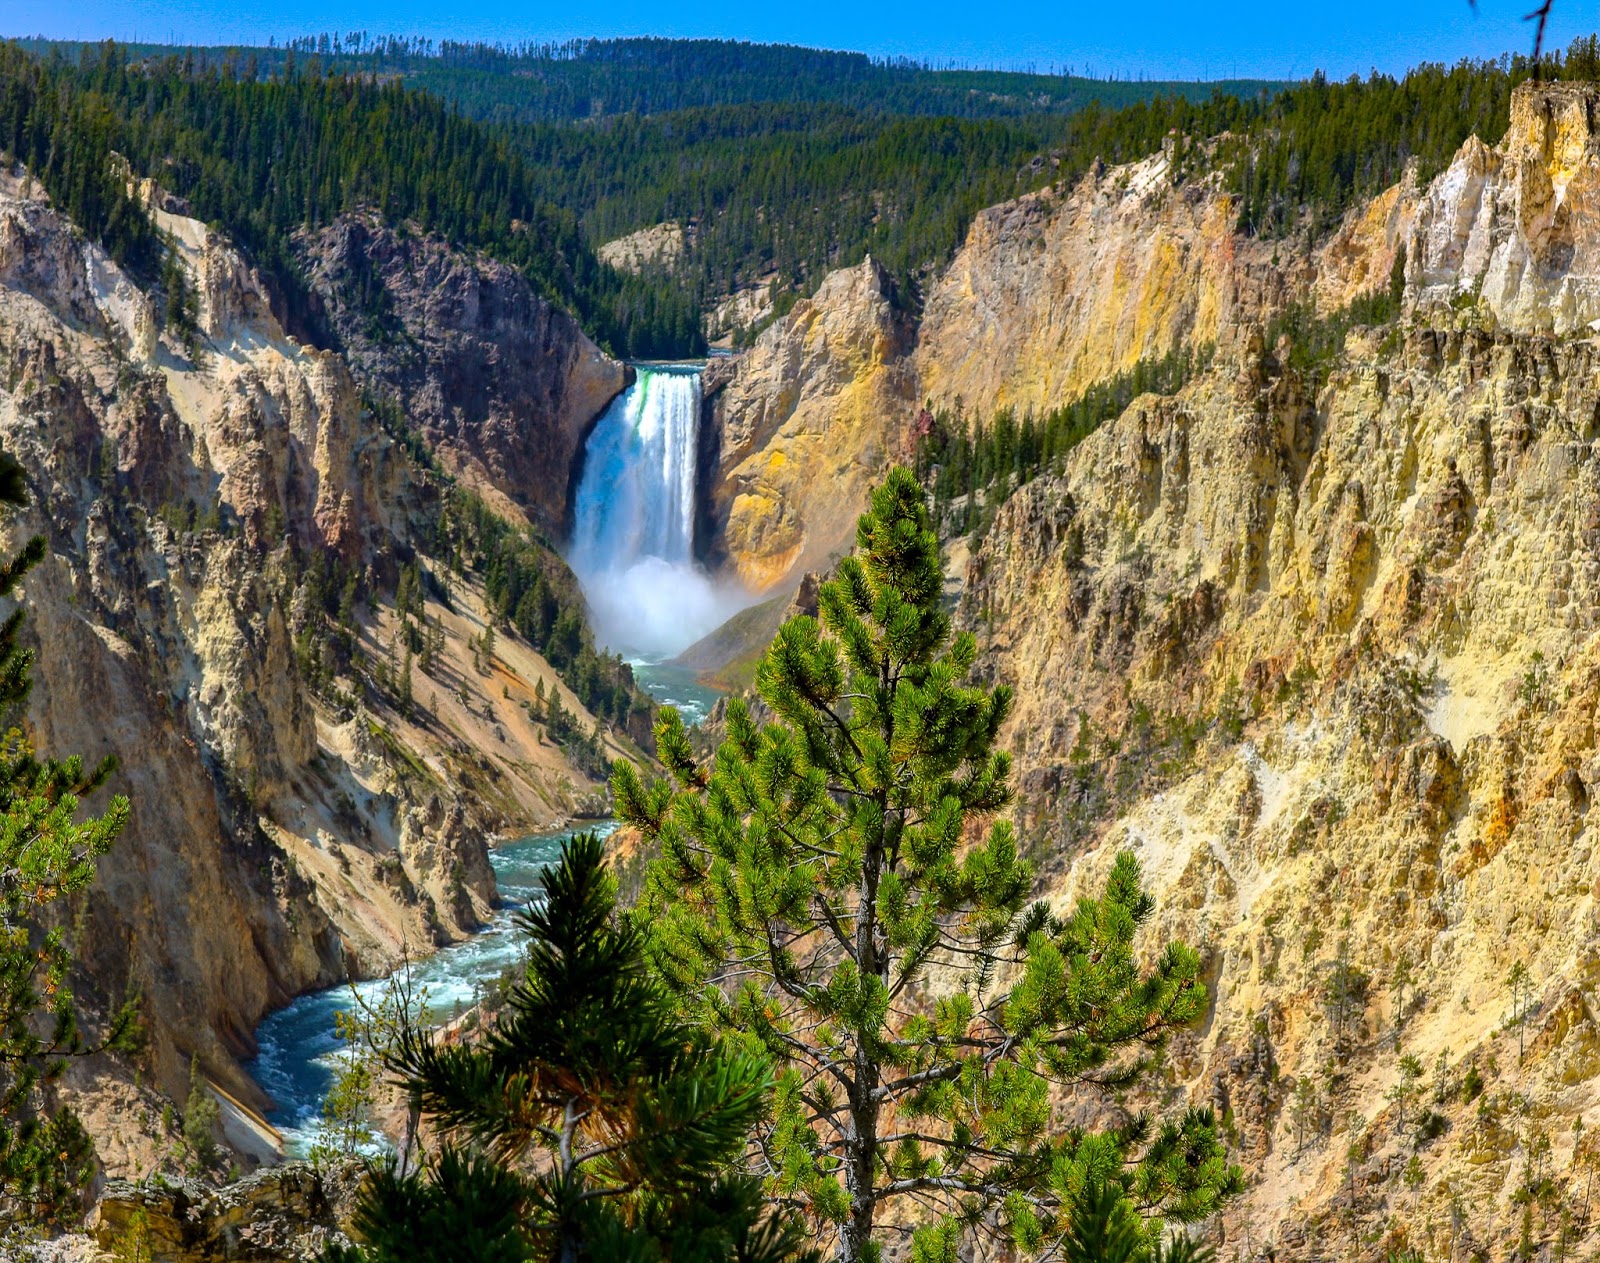
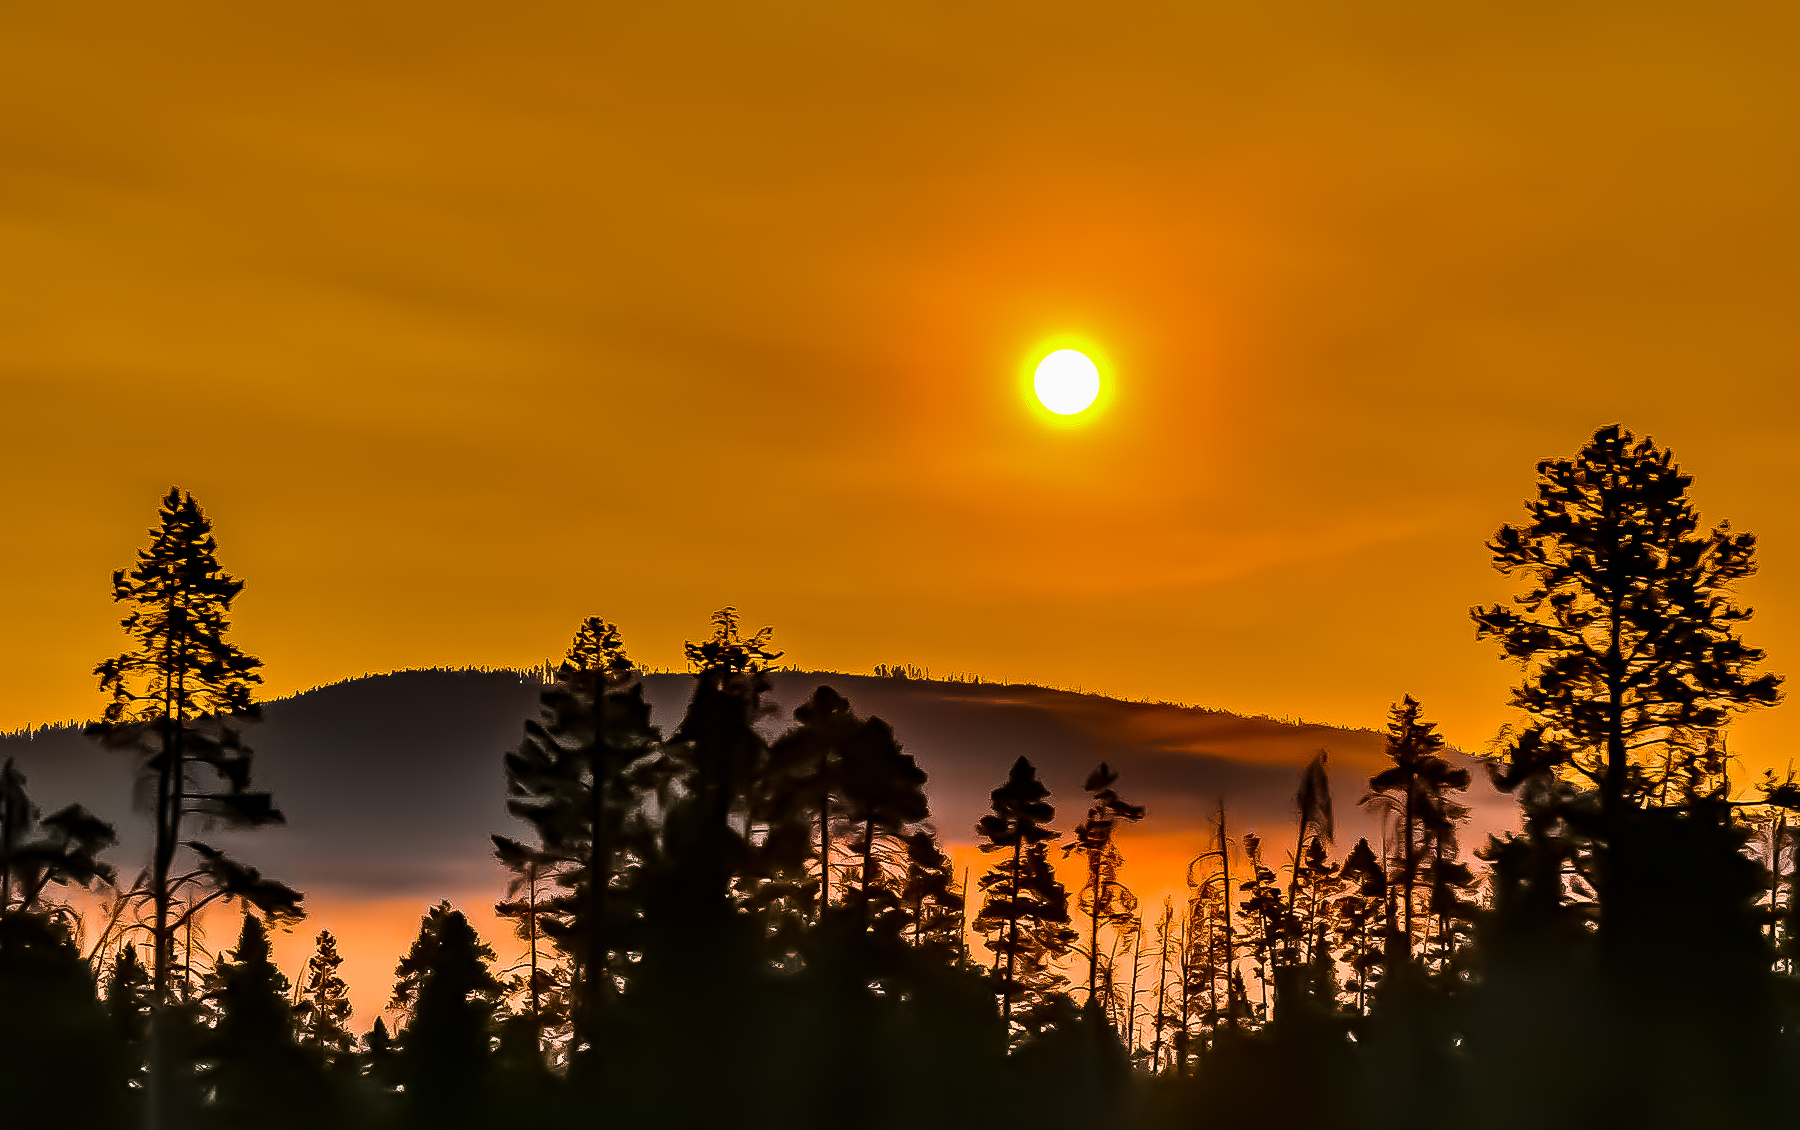
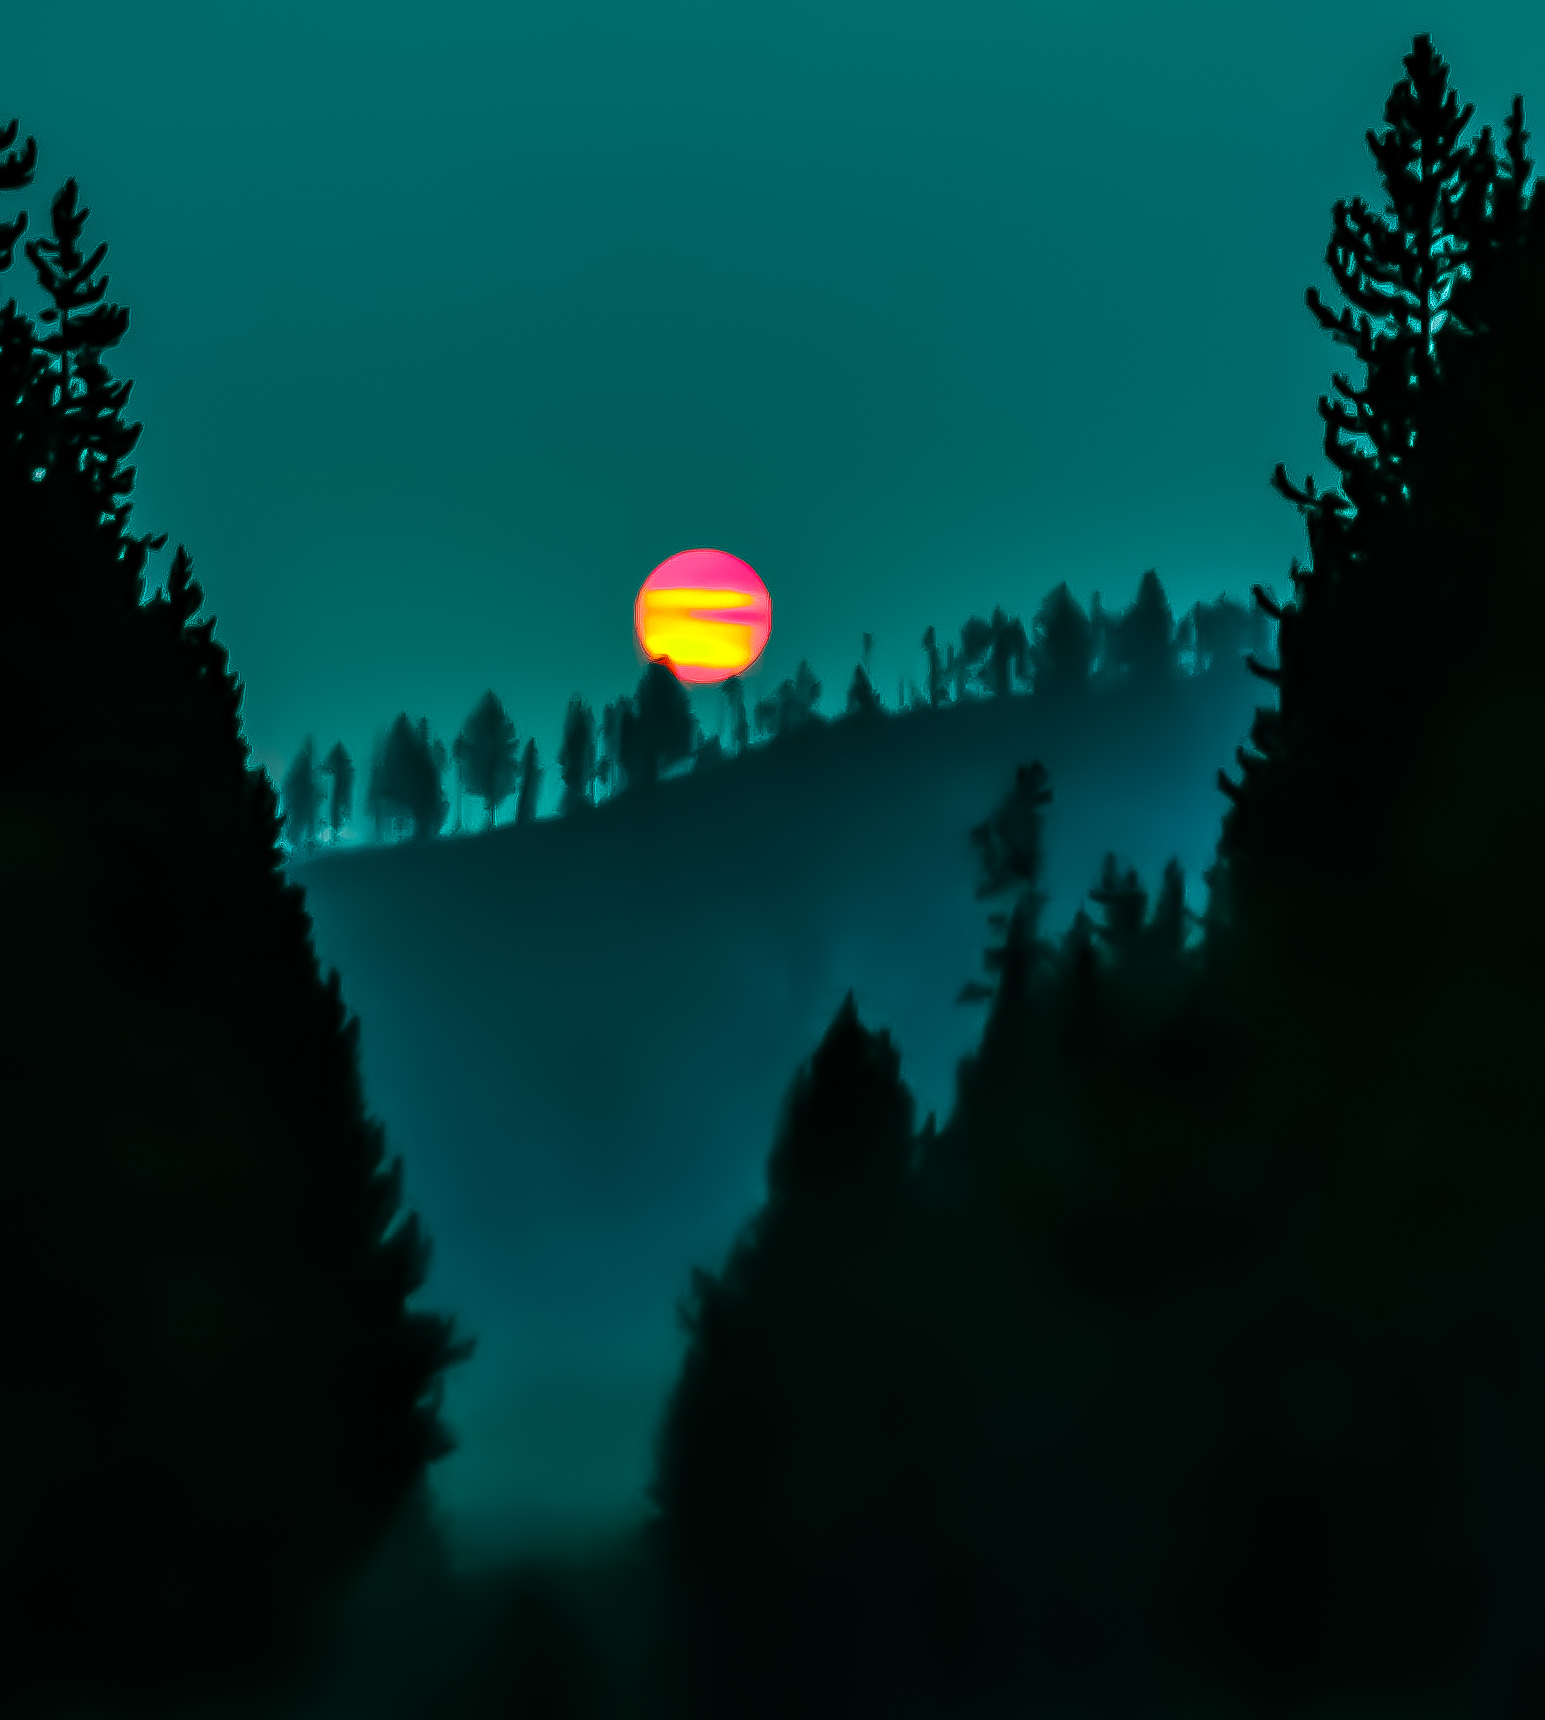
From three short days spent in Yellowstone in August of 2018. At over seven thousand feet elevation, there was frost on the ground the day we left (hence the atmospheric, morning fog in the sunrise photos which have been worked over in Adobe Lightroom).
Life inside the caldera of the super volcano is odd. The grass has a strange hue and the animal life in the world’s oldest national park is wonderfully shocking.
Photos taken with the Canon T6i. Some of the snapshots and gifs were done with the OnePlus5 smarphone. Variations can be found on my Instagram account and in Google photo albums.


.

.
from Blogger https://ift.tt/2LH6dN5
via IFTTT
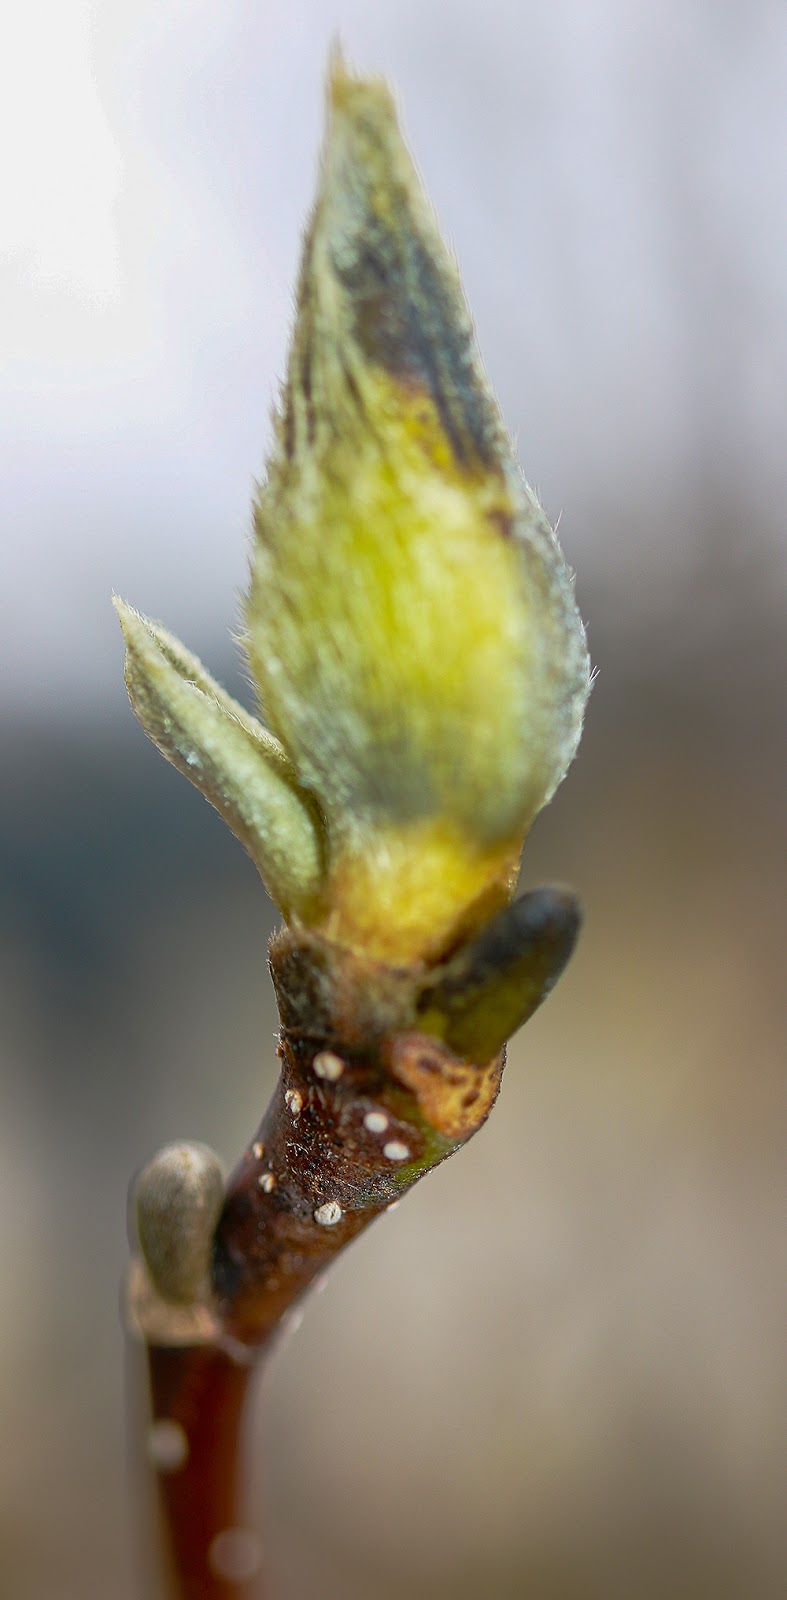
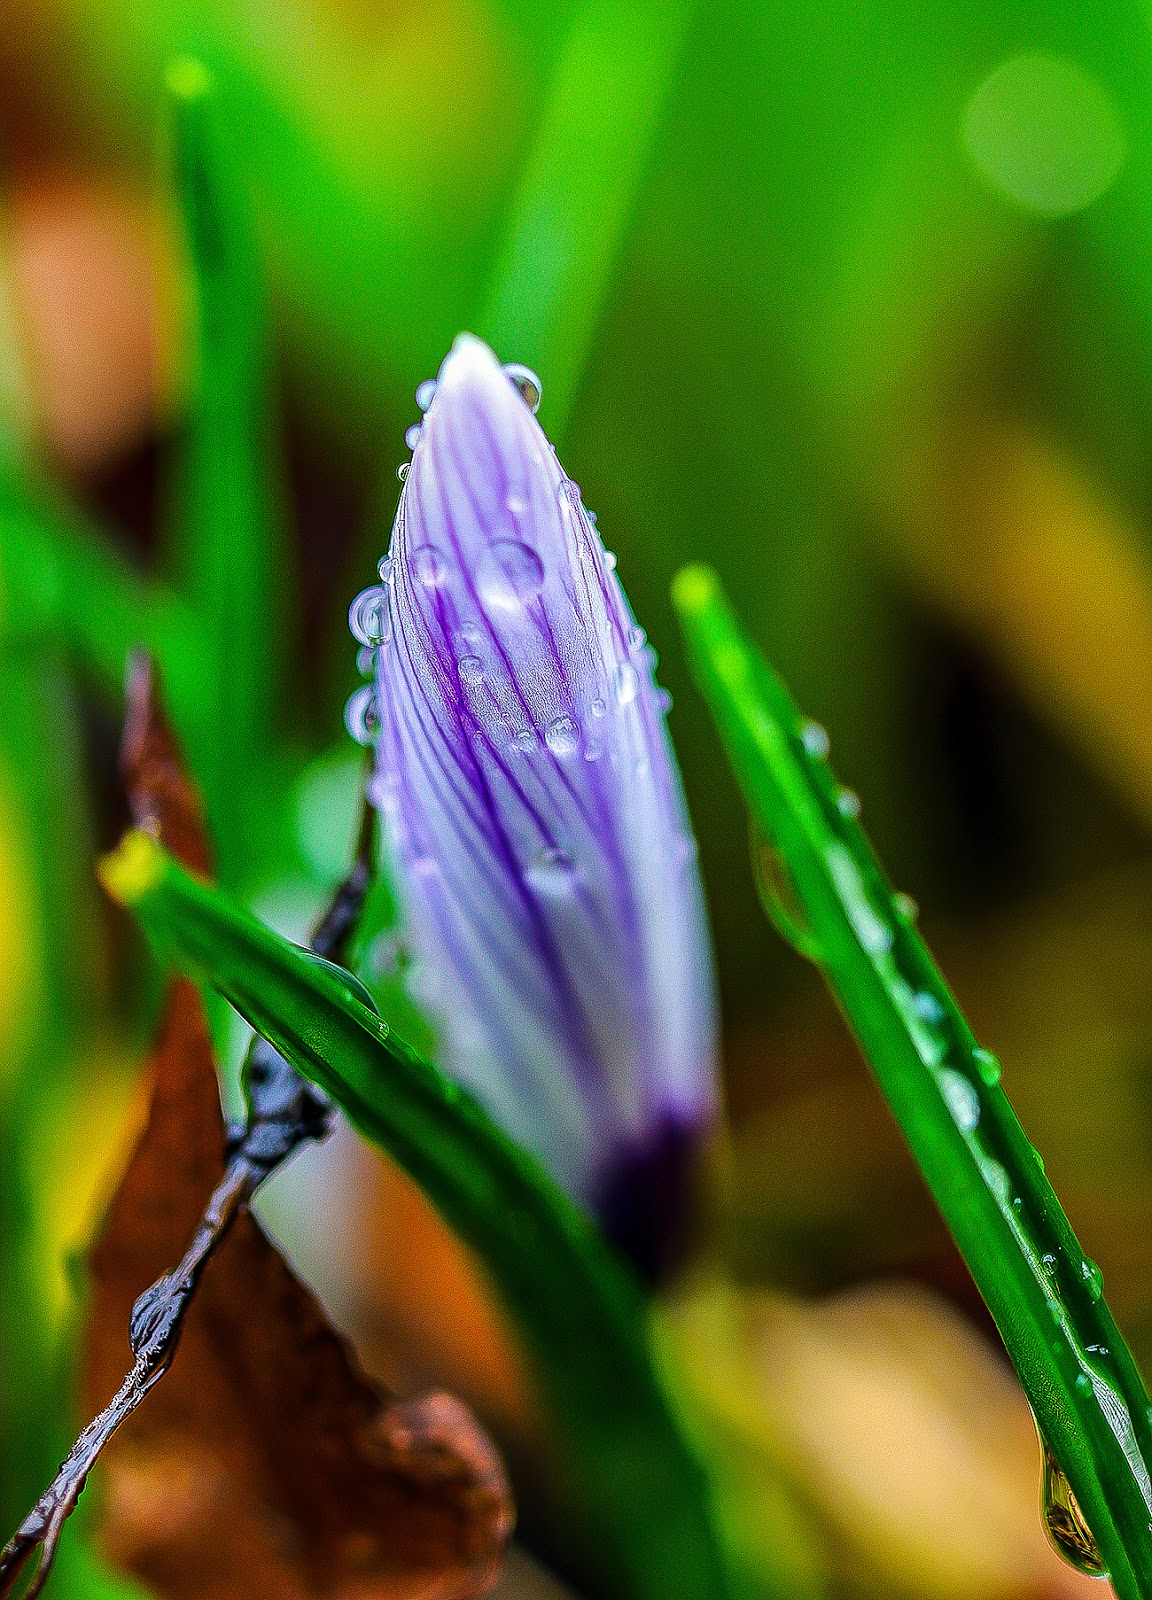
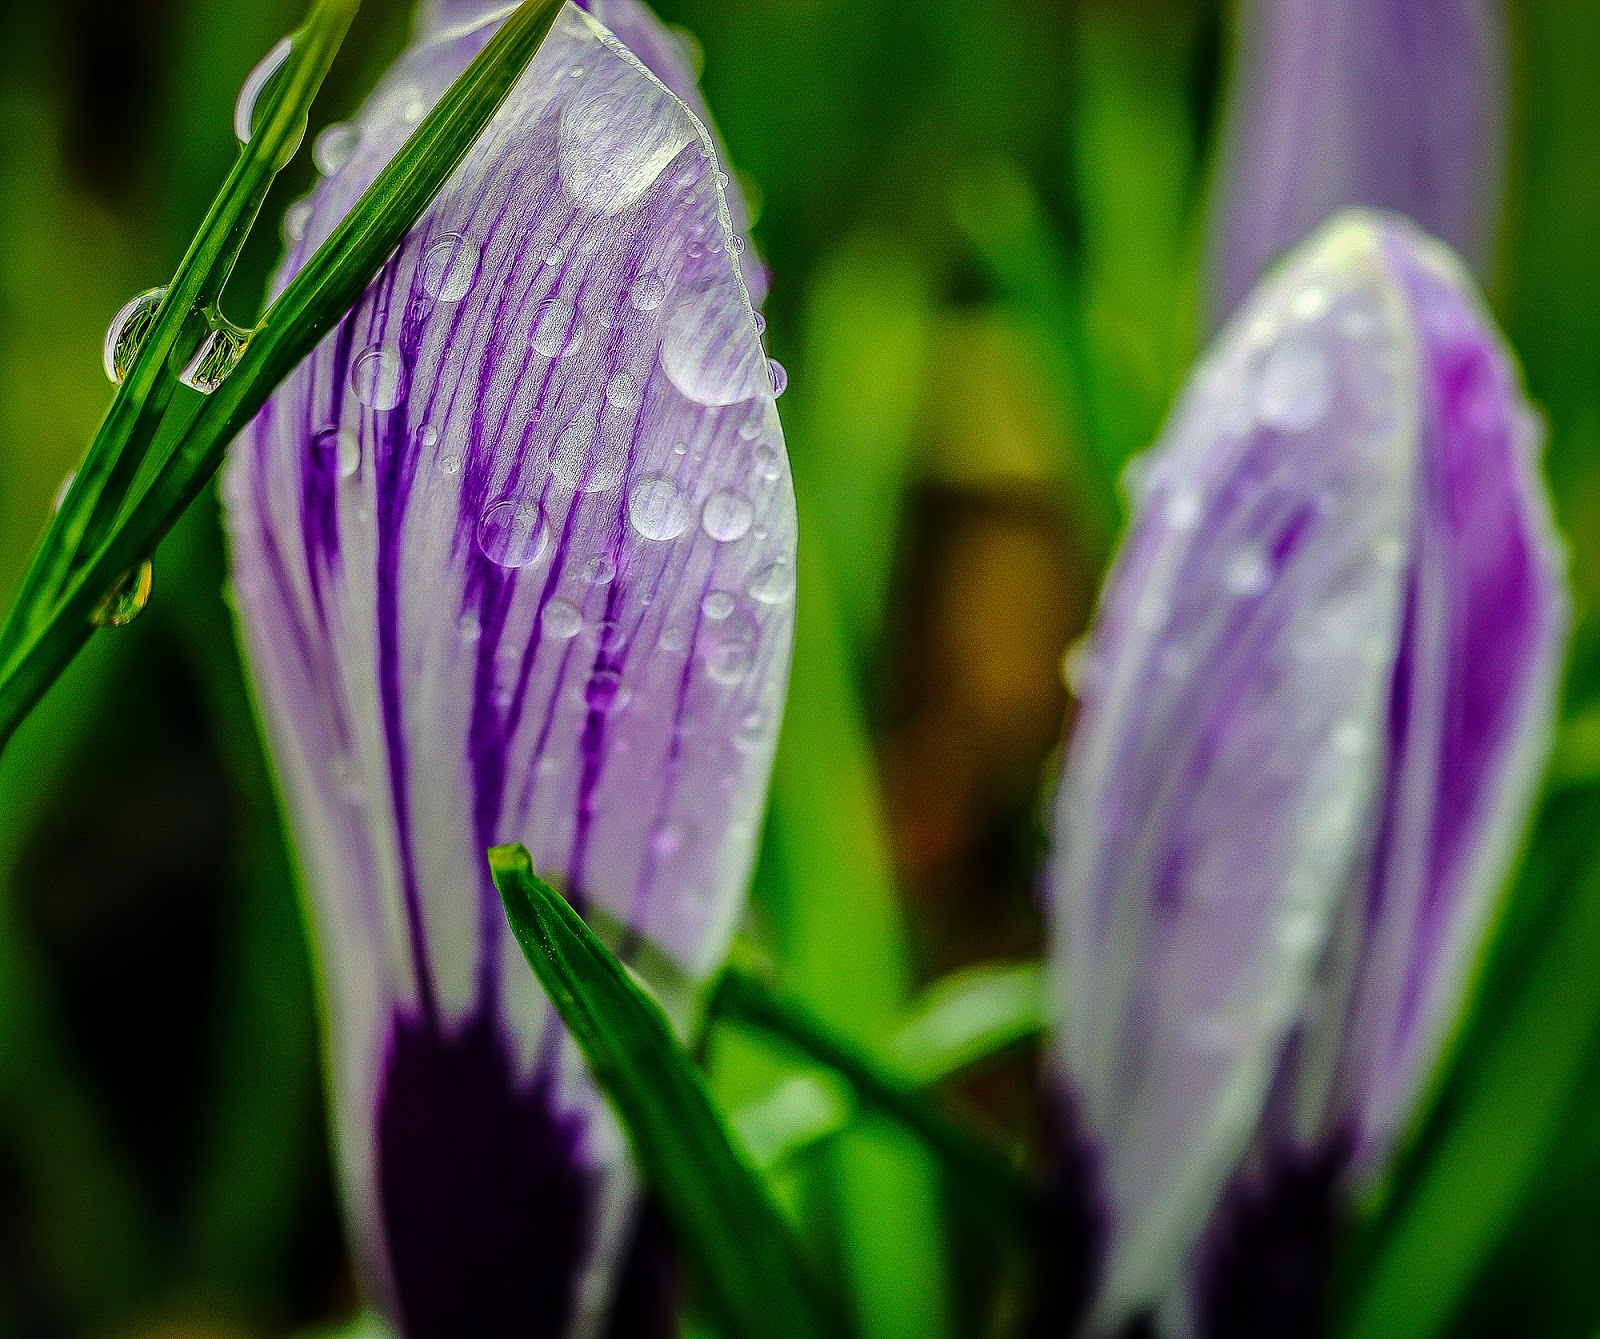
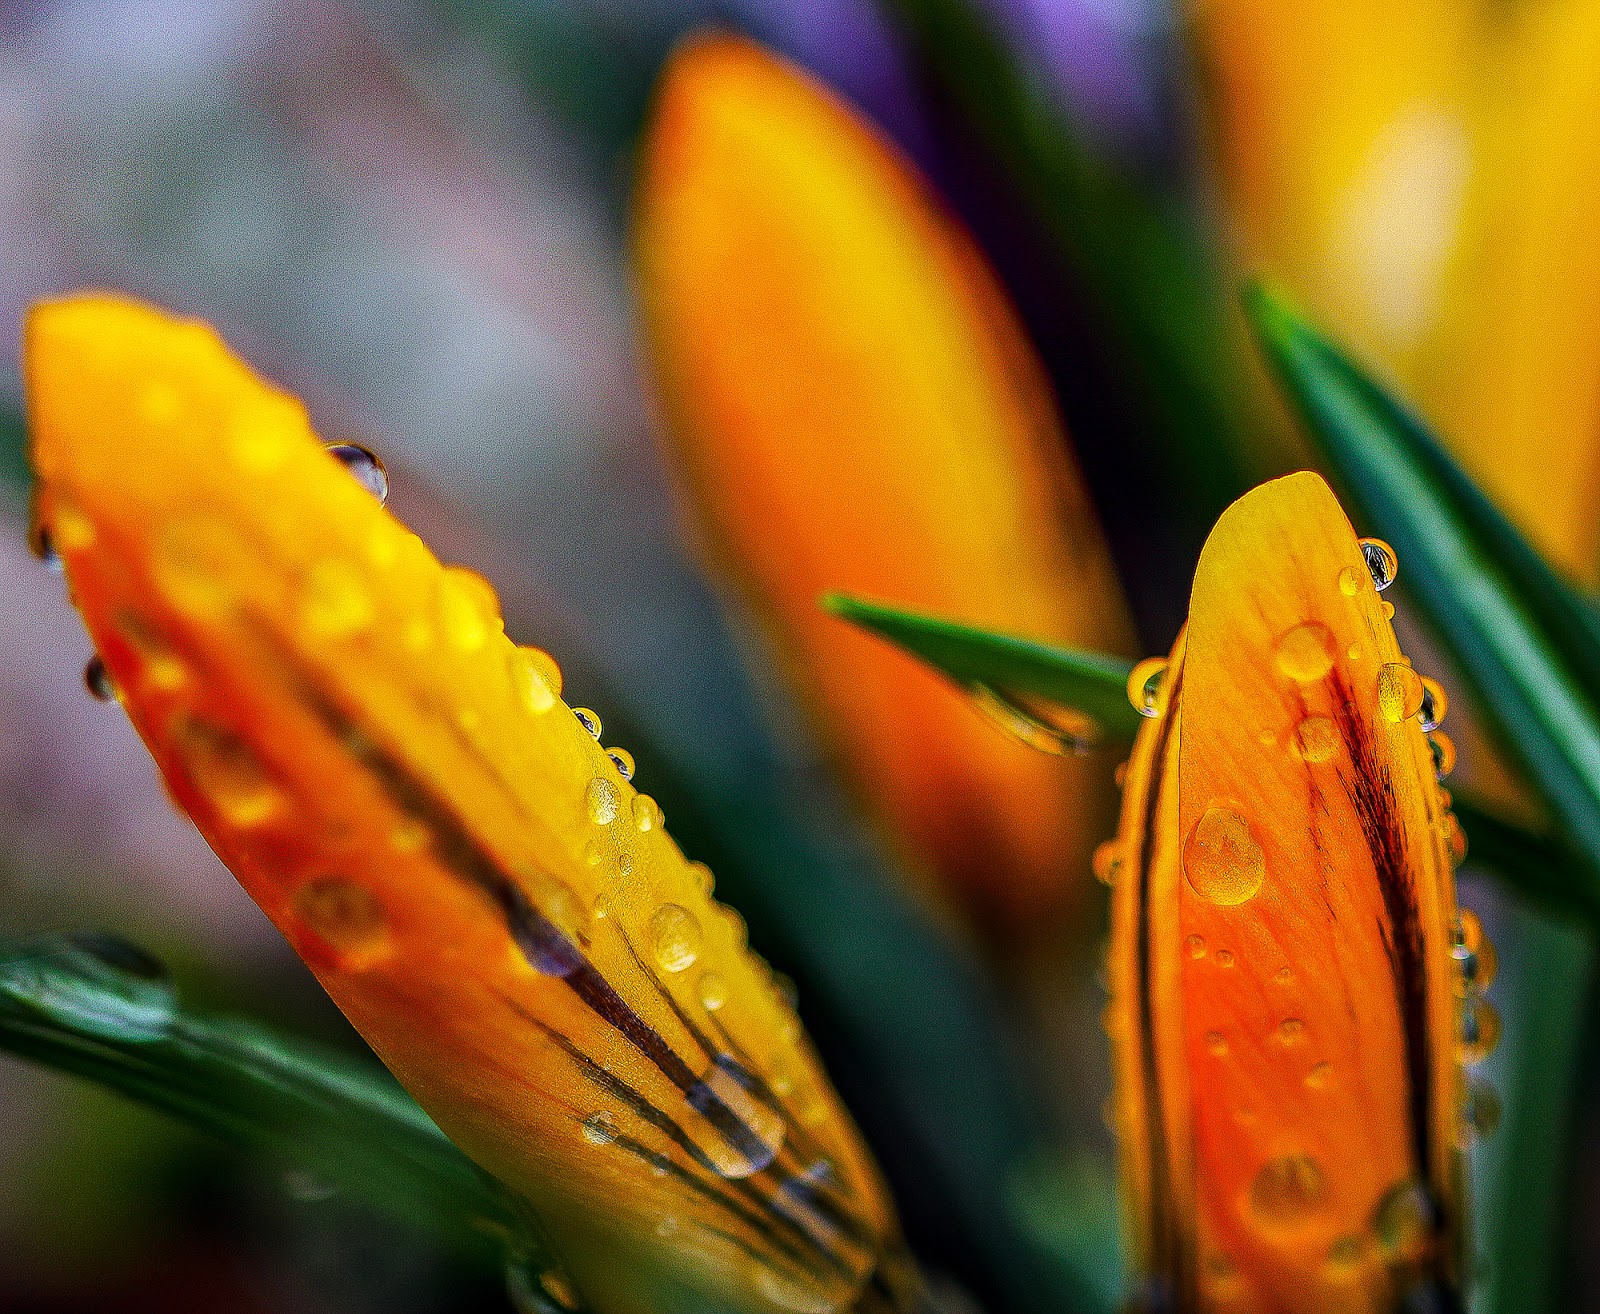
The rain drenched buds of April through the Canon macro lens:


from Blogger http://bit.ly/2VYG1DM
via IFTTT
Setting up a 360 camera on your wing mirror using a gorilla pod and setting it to automatically take a photo every few seconds seems like the best way to catch some interesting self portraits while you ride. It’s a set up and forget system so you can just enjoy the ride.
Afterwards you download what the camera caught and then frame the photos as you wish (the 360 picture lets you move the point of view around until you’ve framed something interesting).
I’ve been trying to replicate the tiny planet view that the Ricoh Theta could do in its software on the Samsung Gear360. GoPro makes a little planet capable app that they give away for free, so I’ve been using that. Here is an example of a time lapse video tiny-planeted in the GoPro software:
The photos are screen grabs of time lapse scenes on the Samsung 360gear. They’ve all been worked over in Photoshop to give them a more abstract look. I’ve included the original photo to show variations:
 |
| Here’s the original photo. |
 |
| Here is a posterized, simplified version. |
 |
| Here it is with an oil paint filter and a lot of post processing. |
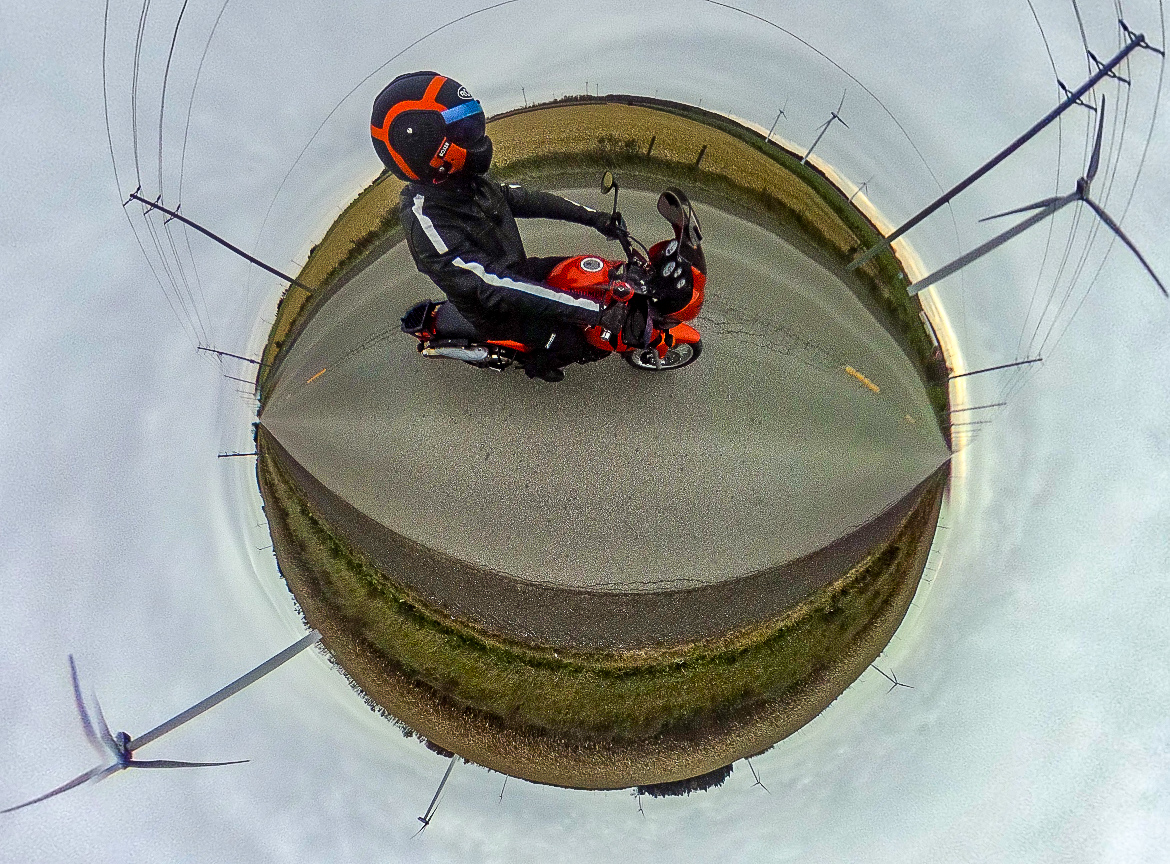
 |
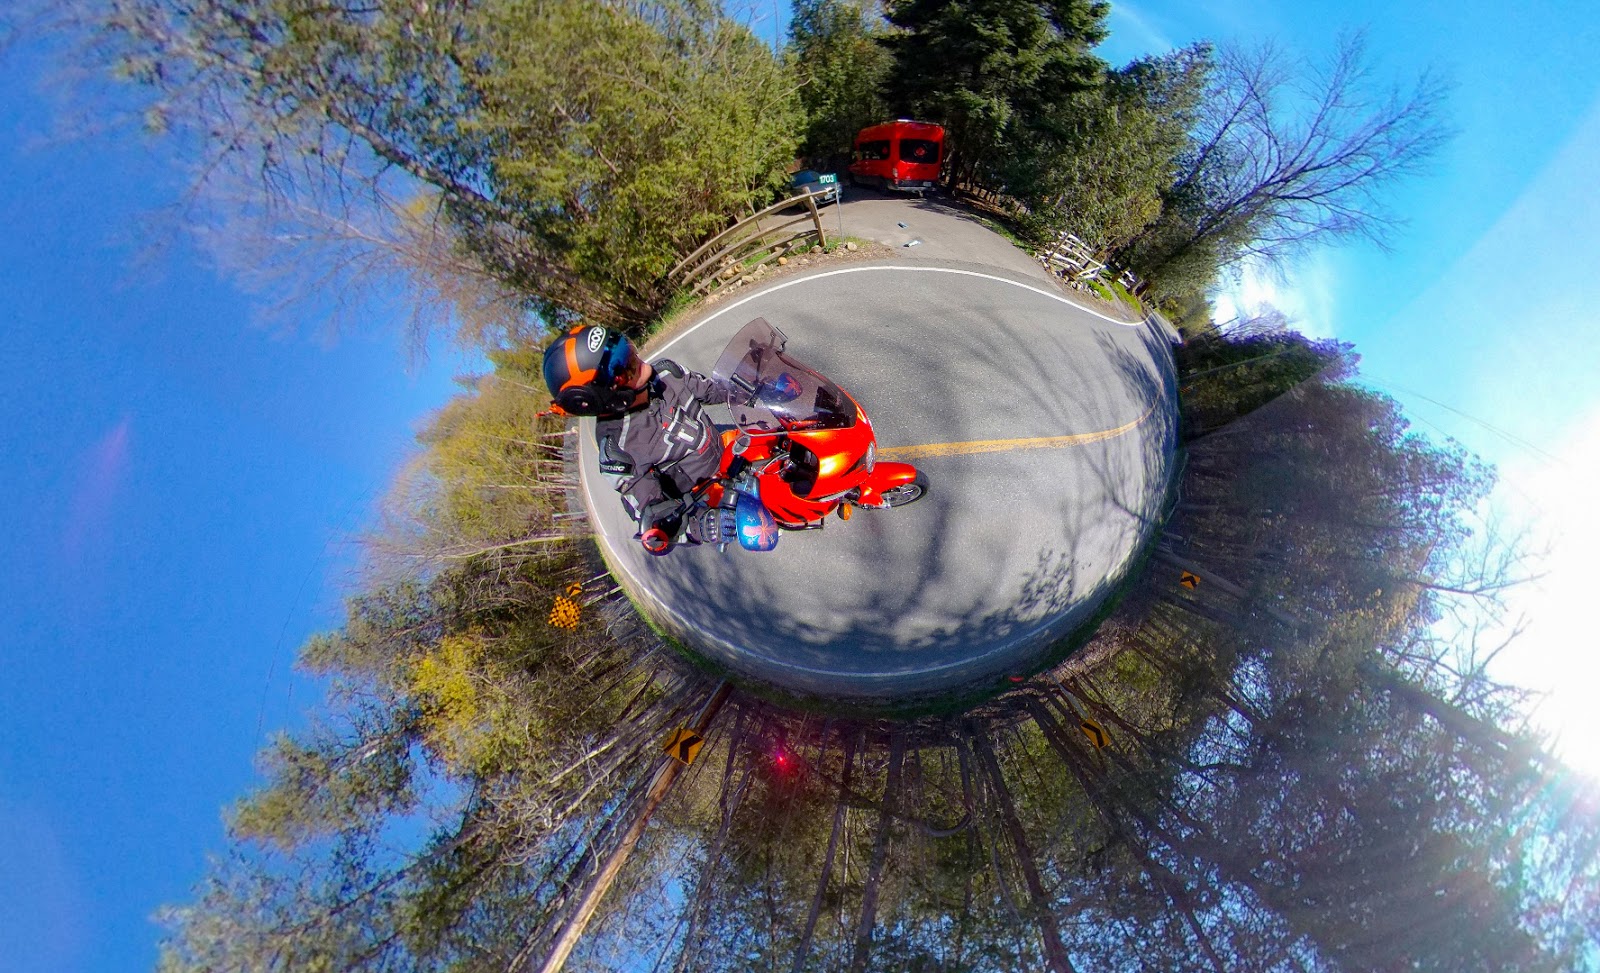
| Here is a tiny-world ‘wrapped’ image taken with the 360 degree camera. Below are some variations on it… |


Below are some other 360 grabs – they’ll give you an idea of how you can select certain angles and moments and then crop a photo out of them pretty easily.


One of the few things the Samsung does well is make time lapse video fairly straightforward (I miss my Ricoh Theta). The software Samsung bundles with the gear360 only works with Samsung phones (which I don’t have). The desktop software won’t render 4k video at all (it ends up so blocked and pixelated from artifacts as to be almost useless). And when you’re first importing video it takes ages for the software to open a video for the first time. By comparison the Ricoh renders video almost instantly, has never had artifact problems when it renders and has never crashed on me (the Samsung software has crashed multiple times). If you’re patient and are ok with crappy results, go for the Samsung. Meanwhile, here’s what I could get out of the damned thing:
This is a 360 fly video sped up, the weekend after the April ice storm:
Software used: Adobe Photoshop CC, Adobe Lightroom CC, Paper Artist, Windows movie maker, Go-Pro VR Viewing software
from Blogger https://ift.tt/2vVeTwN
via IFTTT
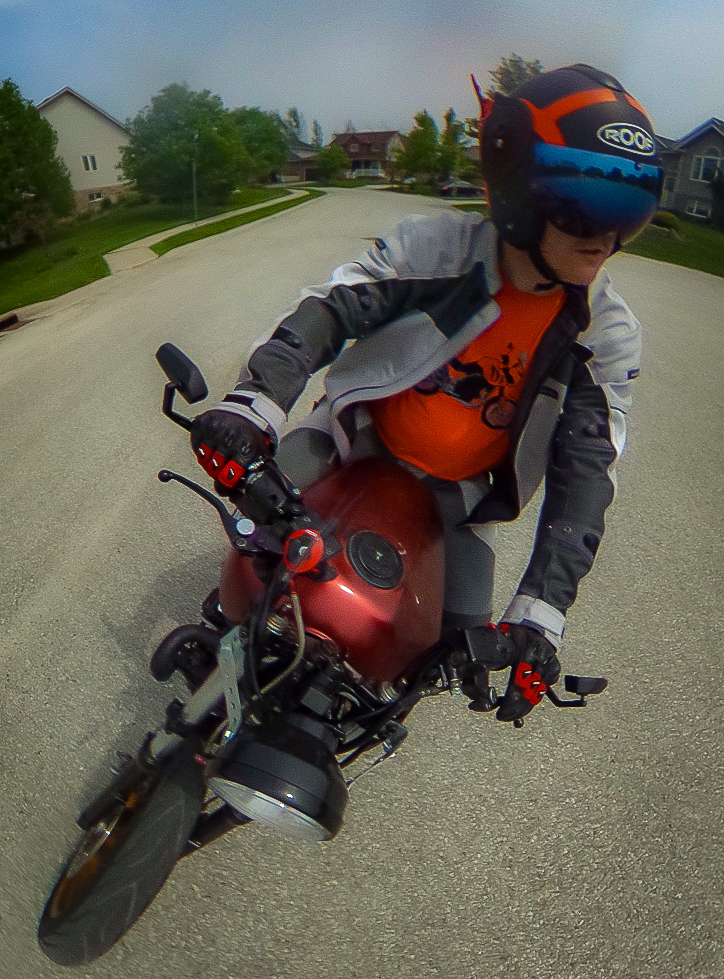
 My 360 degree on-motorcycle photography experiment continues. The process has evolved over time from handheld, manually shot photos to automatic, bike mounted shots. I’ve tried half a dozen different cameras and mounts on locations all over the bike, most recently on the tail rack.
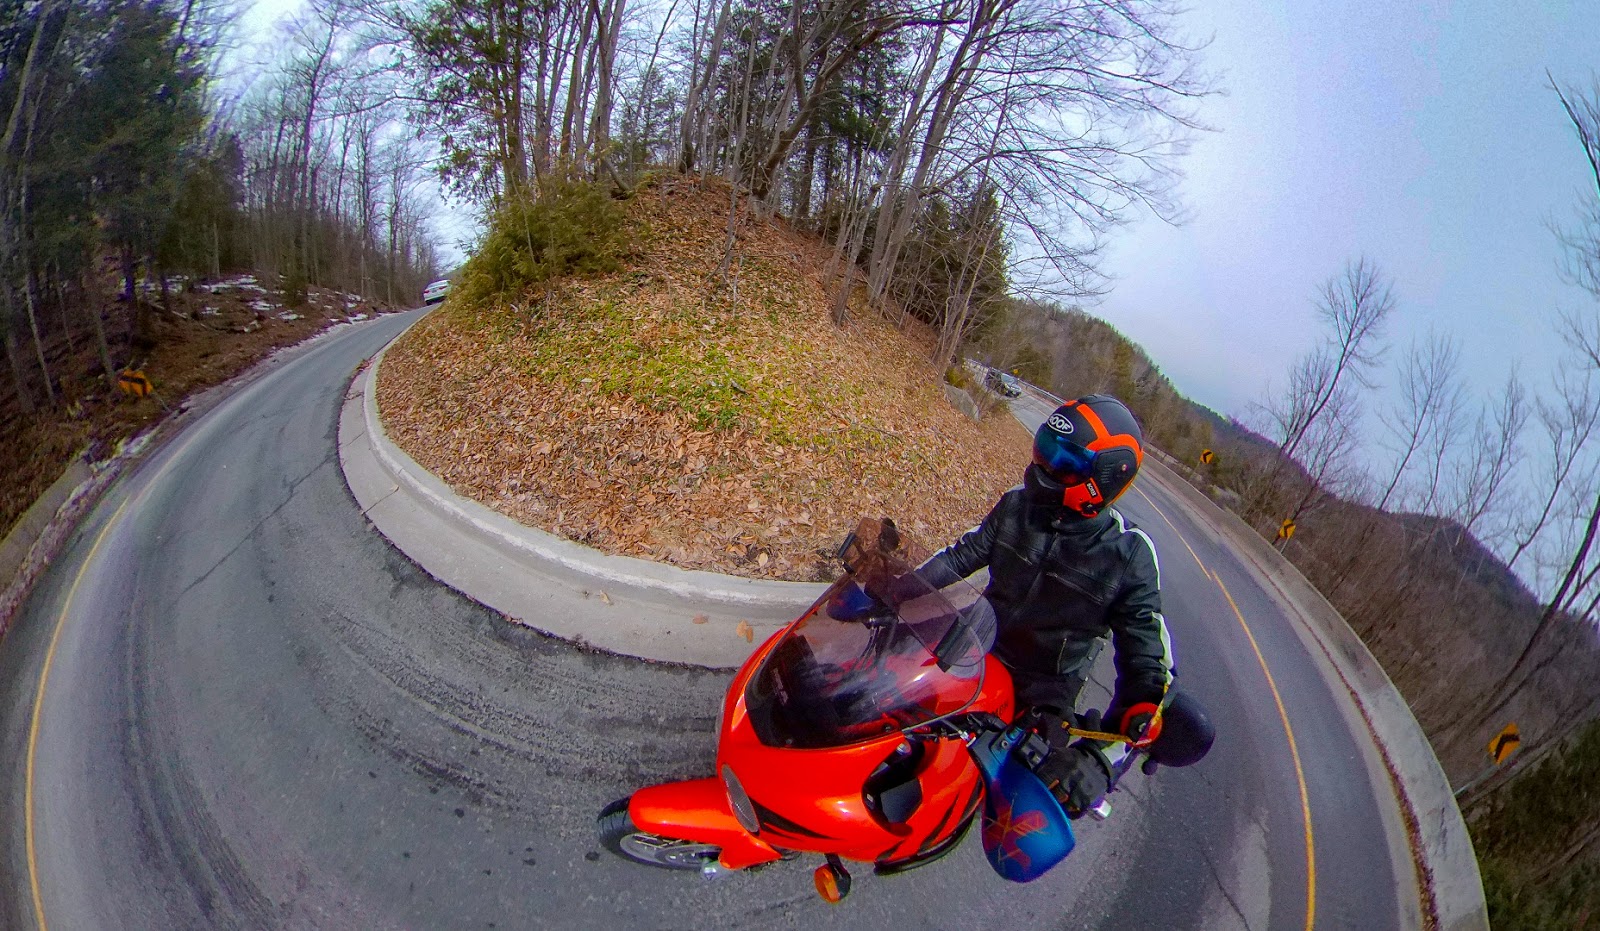
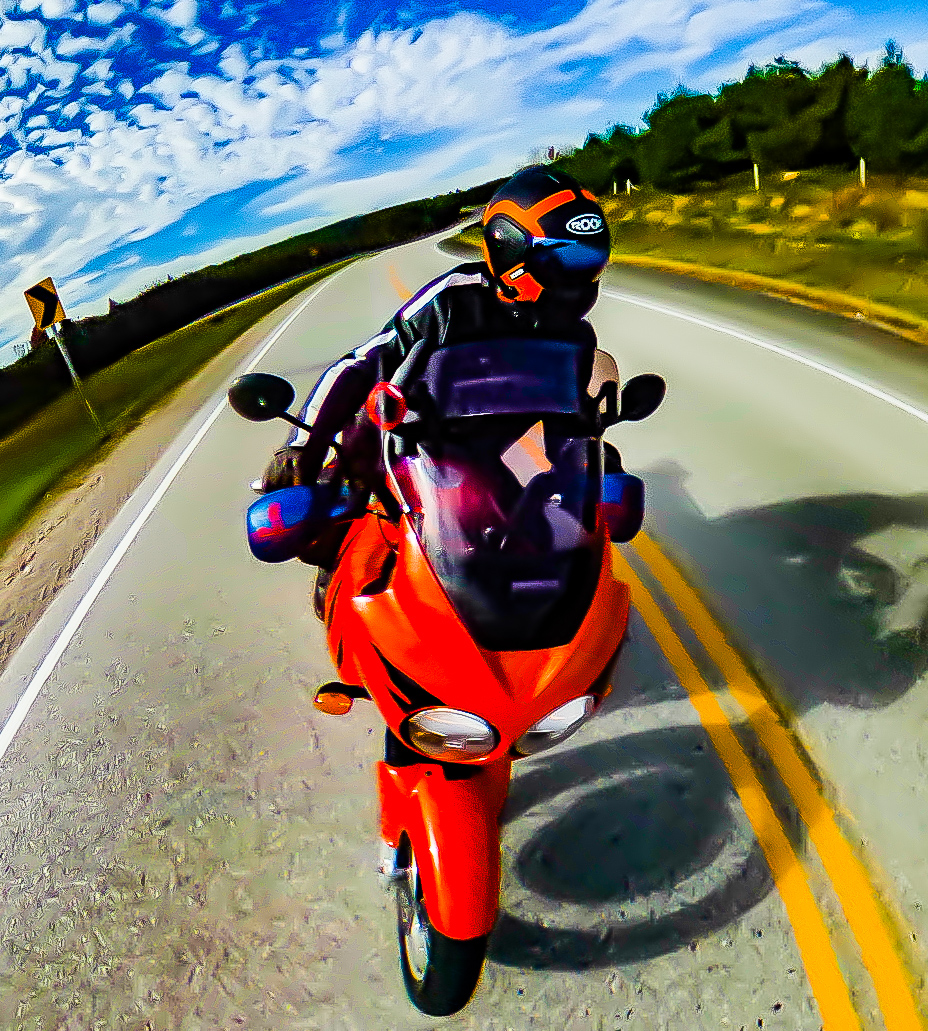
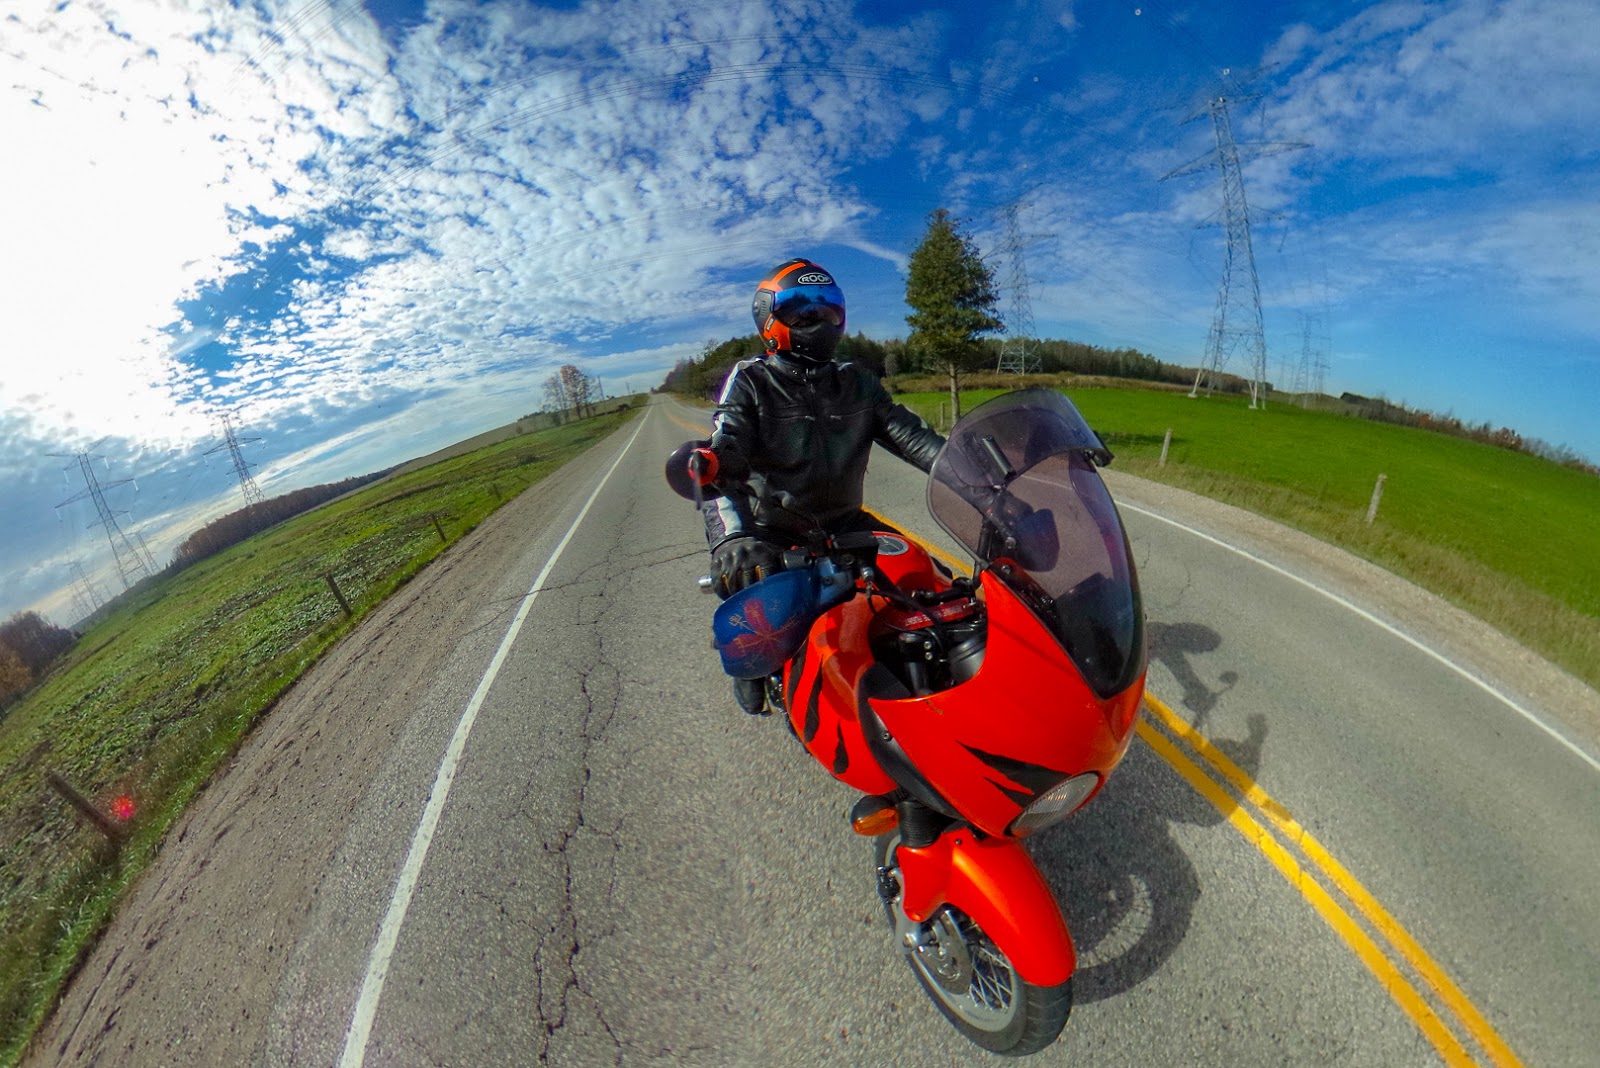
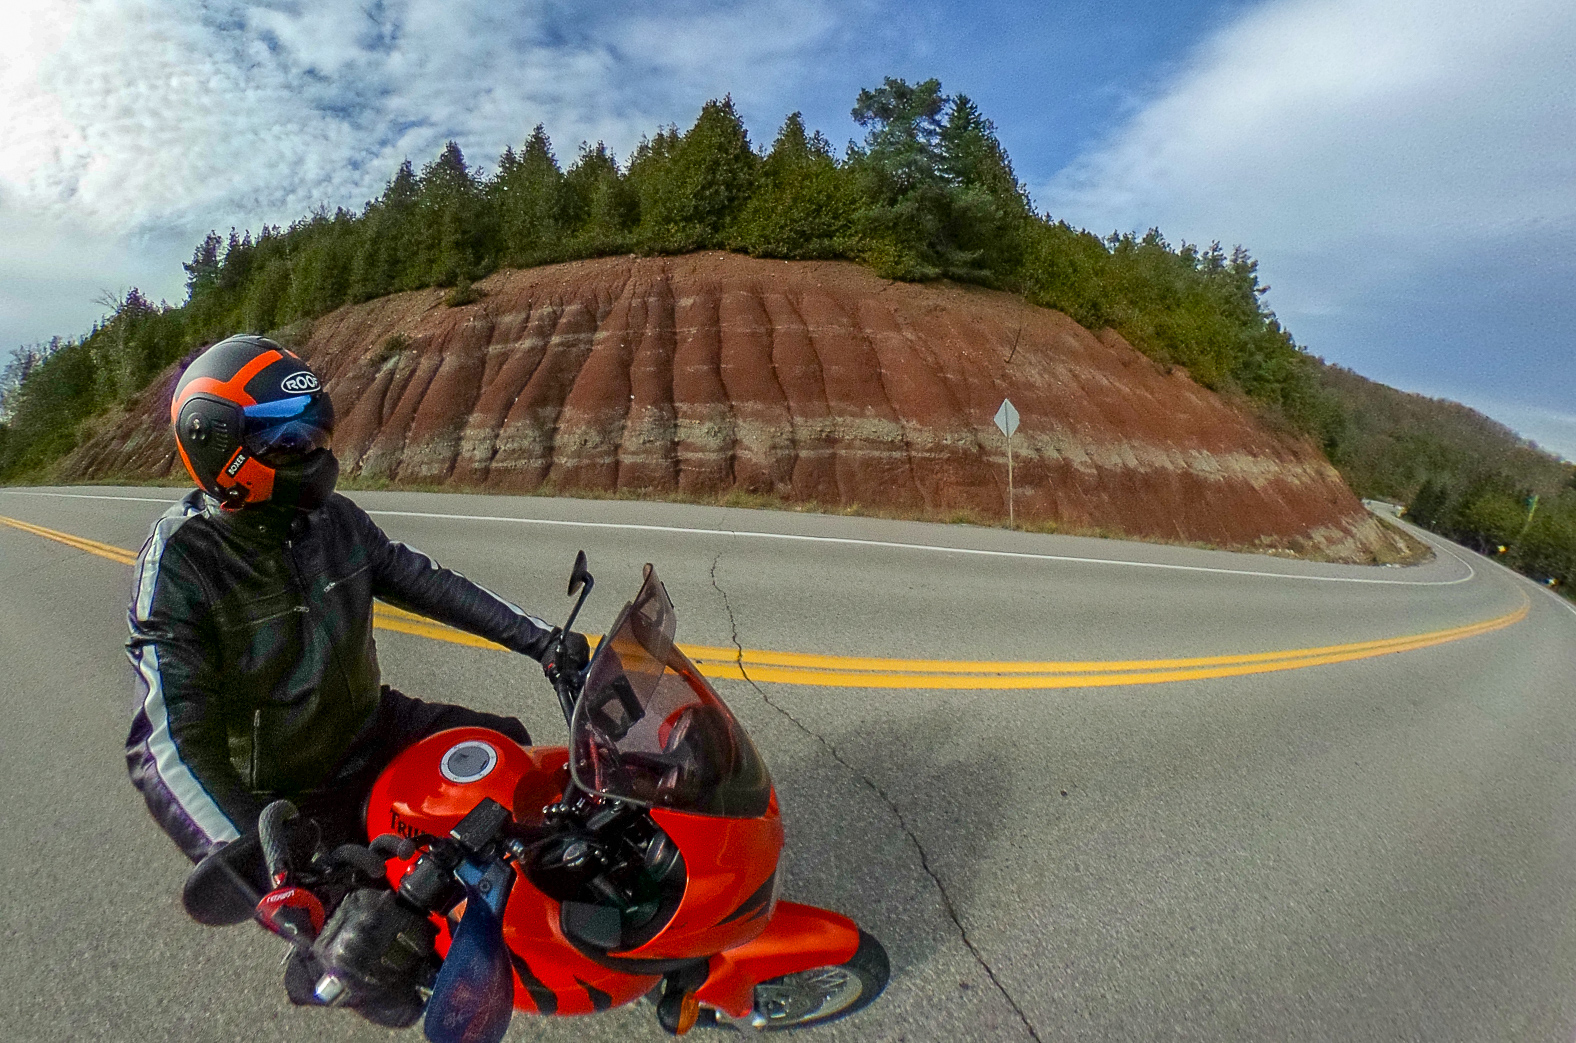
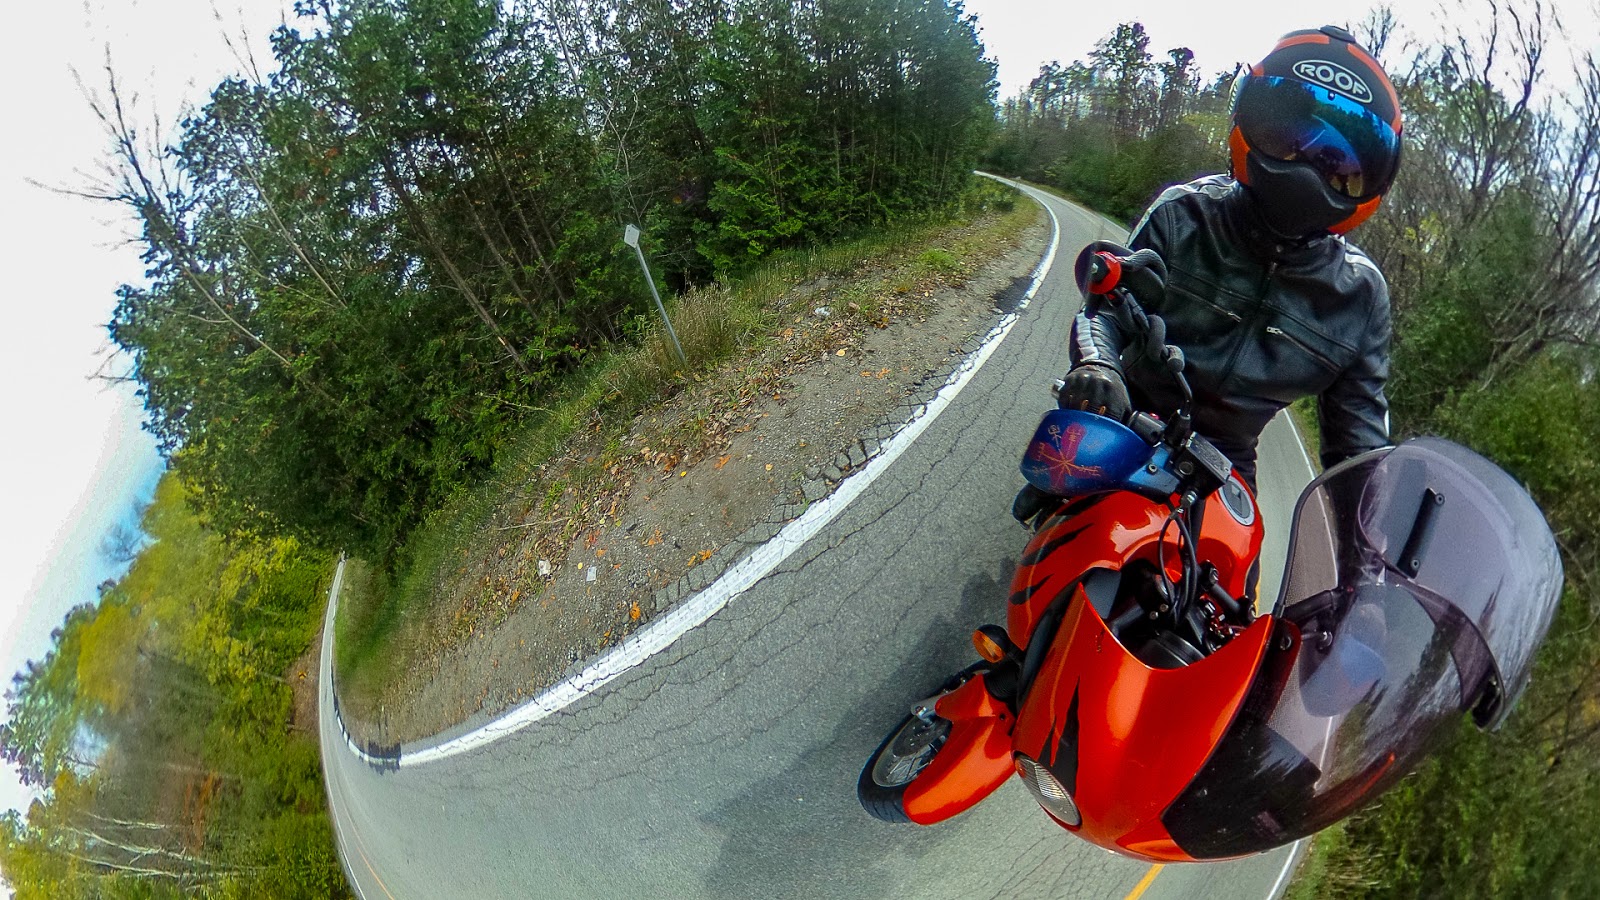
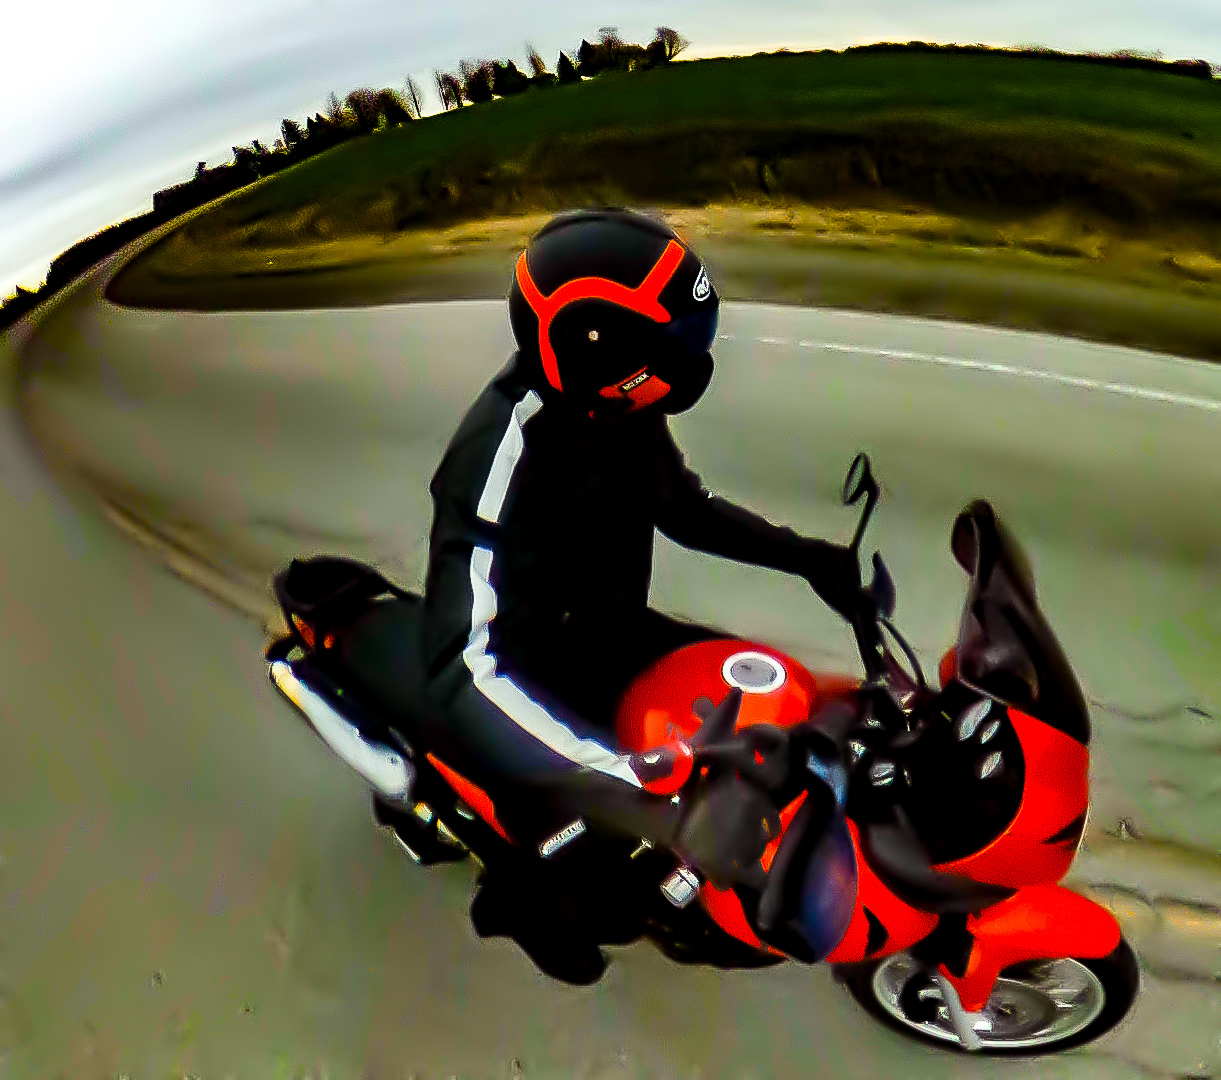
I’ve always wanted to be able to catch the front of the bike while in motion. Mounted to the windscreen the Ricoh Theta doesn’t quite reach. This time I purchased a 1/4 inch threaded rod and cut it to size (about a foot long) and used it to extend the camera out front of the bike. Double fastening the camera at one end and the tripod at the other with extra nuts meant I had no trouble with the rig moving.
The results speak for themselves…
 |
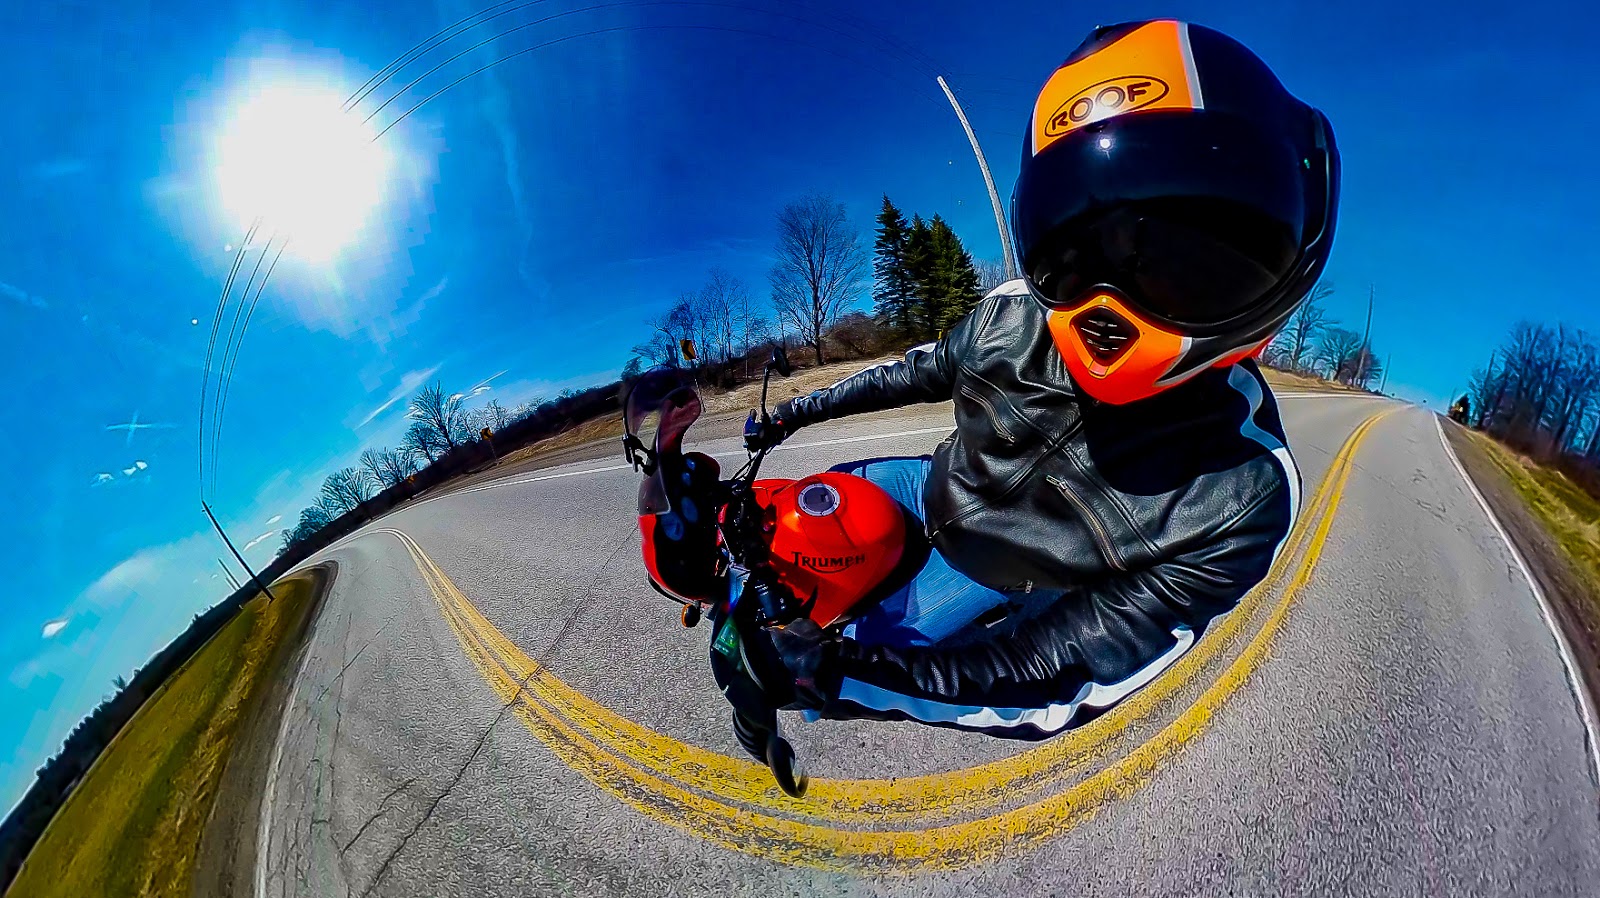
| Early shots are using the extension rig mounted on the upper windshield. It clears the camera from the fairing and gives clear shots of the whole machine and rider while in motion. The rig is stable and holds the camera for steady shots. It never budged on a variety of roads at various speeds. |


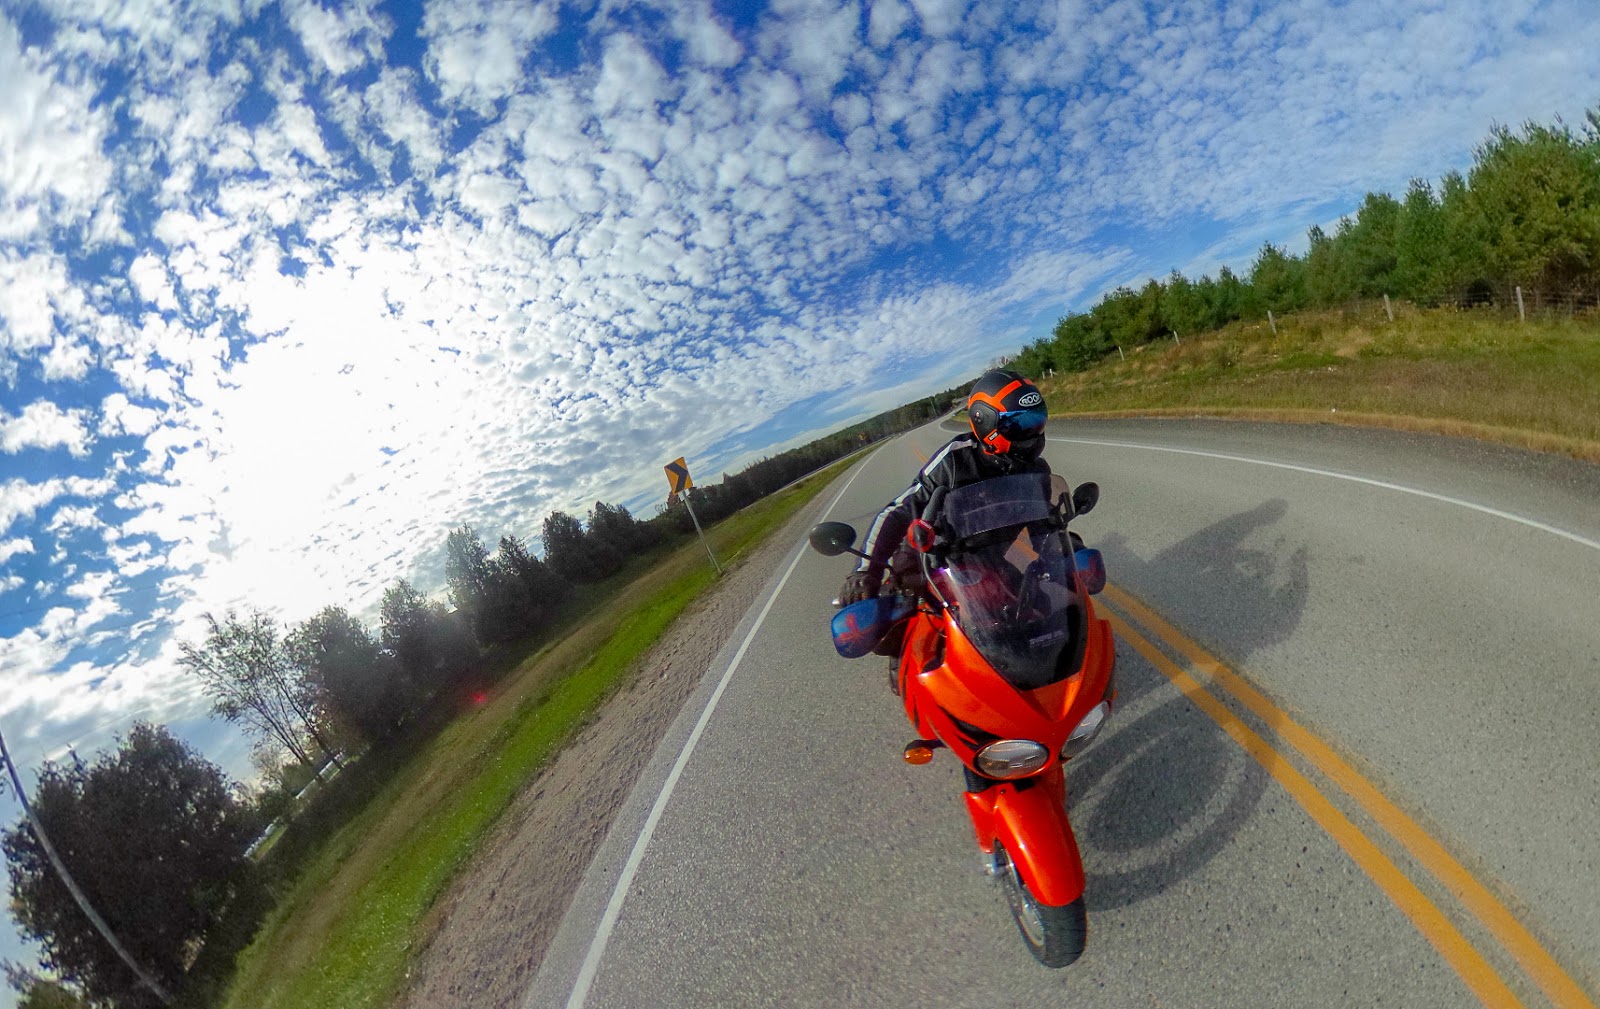
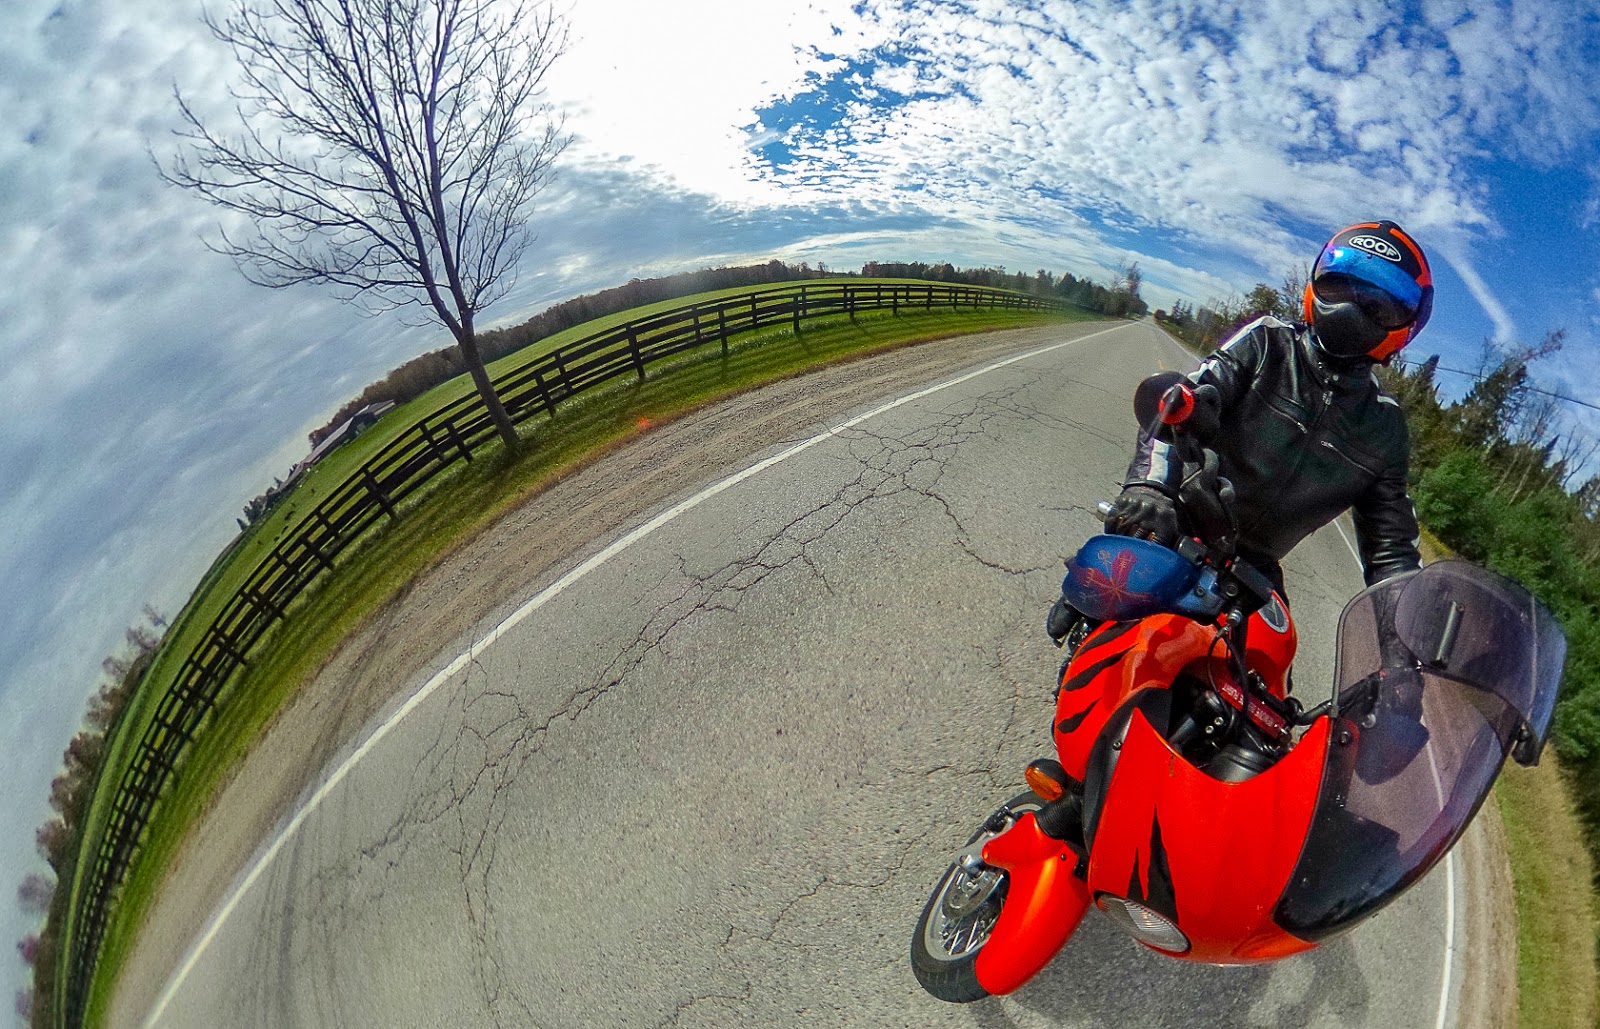
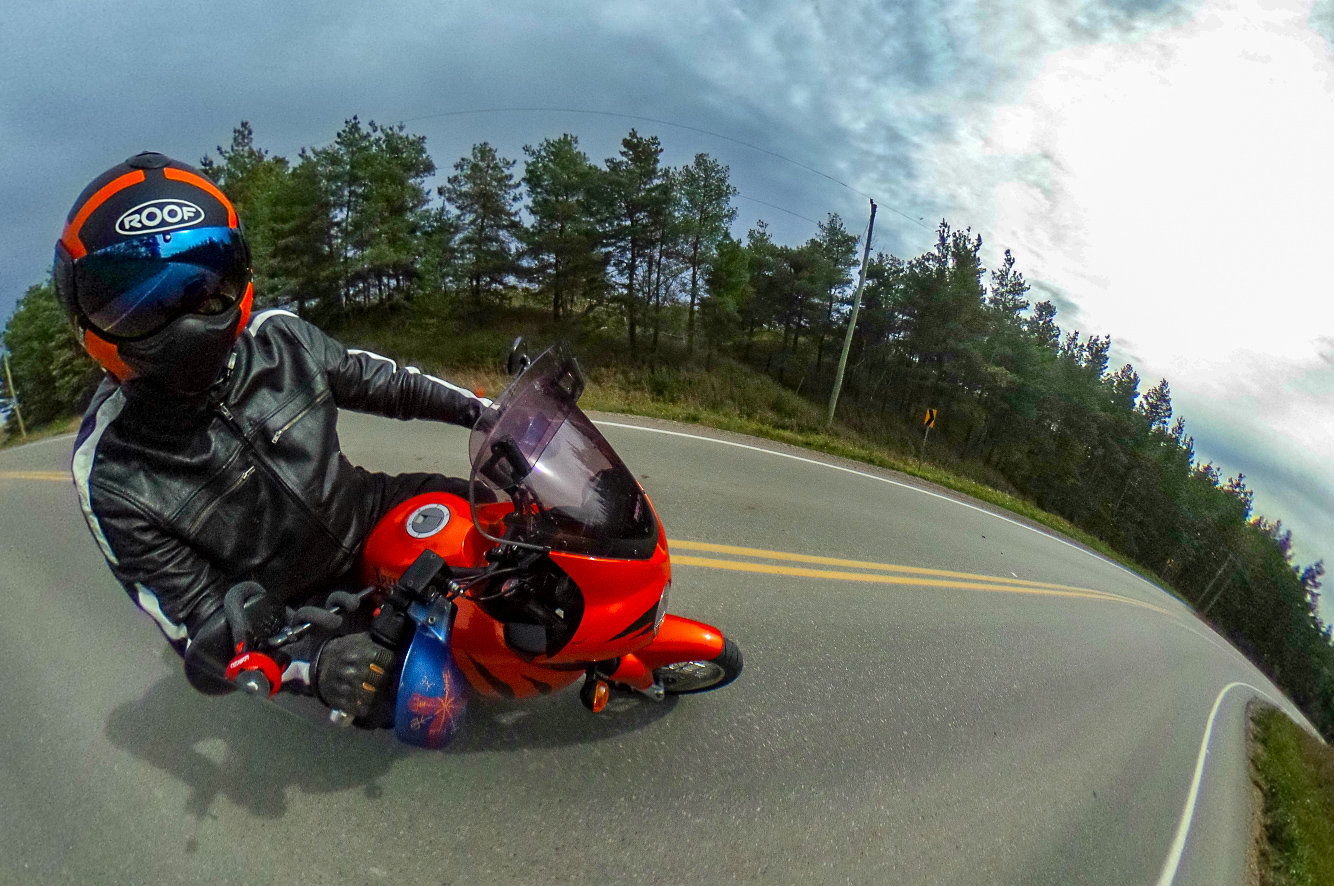
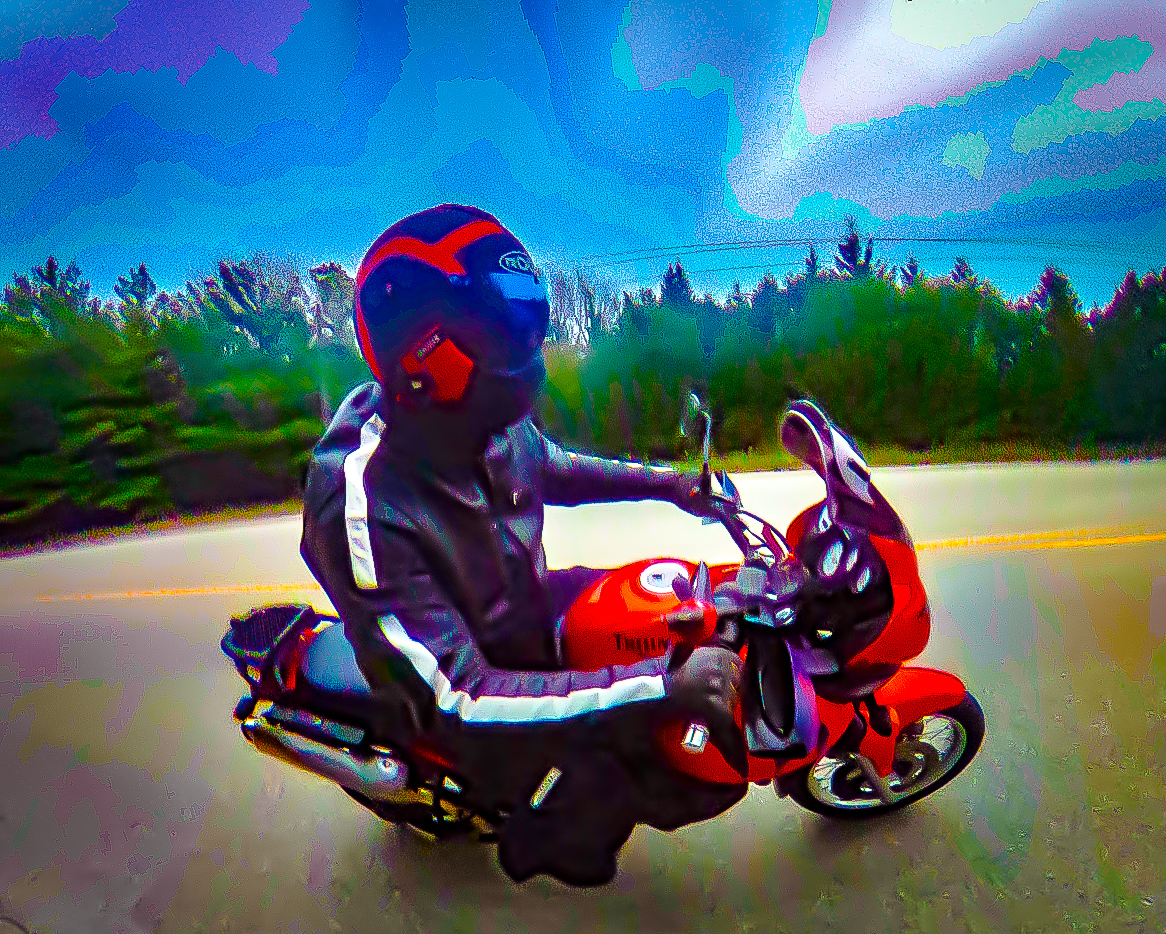
 |
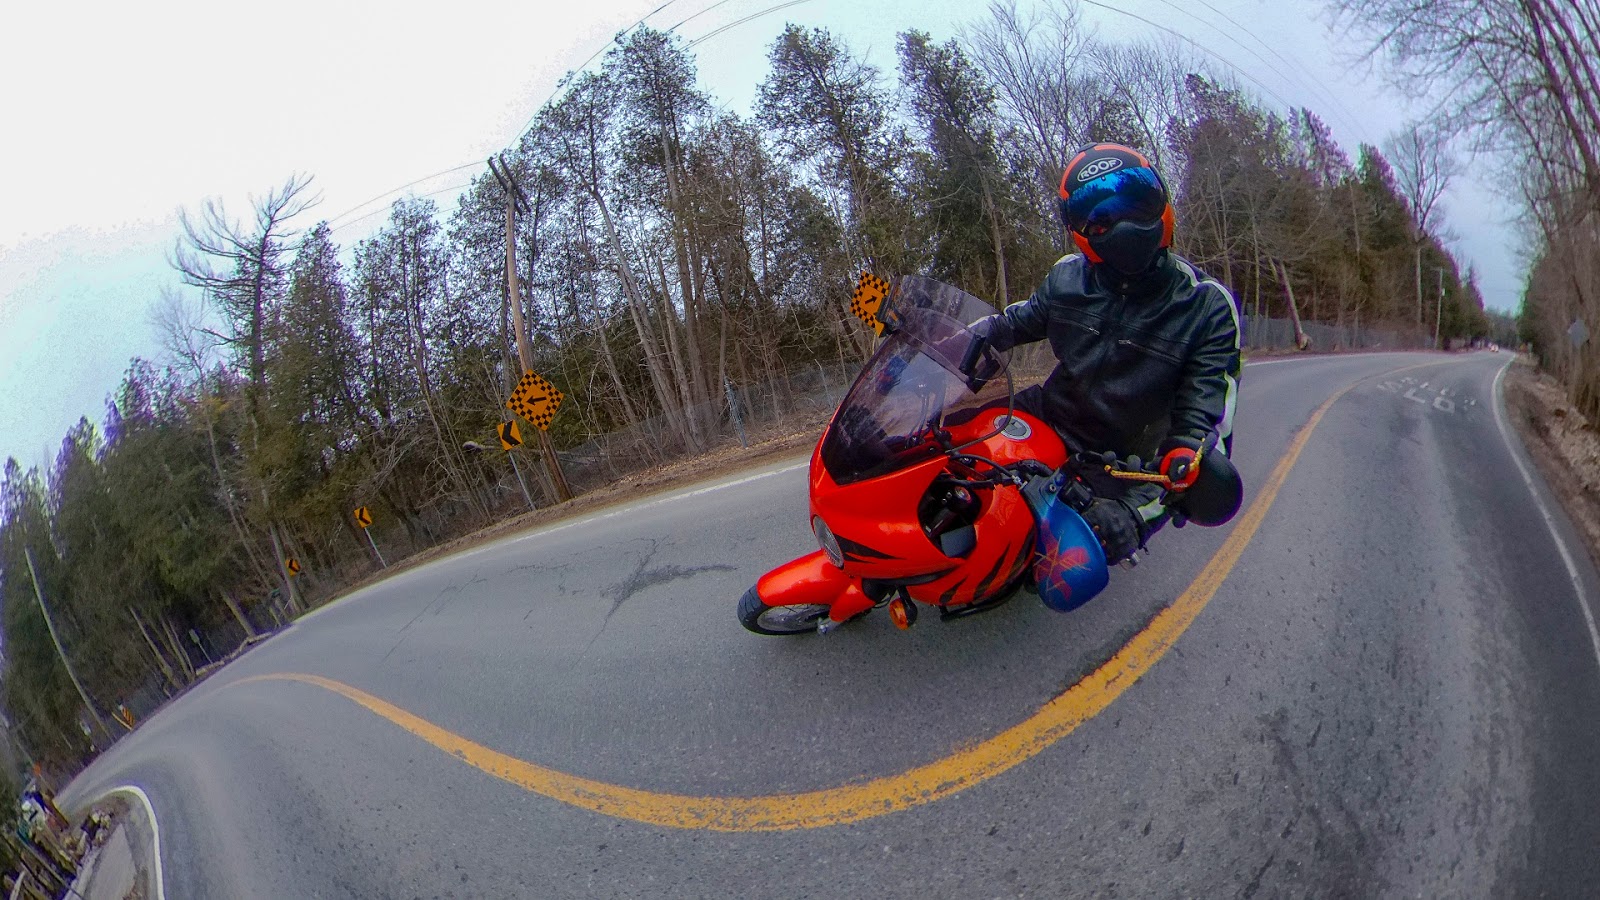
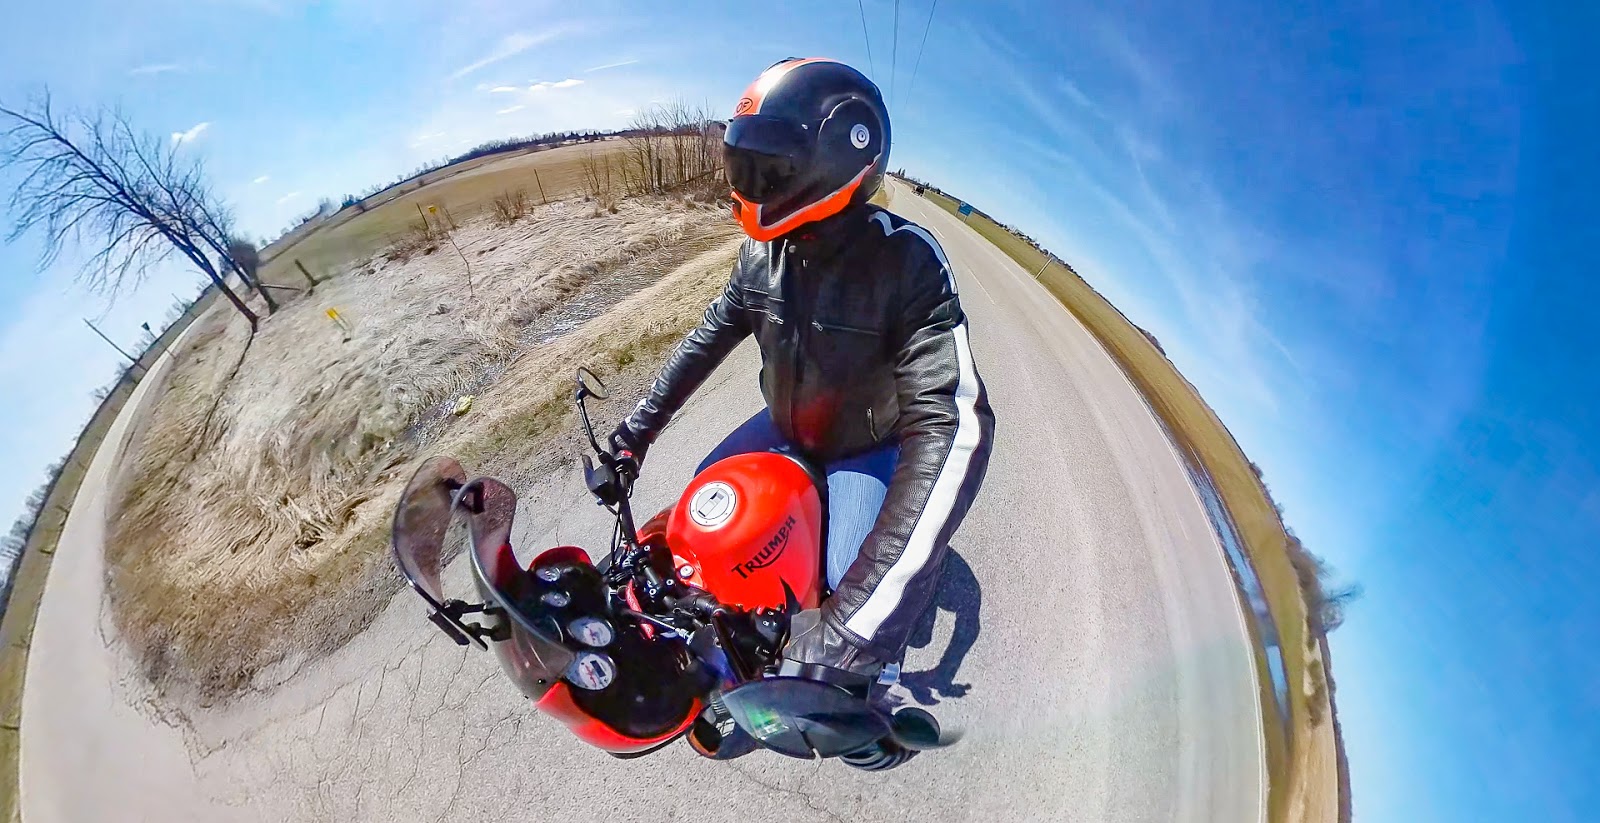
| From the windshield I moved the camera rig to the right rearview mirror. There was a bit of flex in the windshield with the rig attached, but none from the mirror. The shots were once again very stable and steady at a variety of speeds on a variety of different road conditions. This one is at about 80km.hr on a country back road. This angle still shows the front of the bike, but gives more of a 3/4 view of the back of the machine. |

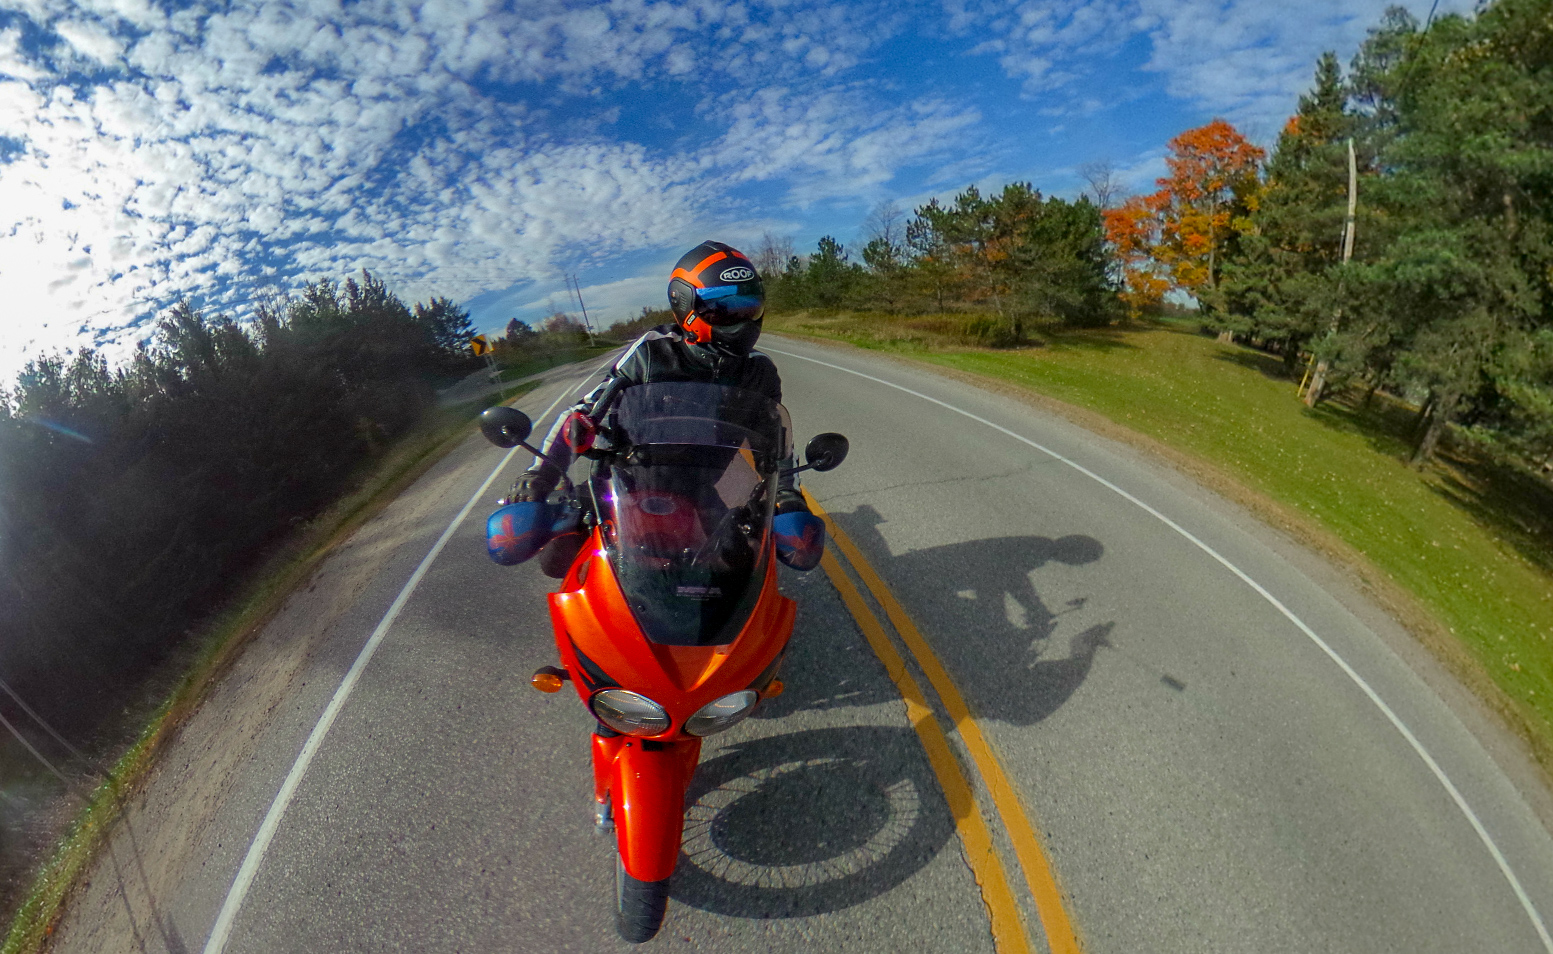
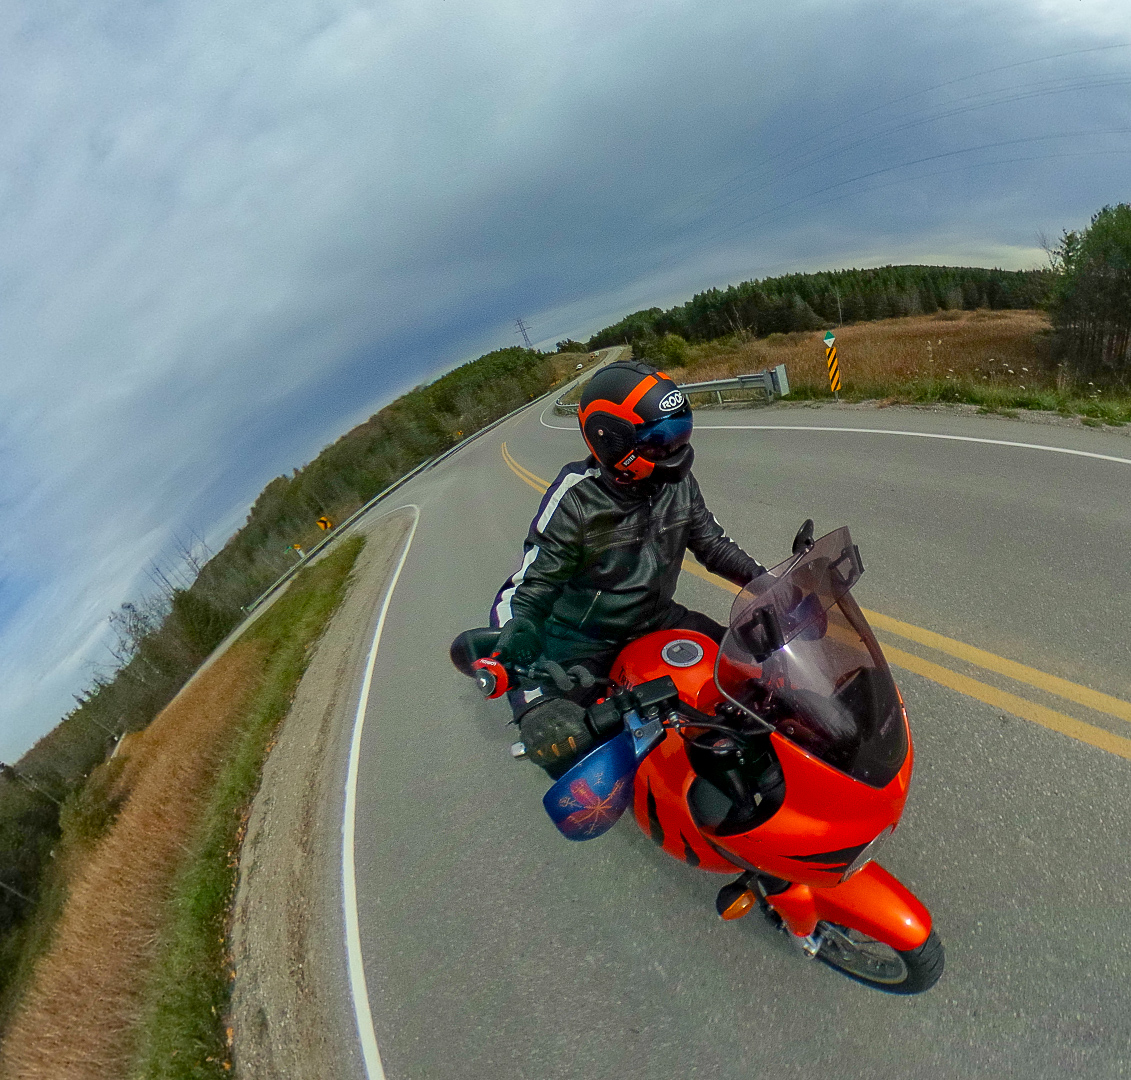
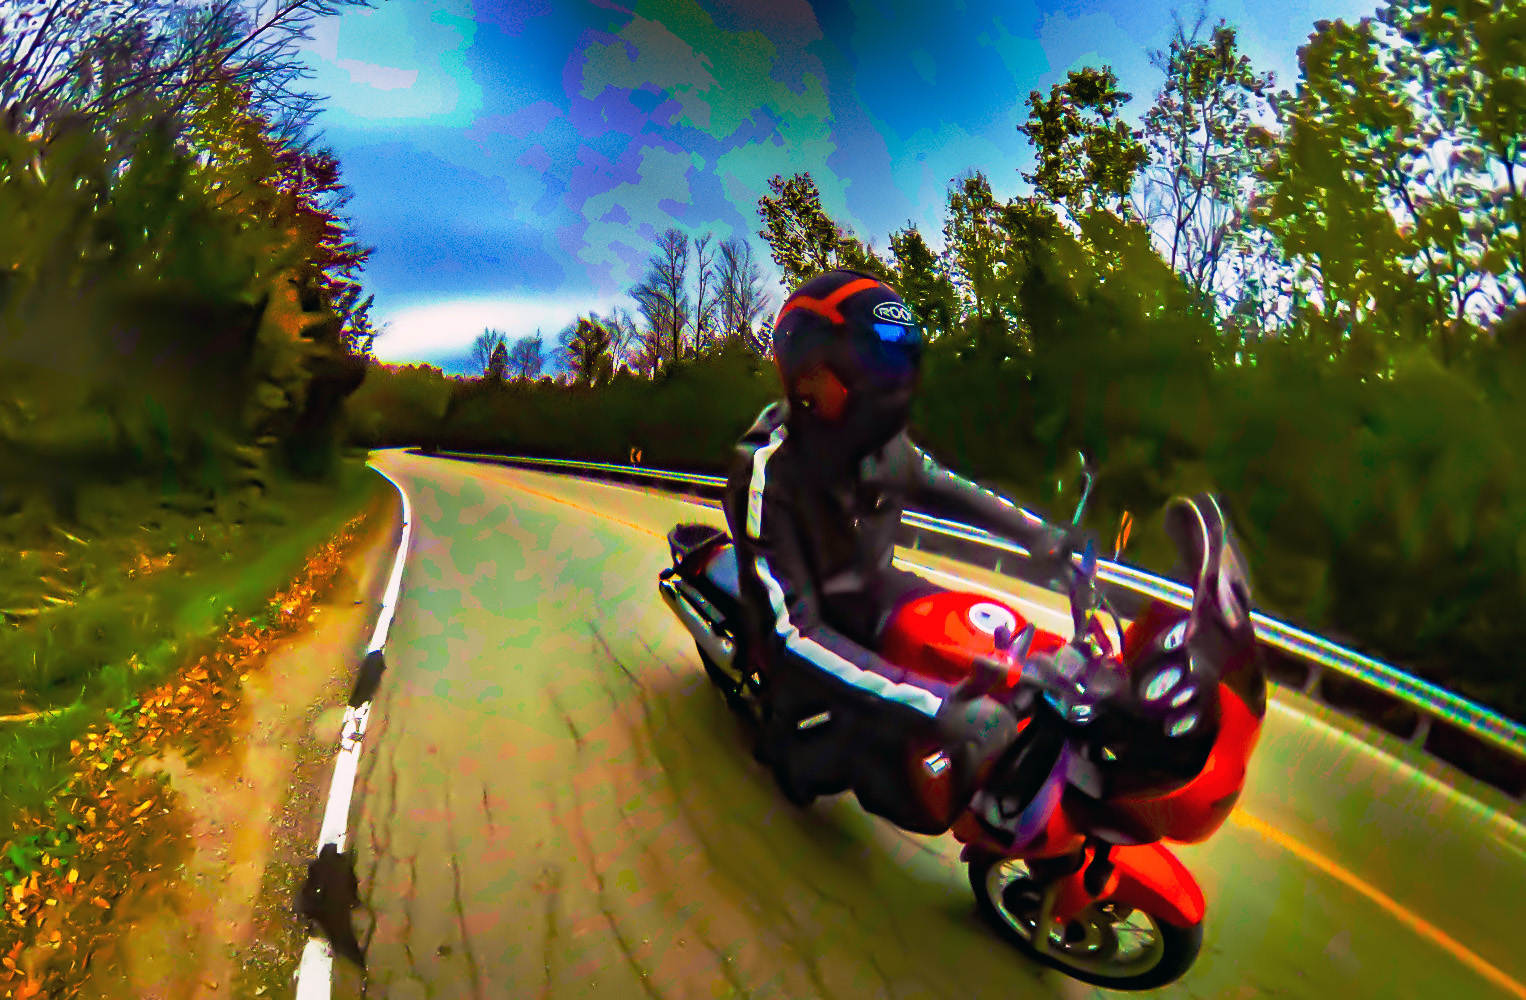
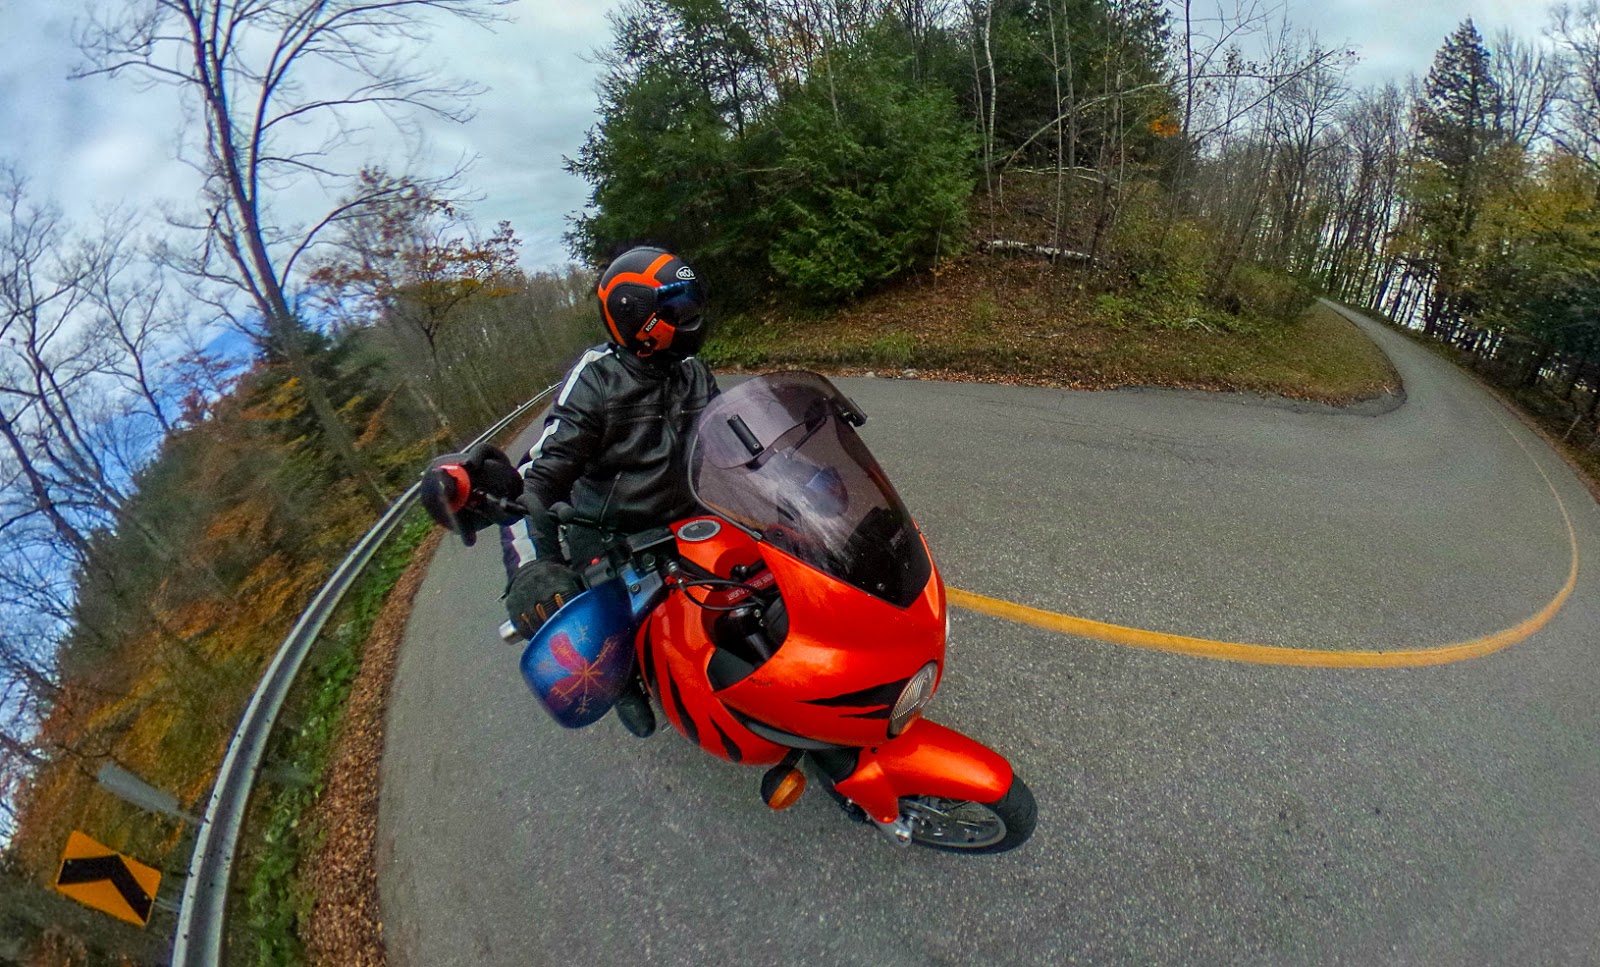 |
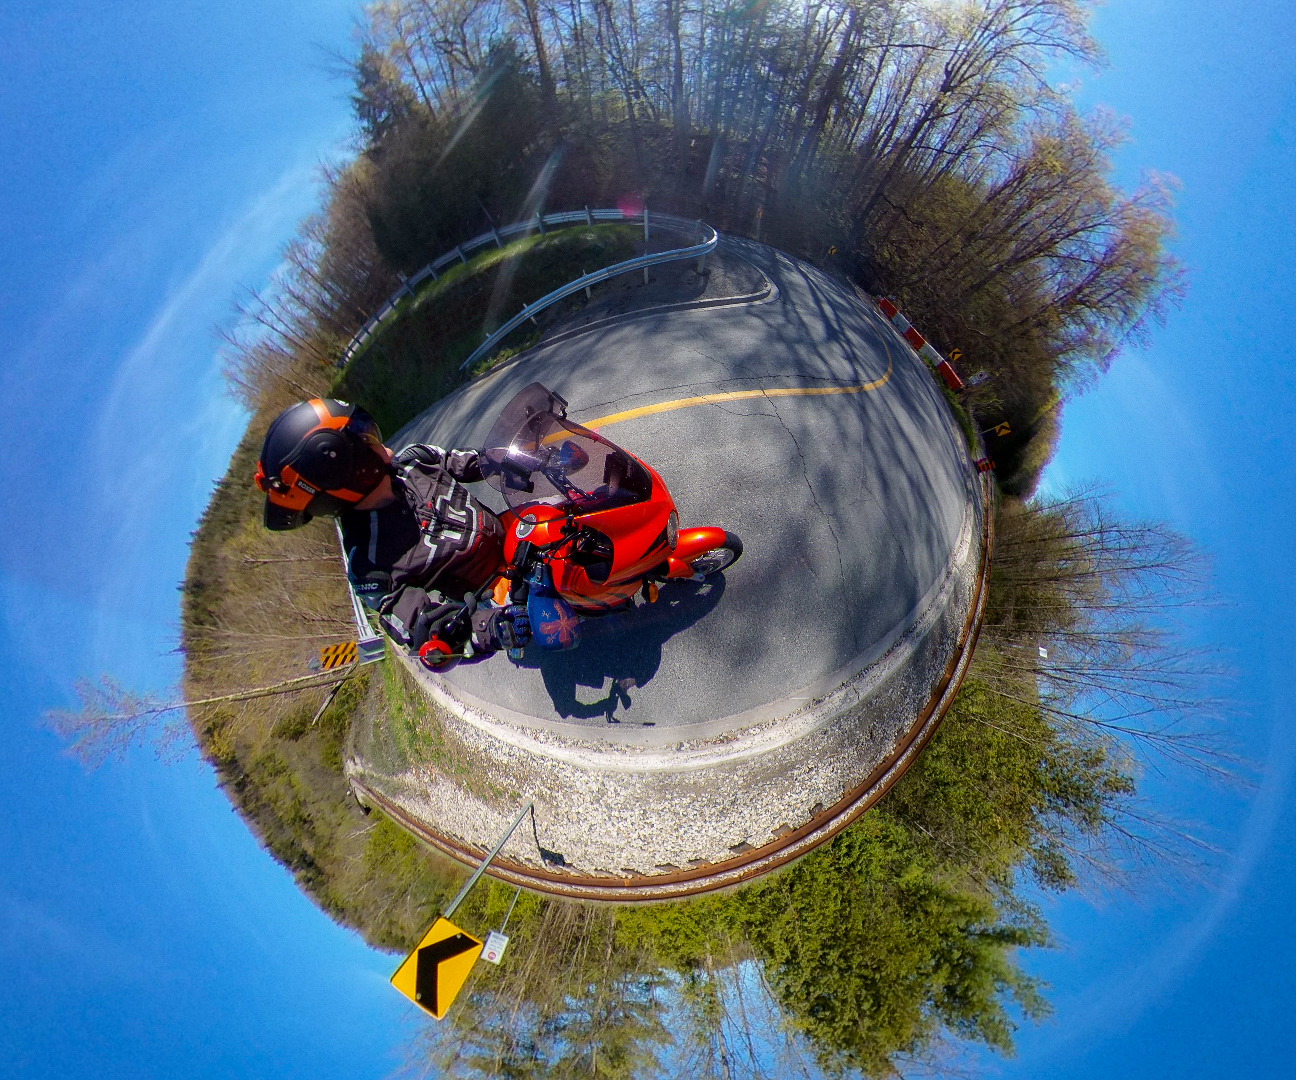
| The distance further off the fairing means a wider view of corners. Even with energetic riding on the twisty bits the rig was problem free. |


 |
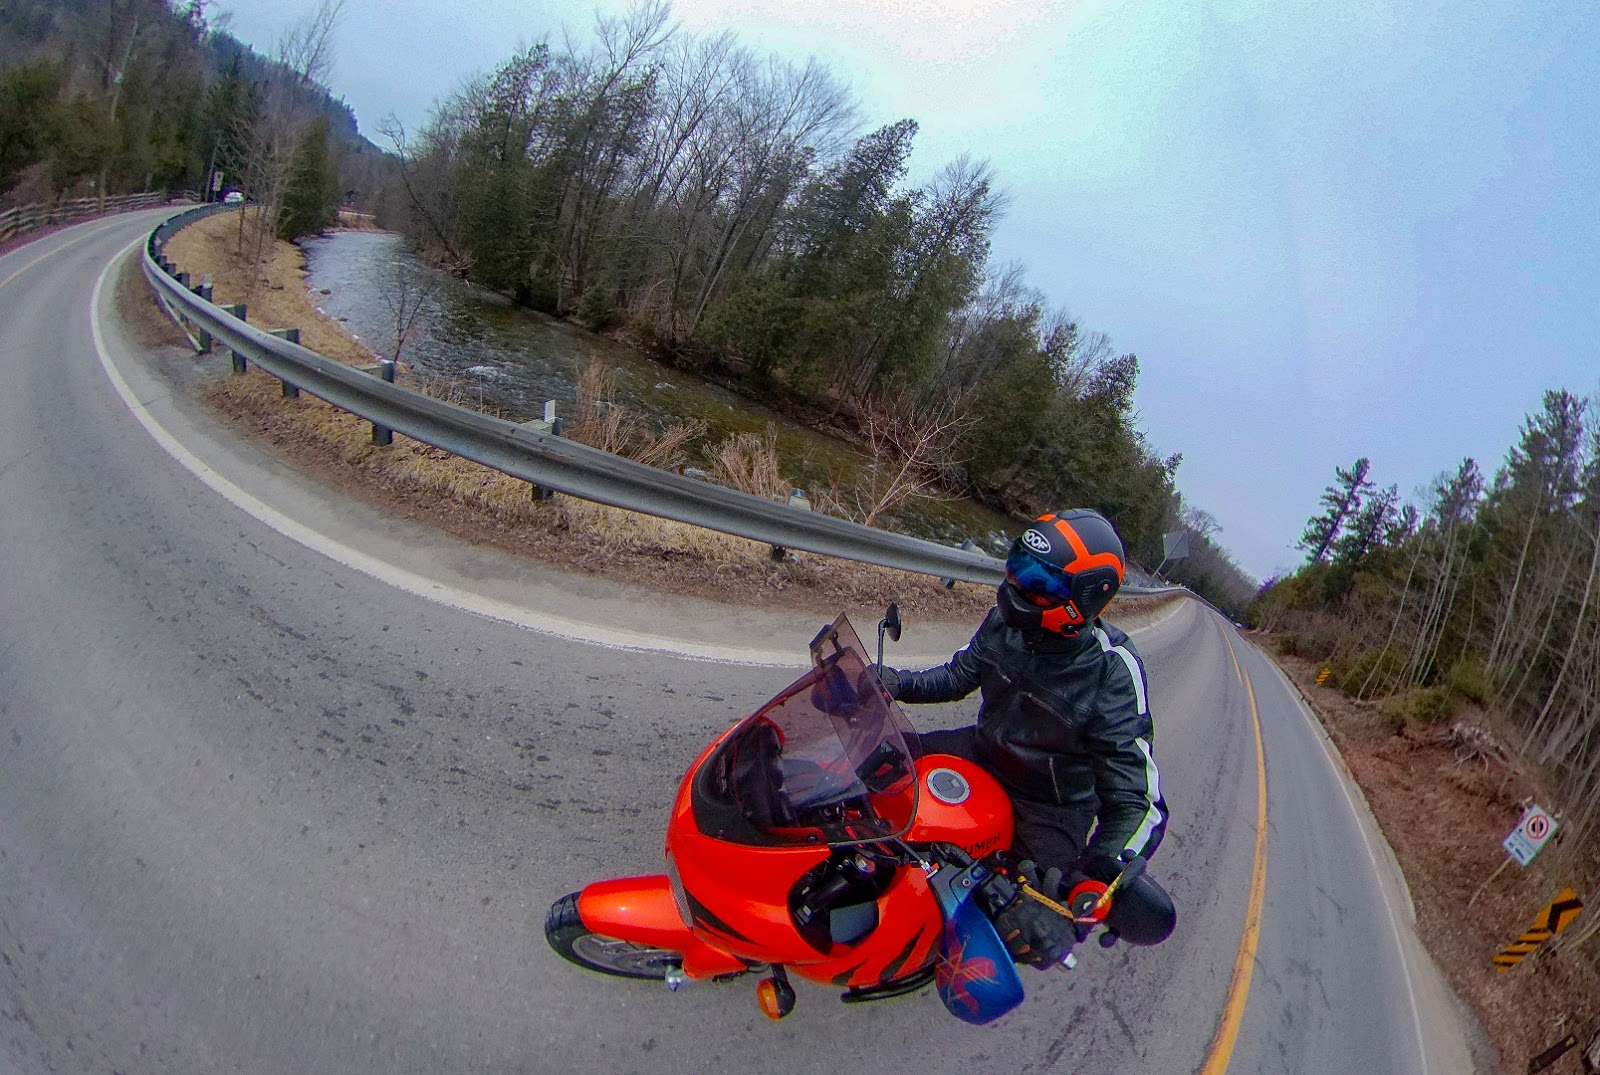
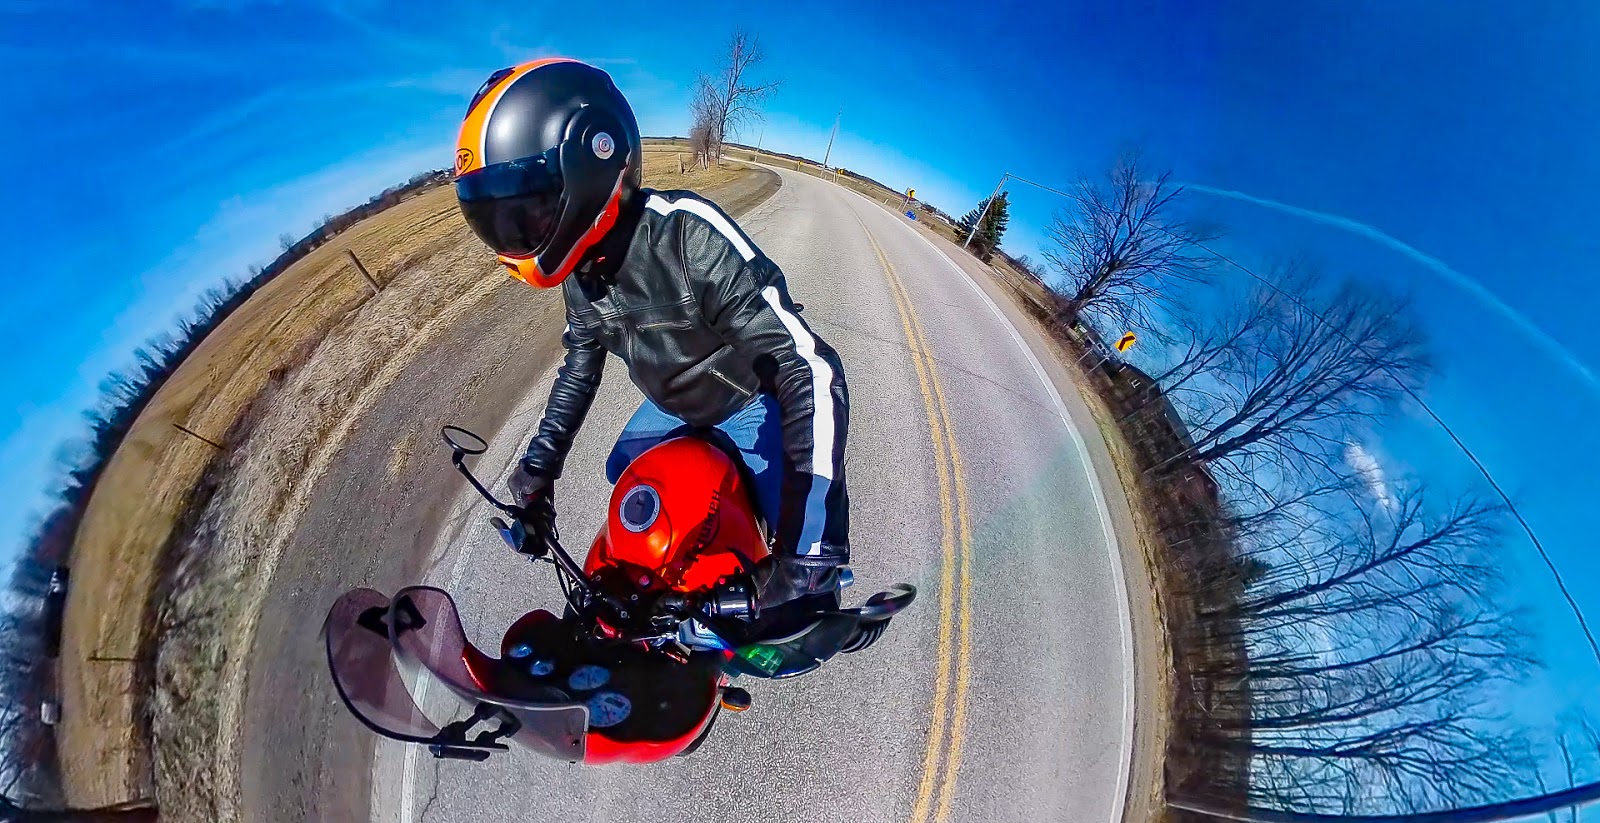
| Further along I angled the rig up higher for a more top down view. The tripod ball joint that lets you easily angle it. If kept tight you can do this on the fly with ease. |

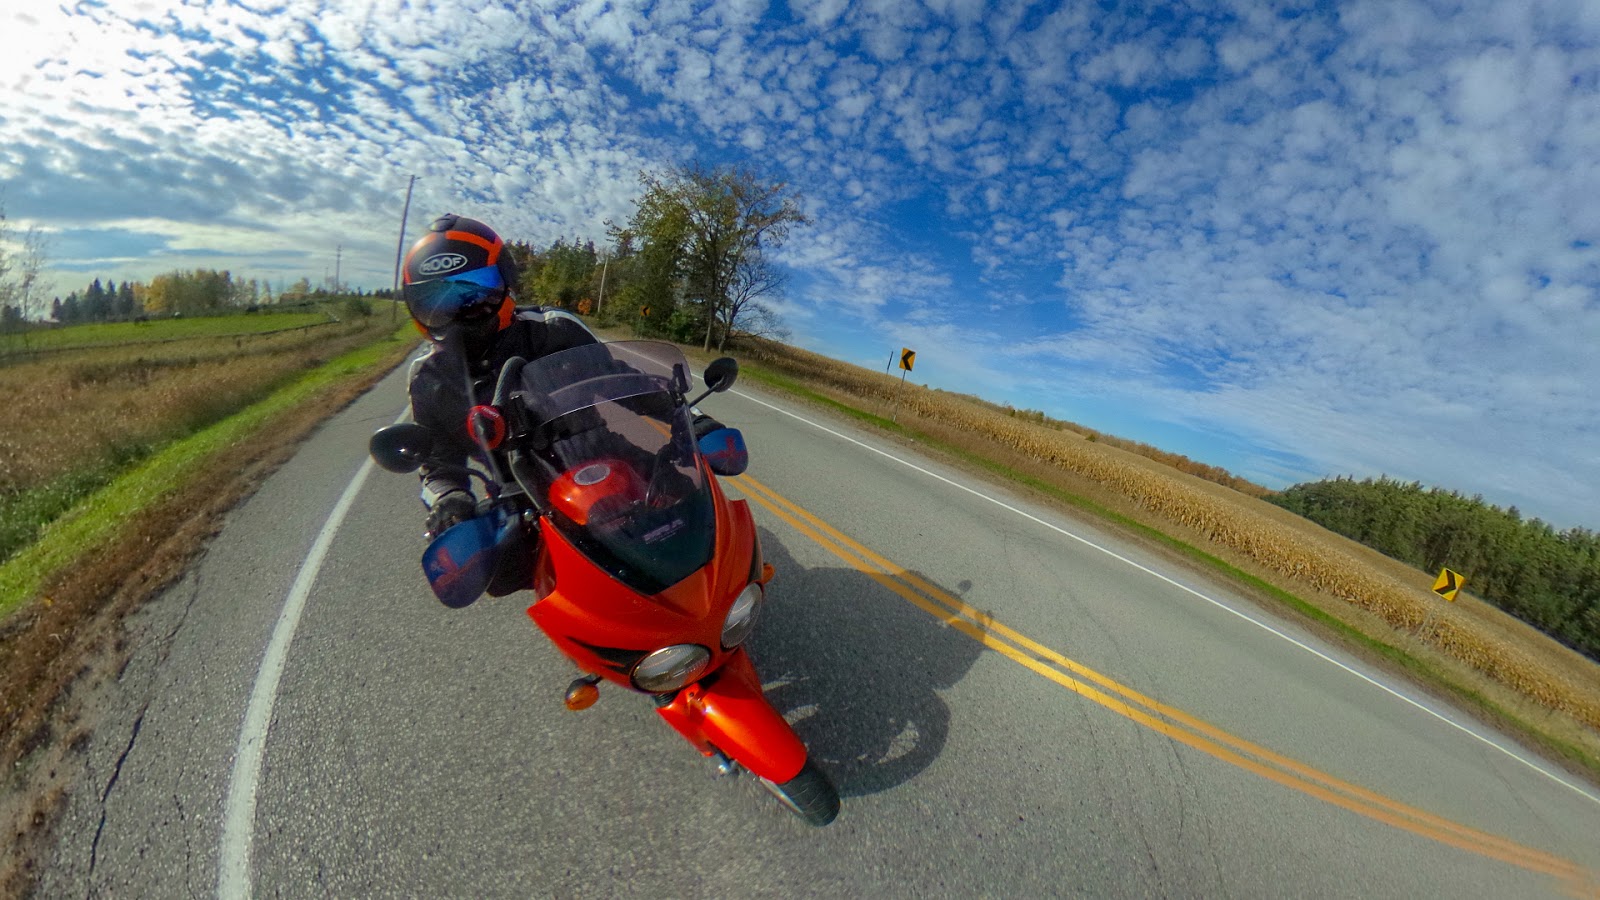
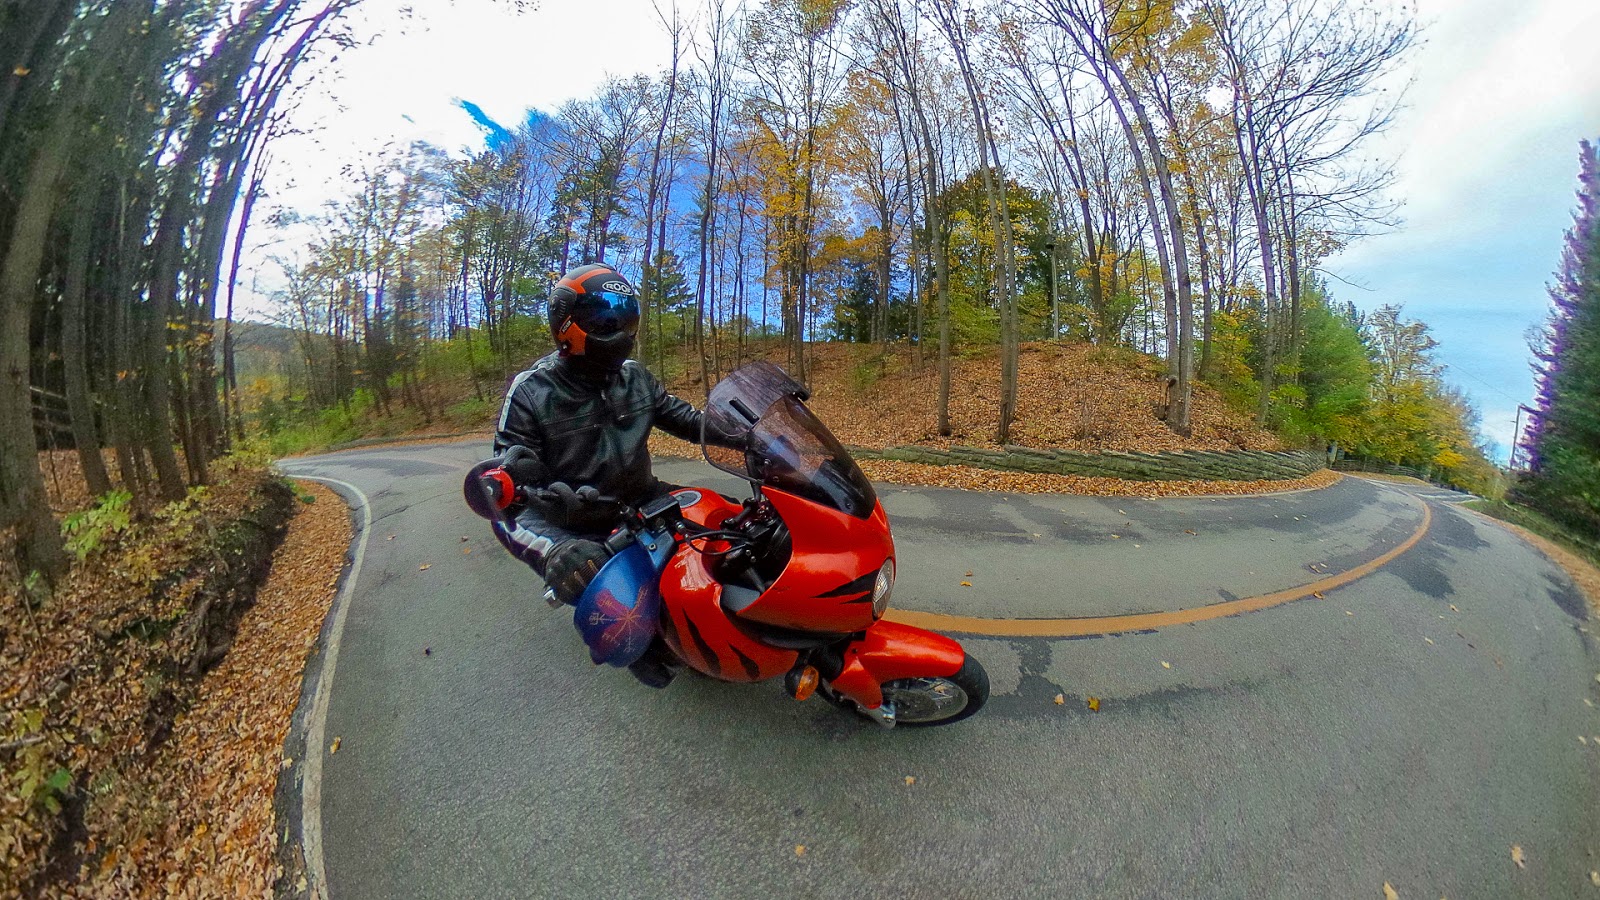
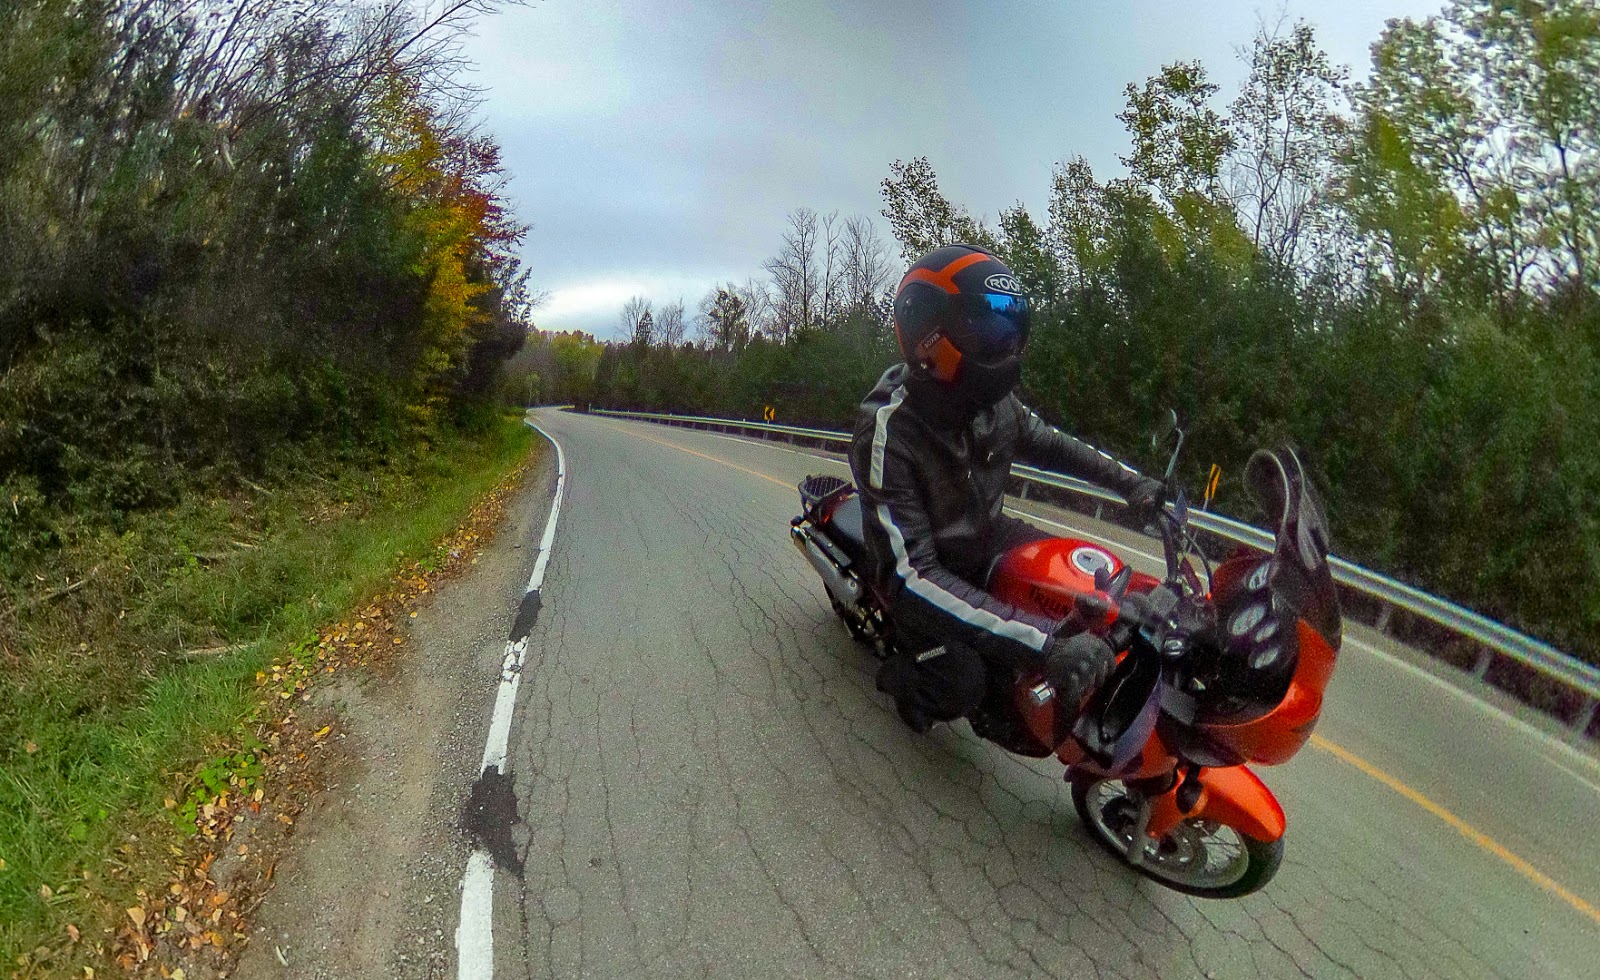
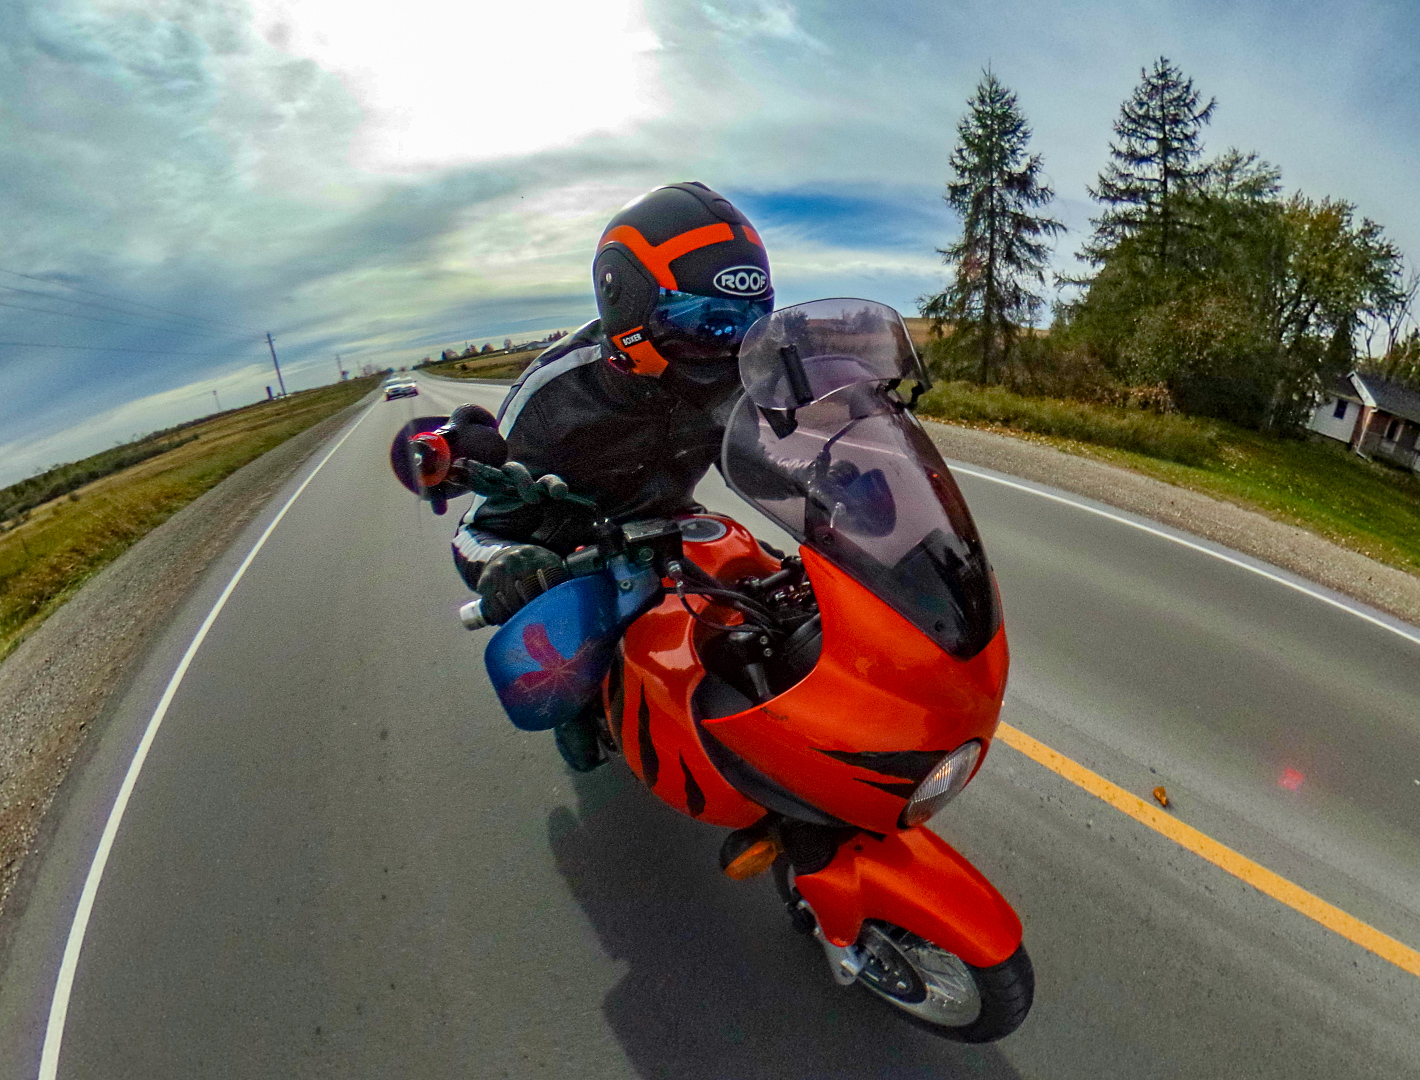 |
| One of the benefits of this on-bike camera rig is that it gives a good sense of speed and captures the intimacy of riding because the camera is doing everything the bike and rider are. Here I’m up to triple digits on a highway. |


 |
| For the last angle I put the camera as far up and out to the side as I could angle it off the rearview mirror. This catches the whole side of the bike and rider well, as well as offering a good sight lines up and down the road. |


That worked. All images are screen captures in the Ricoh imaging software cleaned up in Adobe Lightroom.
from Blogger https://ift.tt/2R4RrTt
via IFTTT