I was reading Classic Bike Magazine last month and one of the auctioneers in the back of the mag suggested getting my hands on a copy of The Rudge Book Of The Road if you are looking for an historical read that’ll get you through a long winter and prime you for the coming springtime.
I had a look around and finally found a 1926 version of the book on Amazon for about thirty five bucks.
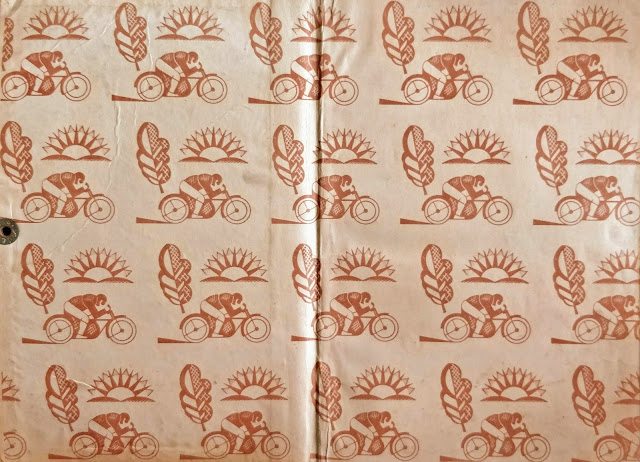
If you have a thing for art deco drawings, the Rudge Book of the Road will scratch that itch!
My copy was once owned by.. a W. Chapman?
Reading a book that’s almost 100 years old gives you a perspective on motorcycling that you might not have considered before. At one point the author talks about how much Rudge has learned from building motor-bikes over the past 17 years. I found myself becoming conscious decades of development that since went into my current 1971 Triumph Bonneville project and then continued on for decades more as found in my modern Triumph Tiger and Kawasaki Concours. A bit of historical perspective is a powerful thing when you’re hands on with the engineering found in modern motorbikes. With nearly a century of continuous development, reading about motorcycling from the dawn of the sport is good mental exercise.
The Rudge Book of the Road takes me back to a time when my grandparents were children and, as a modern reader, I’m left struggling to find a frame of reference in our overcrowded and mechanized world. There were a quarter as many people on the planet when this book was written and internal combustion engines were in an early phase of rapid development as they revolutionized and democratized travel for more than just the wealthy. This book makes a point of recognizing this exciting period in history:
Traffic jams and the expectation that everyone be commuting in motor vehicles in an increasingly crowded and polluted world makes this perspective feel particularly alien in 2022. Can you imagine thinking about motorbike travel like this? If anyone could do it, it’s motorcyclists – we may be one of the last vehicular subcultures that clings this kind of romance, even as the vast majority drive their appliances without a second thought for how they work or experiencing any inherent joy in the activity.
Having lived with rough ‘colonials’ for most of my life, some of the language in this very British book made me smile. It was written for Rudge Whitworth as a sales tool but it leans toward the romance of riding as a theme throughout. Rudge themselves lasted until 1946 before they stopped production, so you’re reading a book by a company that hasn’t existed in over seventy years, which further makes reading this feel like an echo from a distant and unknown past:
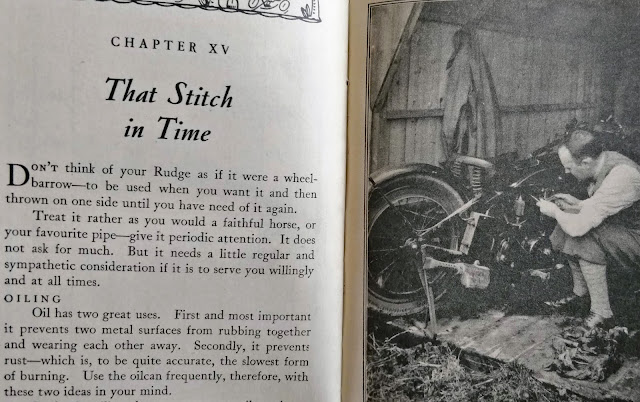
The state of the art in terms of motorcycle engineering was making major steps in the 1920s. Earlier bikes had you oiling the motor as you rode it. Too much and it would clog the spark plugs and leave you on the side of the road having to clean your plugs, a job most modern vehicle operators would have no idea how to do. Too little oil and the engine would seize, possibly tossing you down the road. This degree of involvement in motor vehicle operation was being phased out in the mid-nineteen-twenties bringing more people into the moto-fold.
The idea of sitting down with your new machine and understanding what it needs and how it works is a foreign one in 2022, but Rudge makes this process seem almost meditative. The idea of lighting your pipe and comprehending your new machine in your shed still appeals to a few of us. Perhaps this is another of those colonial distinctions. I have no trouble finding programs on industrial history and engineering when I watch British television, but Canadians seem more focused on resource extraction and office work than they are with understanding how things work and then manufacturing them. This sort of mechanical sympathy will sound particularly foreign to Canadian ears:
Sit on a can of gasoline and light your pipe! Those were the days…
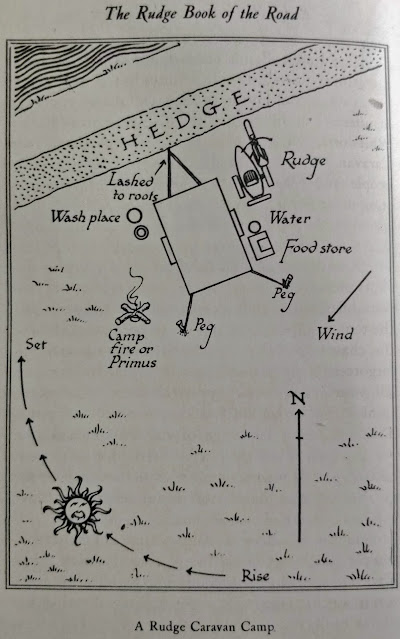
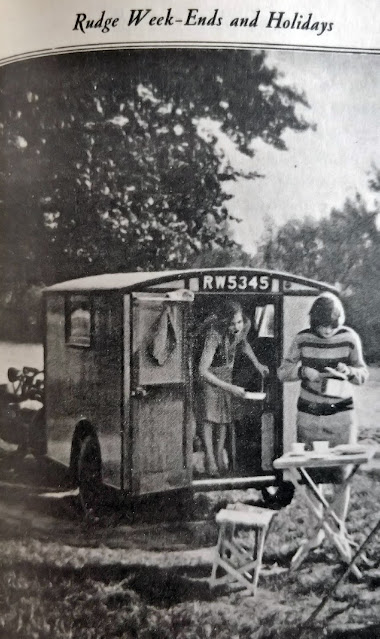
This old book doesn’t limit itself to motorcycling mechanics. If you’ve never camped before they offer advice for those new to sleeping on the ground. Rudge made sidecar outfits and even a trailer/caravan for people interested in taking everything with them.
When your trusty leather bound Rudge Book of the Road isn’t teaching you how to moto-camp, it’s explaining how the roads you’re riding on might be built on top of old Roman roads or how to identify the architecture of the historical buildings you’re touring past. This makes me wonder whether Rudge’s target audience was perhaps a bit more educated than your typical rider, but it also makes me wonder if maybe people were just a bit smarter back then without a phone to immerse them in social media in all the time.
The book doesn’t stop at camping or architecture and goes on to teach you how to forecast the weather, tell direction and even tells you where the biggest hills on the island are so you know what gear to tackle them with. It then provides charts on when the sun rises and sets so you know when to turn on your new-fangled electrical light. Rudges were one of the first to go electric. A few years earlier you were lighting a gas powered lamp on your motor-bike before proceeding into the dusk on mostly unfinished roads (while remembering to give the top and some oil). There are (many?) riders now who have never turned a wrench or put a wheel off pavement.
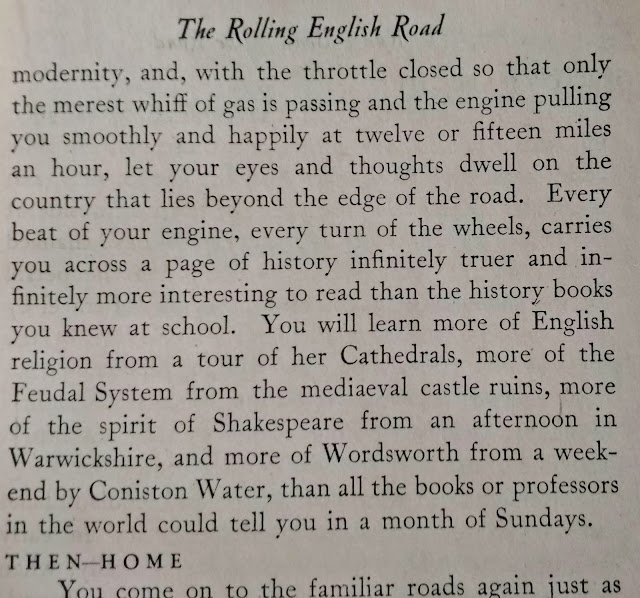
You’ll learn more from doing things than you will from “all the books or professors in the world”. Something we’ve forgotten in our screen-fueled information revolution?
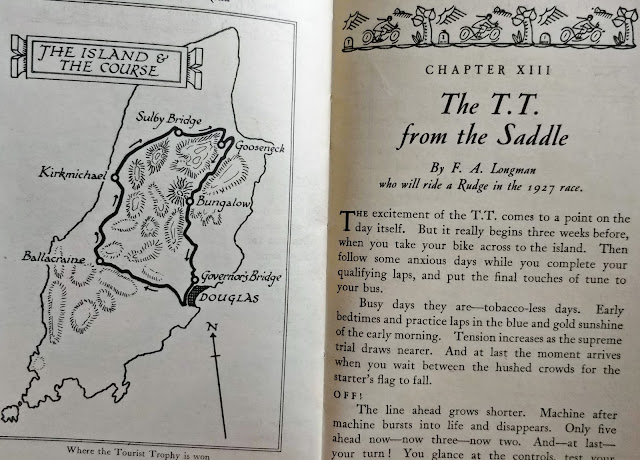
There is another chapter written by F.A. Longman, Rudge’s rider in the 1927 Isle of Man TT road race. He writes with a racer’s urgency and puts you in the rider’s seat as he talks you around the T.T. mountain course while it was still young and relatively new. It’s amazing how little has changed in the racer’s mindset even while they’re using machines that have only just recently become mechanically self contained. They were seeing huge leaps in speed as technology improved and riders came to terms with what this new technology was capable of.
After teasing you with the Isle of Man TT, the RBotR then gives you some 1920s style advice on how to get ready to compete in trials and perhaps even go road racing with your motorbike:
Civilisation continues to makes fools of us all in 2022…
Give up the cigarettes and alcohol entirely, but do keep the pipe smoking! Can you imagine modern, liability-driven manufacturers encouraging riders to do this sort of thing on their new motorbike? It’s difficult not to get swept up in the enthusiasm and possibility of riding at a time when it was still new to so many people, including the people who built the things! The lack of caution is exhilarating.
The book ends with a complete set of colour maps of the United Kingdom, but not before it talks you through buying your Rudge (this is a marketing piece, remember?). Your fifty pounds (about $1350CAD in today’s dollars) gets you the base model of the Rudge Four – for ten pounds more you can get the sport model. New bikes were much more accessible back in the day!
The final gift this old book gives you is a list of future readings if you’re interested in motorcycles and travelling on them:
Unknown Norfolk is on my shortlist. I wonder how many places I’ll recognize from growing up there fifty years later.
The Rudge Book of the Road was such an interesting read that I’m going to keep digging for some of these other historical moto-reading options. The RbotR suggests slipping one of these in your (tweed?) jacket pocket to read when you get to your destination and finally put your feet up – with your pipe, of course – after another exhilarating day of riding in the dawn of motorcycling.
A more modern motorcyclist philosopher, Matt Crawford, described riding as “a beautiful war“, the Rudge Book of the Road shows that it has always been thus. If you ride, you’ll find this a familiar and enjoyable refrain.
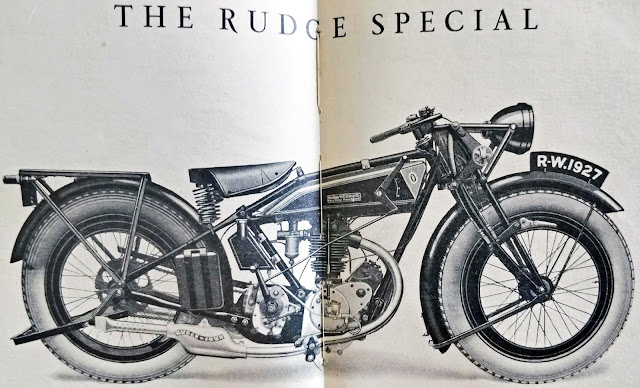
No rear suspension other than springs on the seat and a tank that hangs under the frame: state of the art motorcycle engineering in 1927 seems archaic but these machines were a huge step forward in dependability and hint at the evolution motorcycles would take.
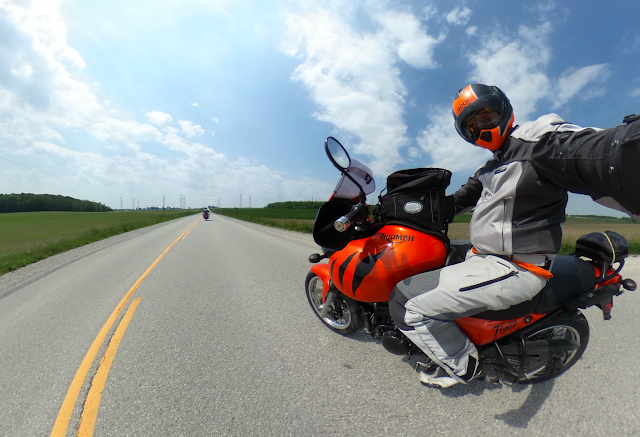
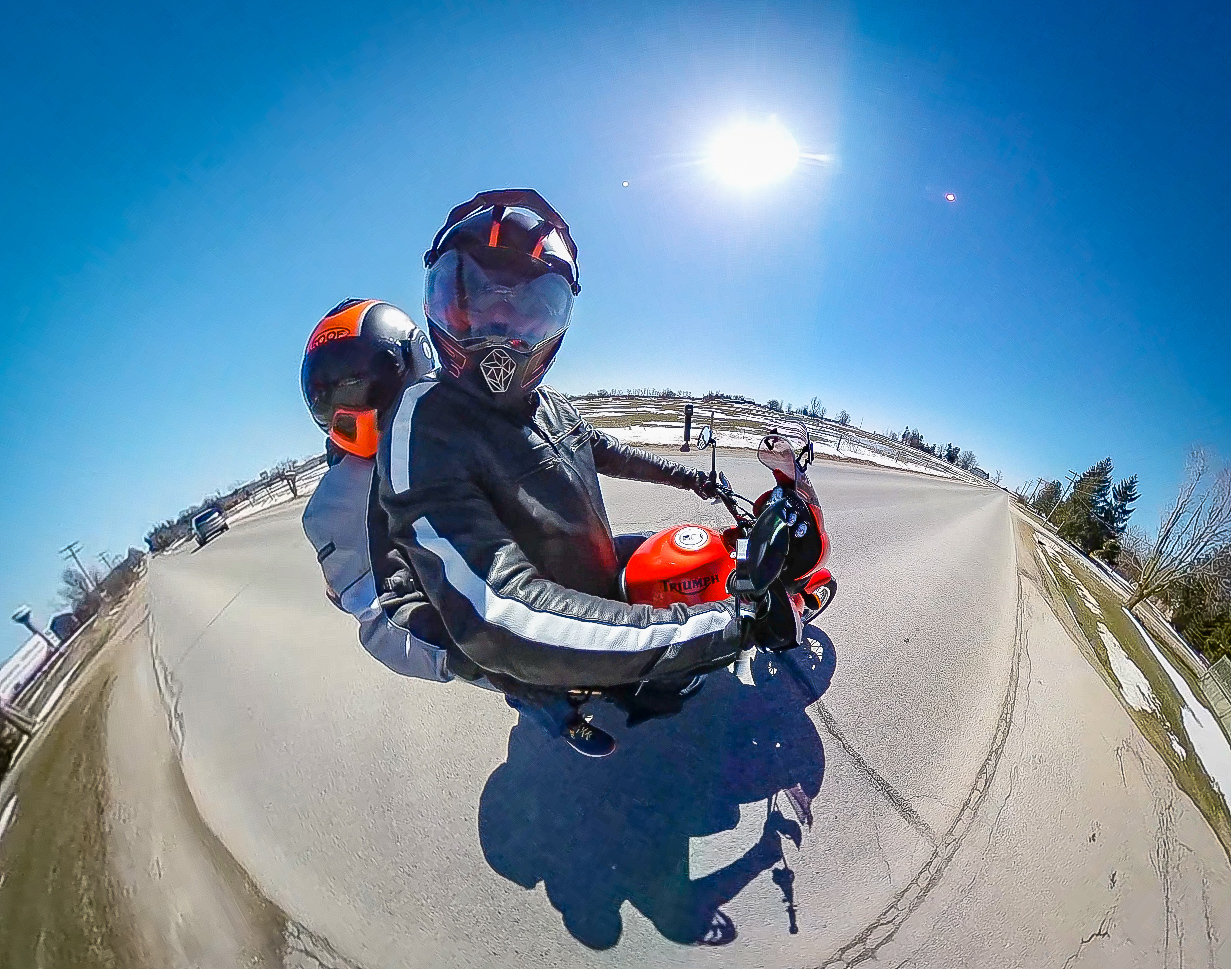
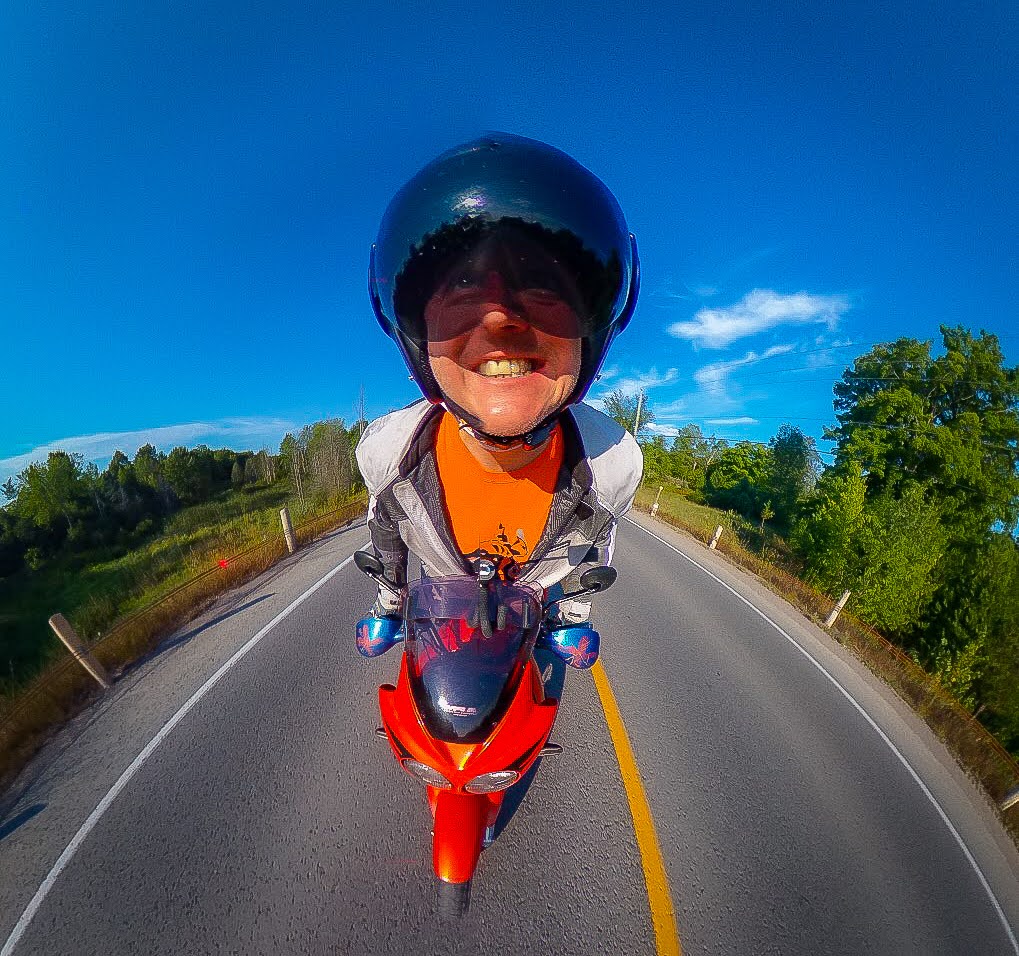
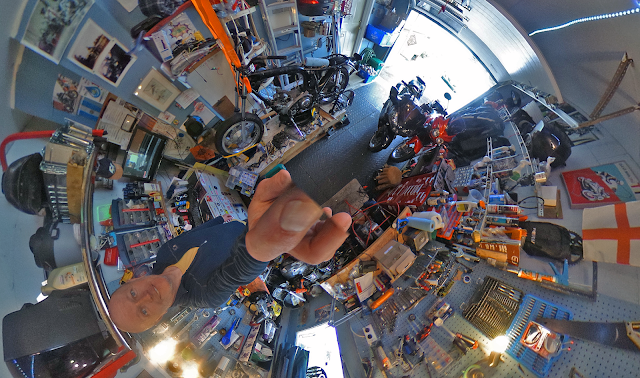
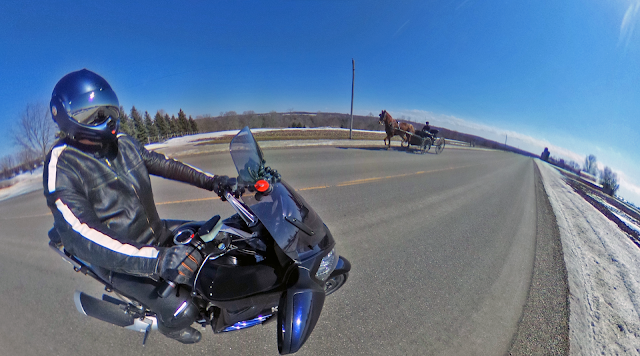
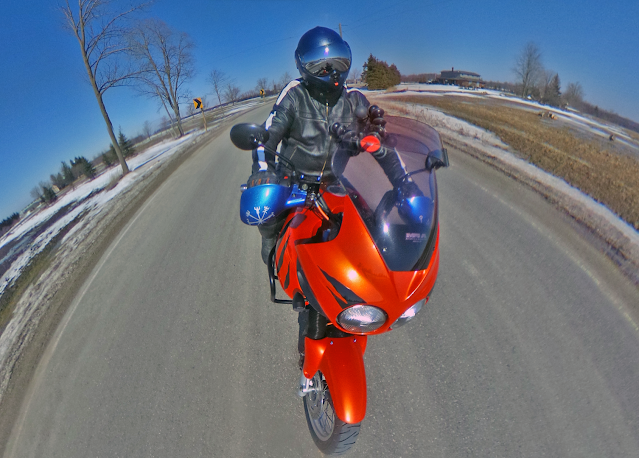
I’ve been asked how I manage to get on-motorcycle photos while riding, it isn’t with a drone! Here’s a quick how-to on taking striking action shots while you ride using a 360 camera attached to your bike using a flexible tripod. There are links at the bottom to other examples of on-bike 360 imaging.
You need a camera with a very wide angle of view. My preference is for a full 360 degree camera as this also lets you form your images into ‘tiny-planet‘ photos, which are a unique, relatively new way to compose a photograph. As part of my job I’ve tried many different 360° cameras, but my favourite for on-bike shots is the Ricoh Theta. It has bright, clear LEDs to let you know what it’s doing and is easy to operate (even when wearing motorcycle gloves) physical controls. It’ll let you preset things on a smartphone if you want, but it works just as well firing the shutter button for video or photo.
Other 360° cameras I’ve tried have you faffing around with smartphone based controls which don’t work with gloves on. I’ve also had problems, especially with Samsung’s Gear360, rendering images out of that camera in the provided software. The Ricoh software offers settings I value like interval photography and the software has never had a problem rendering quickly. All the 360° cameras I’ve tried have surprisingly good light retention and clarity of image for fixed lens cameras.
You might be able to get away with a 180° camera or something like a go-pro with fish-eye lens, but the 360° camera guarantees you catch everything because it catches everything with no need to aim and focus.
I started doing on bike photos by firing the shutter using the big button on the Theta. This produced some good on-bike shots, but you always end up with an arm in the photo holding the camera, and you look like you’re not focused purely on riding because you’re not.
There are some benefits to firing the shutter manually. You can time it to catch something interesting. You don’t have to focus or aim at anything because the camera catches it all in focus. You can make some interesting angles holding it low over the pavement, overhead or anywhere else you’re flexible enough to reach. Even with all that though, you’ve still got an arm in every shot, unless you’re really cunning with the cropping in post processing.
Last summer I was testing a self levelling gimbal for 360° video and made a video under the most challenging circumstances I could devise (riding a motorbike):
The gimbal did a good job of levelling things when the bike went around corners and I liked the focused-on-riding look of the shots. This experiment got me thinking about a way of fixing a camera to the bike that would match angles with the bike when it leaned over in a corner. I also wanted something that didn’t involve a camera right in front of me while I was riding.
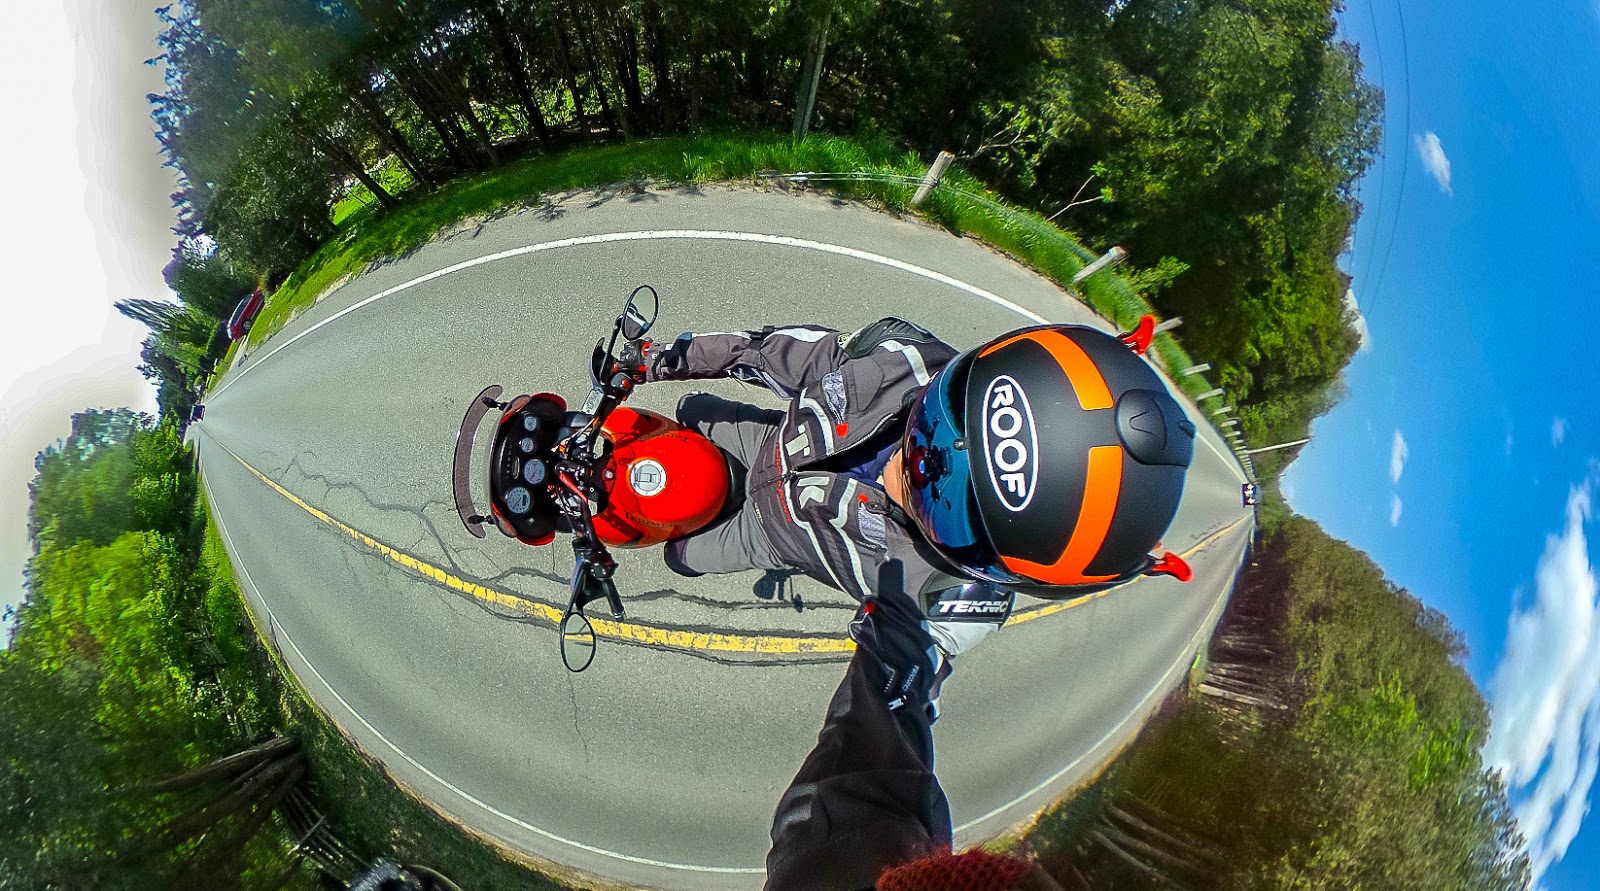
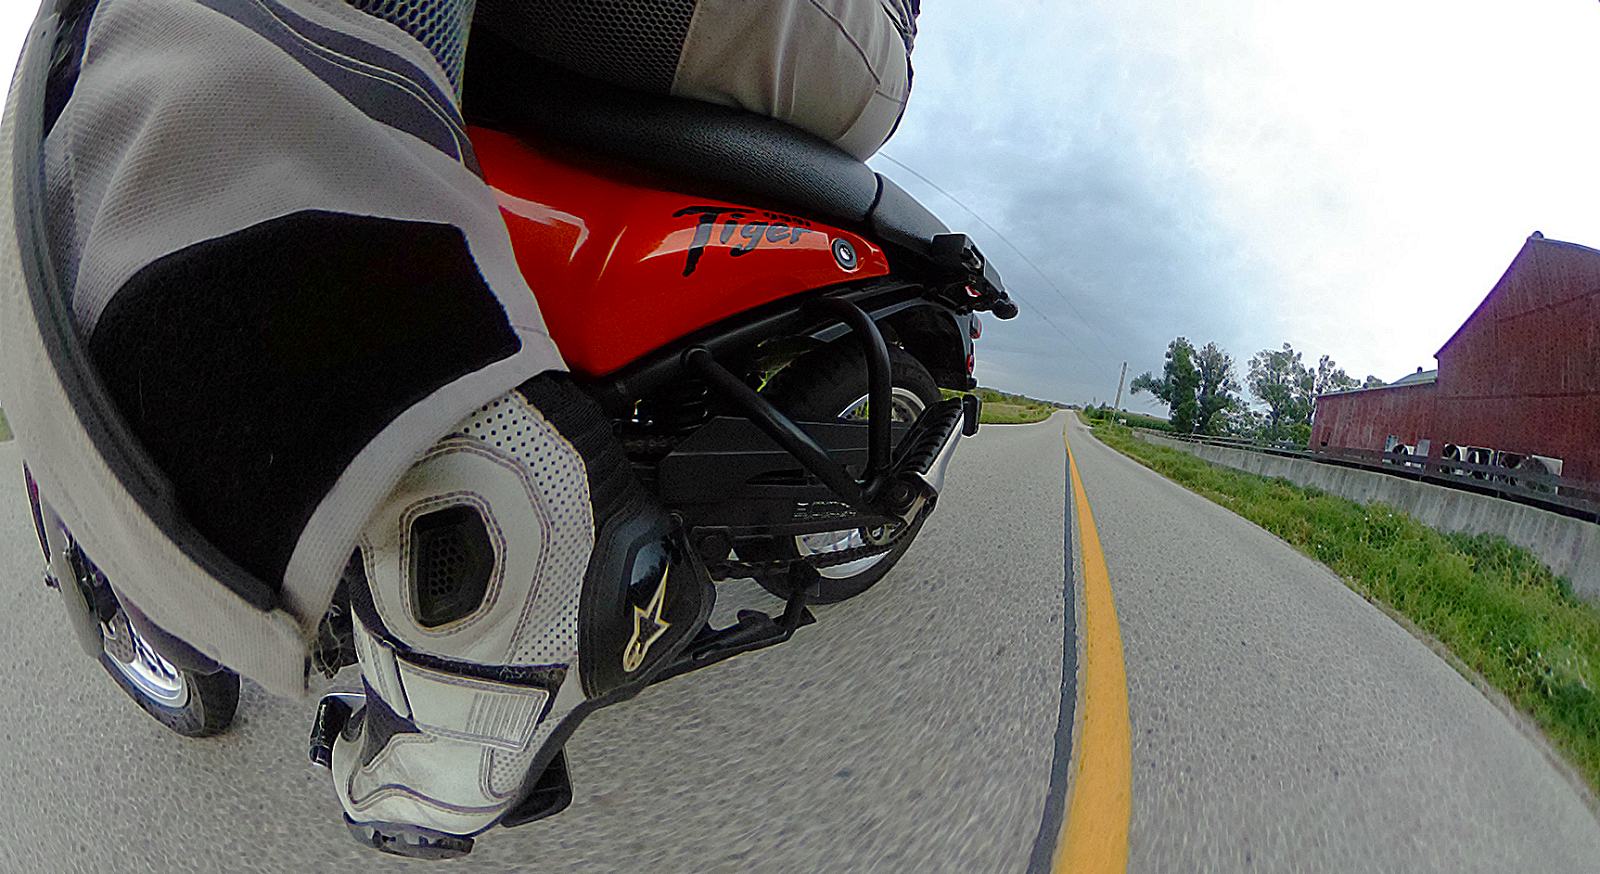
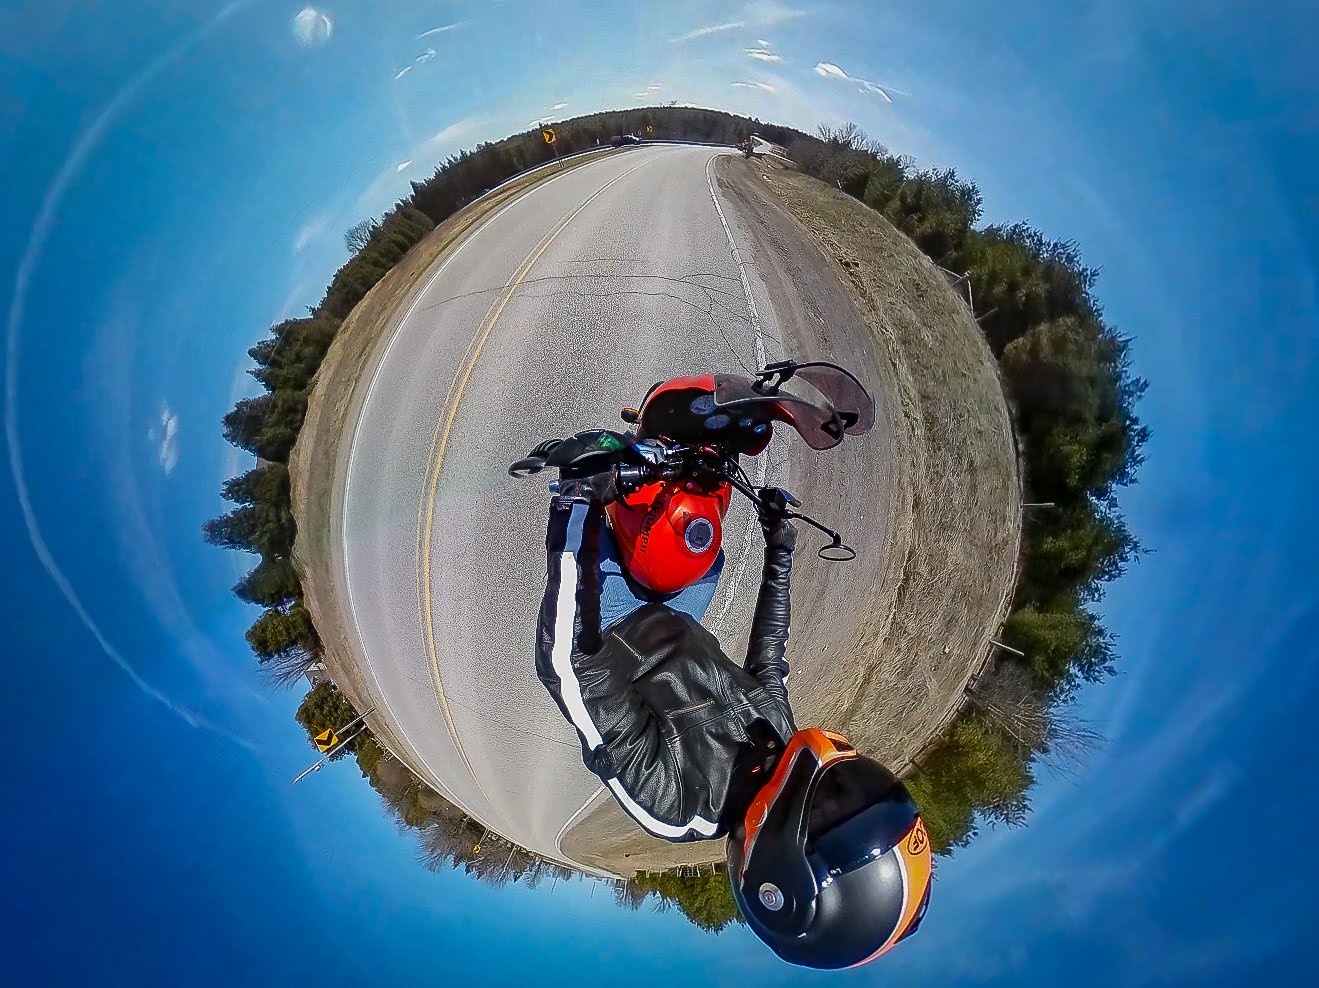
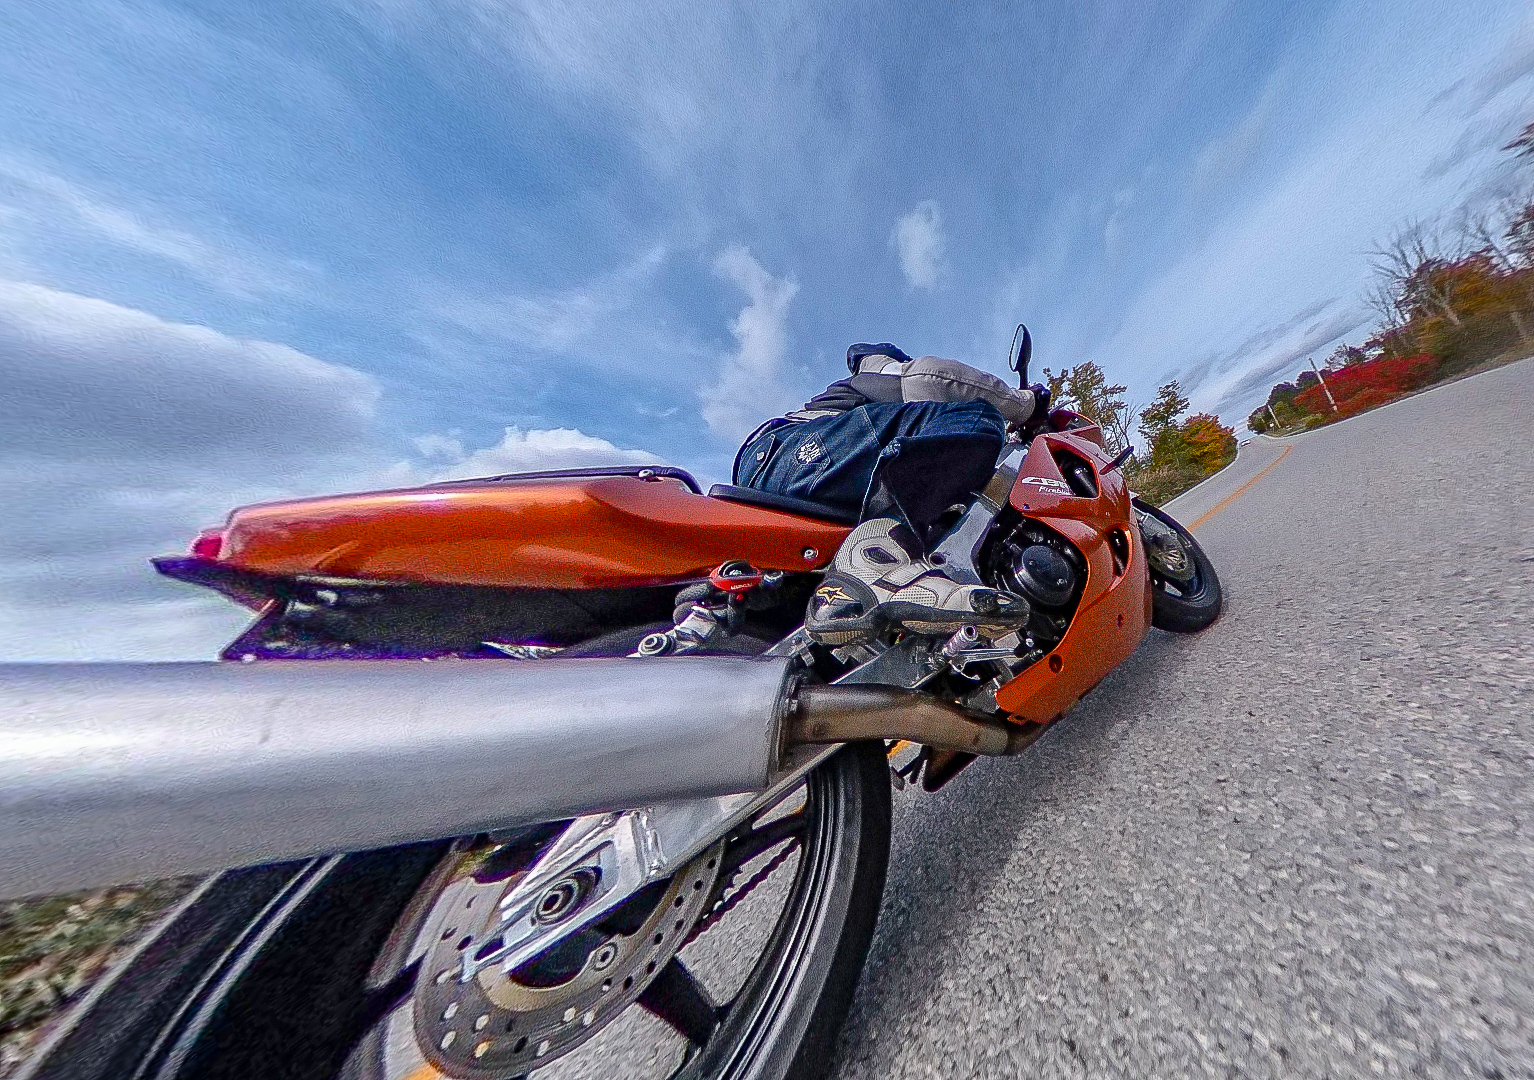
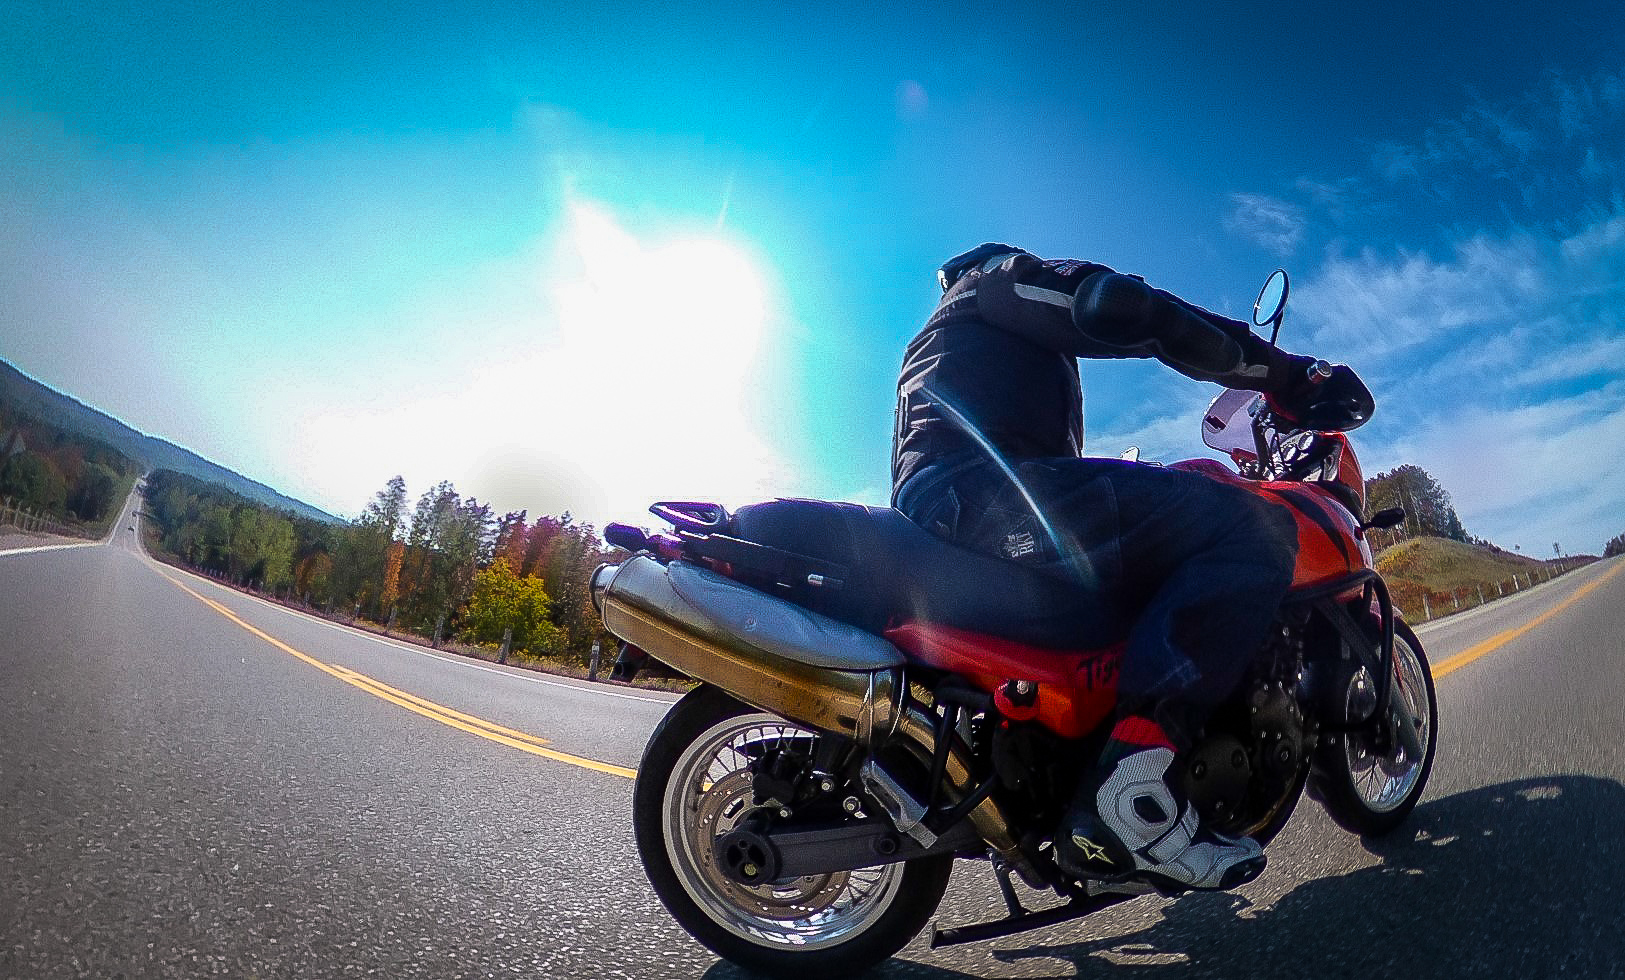
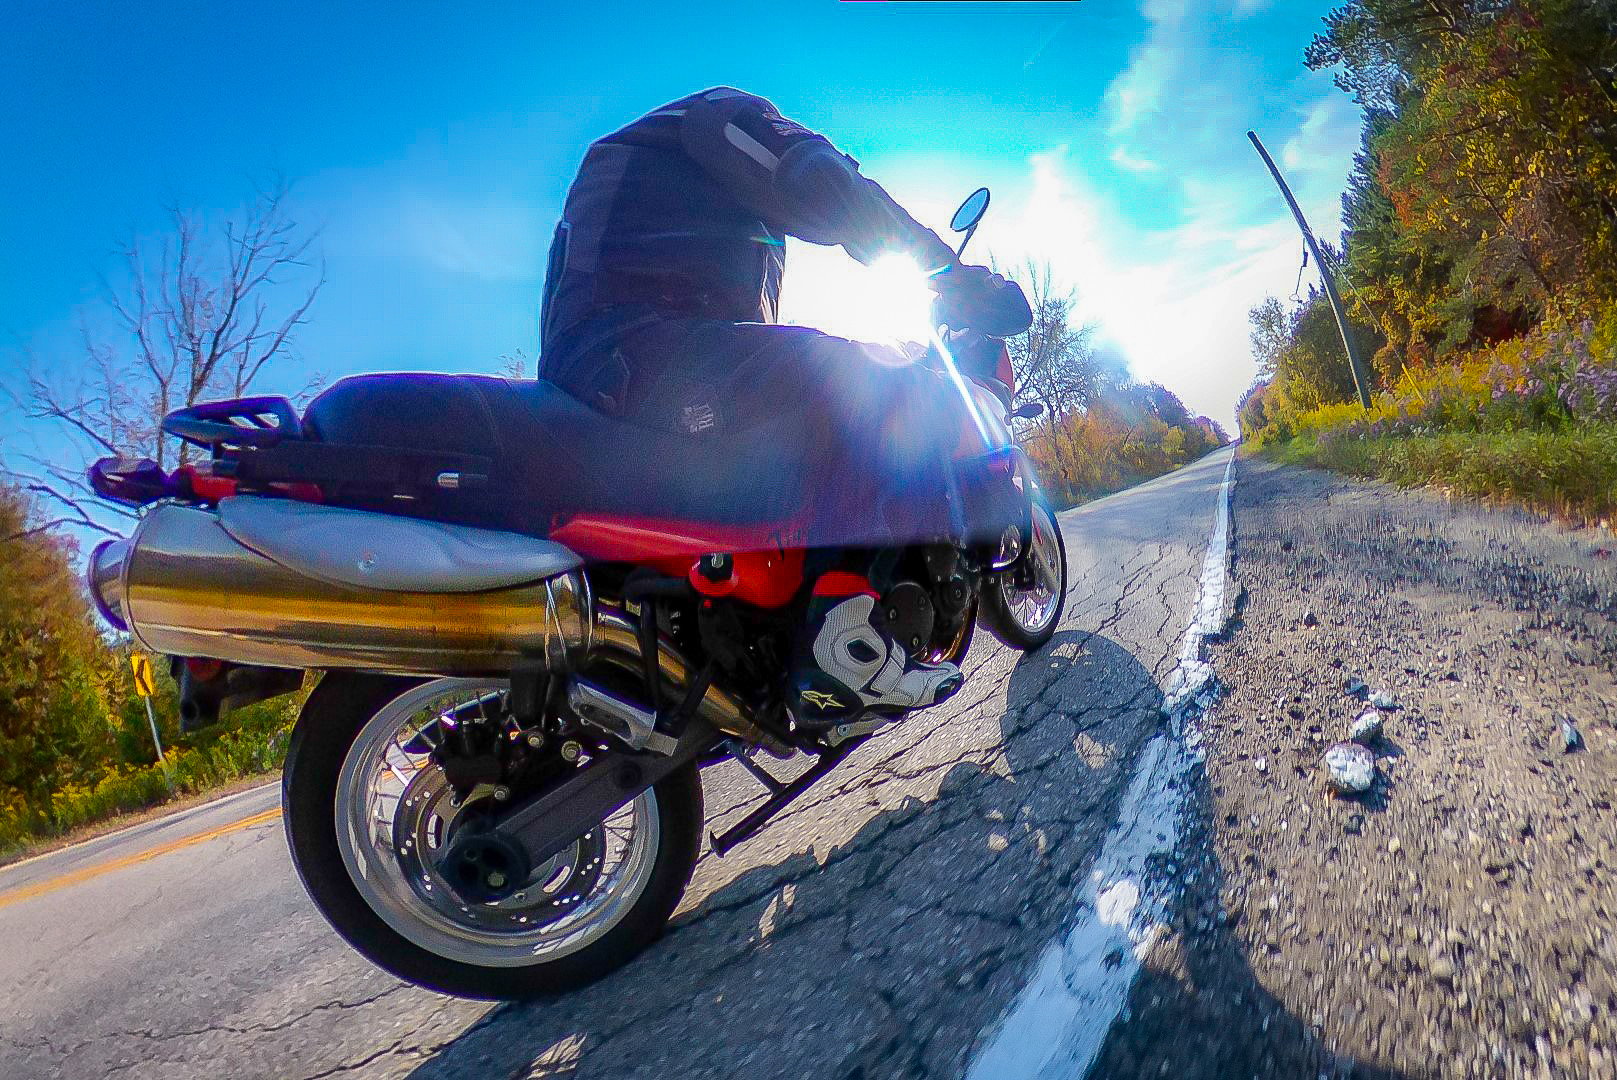
I finally settled on a gorilla-pod type flexible tripod. If your bike has raised rear view mirrors they make the perfect mounting point for the camera. If you wrap the tripod around the wing mirror with some care, you can still use the mirror effectively. Flexible tripods have good stretch, so I’d recommend wrapping one of the arms right around the mirror arm to ensure it stays attached even if it comes loose. I pre-set the camera to take a photo on interval mode every 5-10 seconds and then forget about it. When I get back I look through the photos for interesting shots and then pull them into the 360 software which takes the raw image data and lets you move around within the photo to frame the part you’re looking for. The shots you end up getting look like they were taken from a drone flying along next to you:
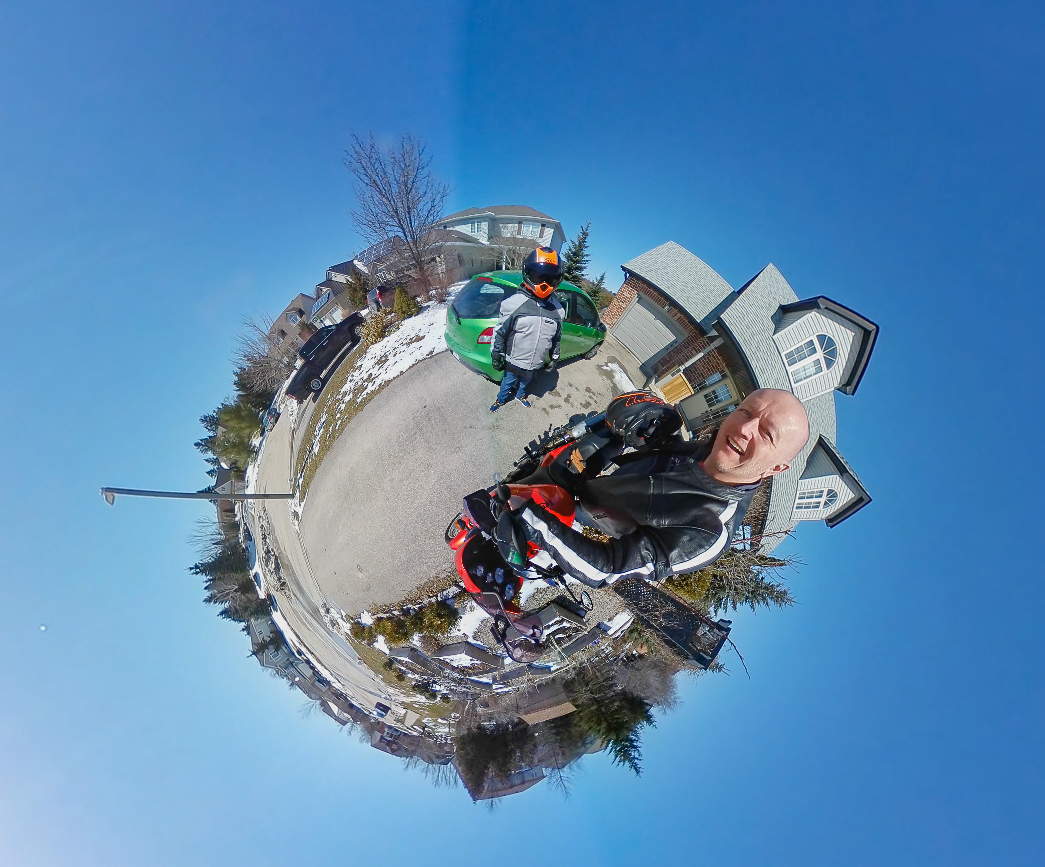
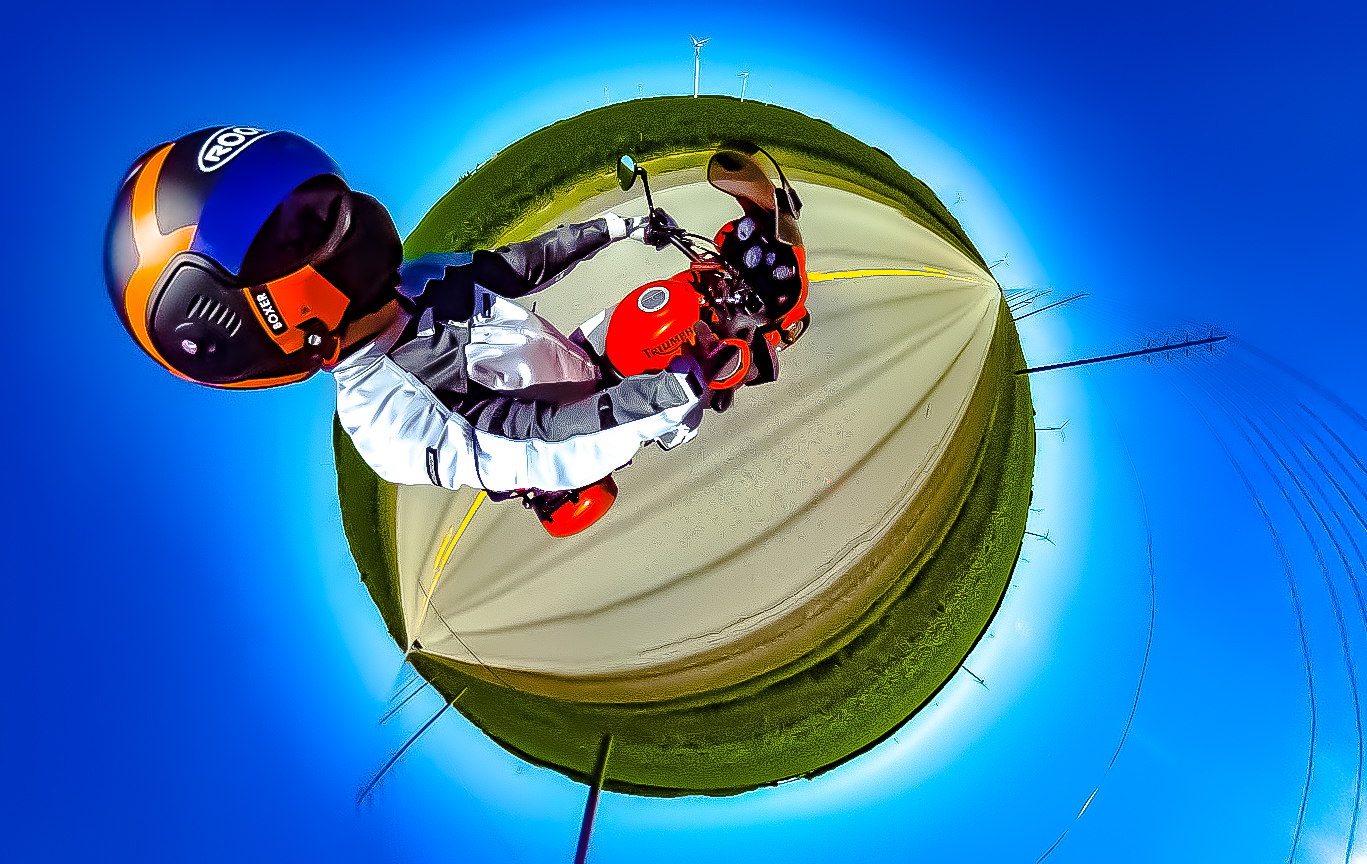
You can play with the geometry of 360 photos and video in a number of interesting ways. One of the most popular is the little planet shot where the image is distorted to make the ground a circle in the centre of the photo. The Theta software does this if you put your photos onto the theta360 website with the click of a button. Here are some ‘tiny planet’ images:
It’s digital photography, so don’t be tentative. Try different things, fire a lot of shots and keep the good stuff. With a bit of practice you’ll be producing amazing looking on-bike shots that’ll have people asking you, ‘how’d you do that?’
Here are the bullet points in case you’re a millennial that doesn’t read long form text:
Get yourself a quality Gorilla Pod type tripod. I use this one I got from Amazon, but I’d suggest going up market a bit – this thing is a plastic piece of crap.
Wrap it around one of your rear view mirrors.
I loop one tripod leg right around the mirror arm, so there is no chance of losing the camera (I learned that the hard way).
it has physical buttons that are easily usable even with gloves on
it has clearly visible LEDs and modes
the Theta has superior software for video and photo editing, including built in tiny planet settings and it never crashes or renders pixelated (like Samsung software)
it’s aerodynamic and much lighter than alternatives
Set the camera to video or interval photo-shooting, start it up and forget about it
When you get back download the videos or photos and check out what you caught
When you use the software you can look around within each photo and video and compose photos and video based on the bit you want to see
Getting a grip on running scripts in Photoshop lets you automatically generate hundreds of tiny planet images that can then be dropped into a stop motion video.
As GP from Hammy Hamster would say, ‘the elephants are against us.’ With the outside trying to kill us again, I’m focusing on doing a complete tear down of the 1971 Triumph Bonneville project. I was originally going to see if I could get the bike in motion as it is, but a combination of factors including 1971 Triumph build quality and the early 80s muppet who tried and failed to turn the bike into a chopper’s spannering skills have me now approaching this as a frame up restoration.
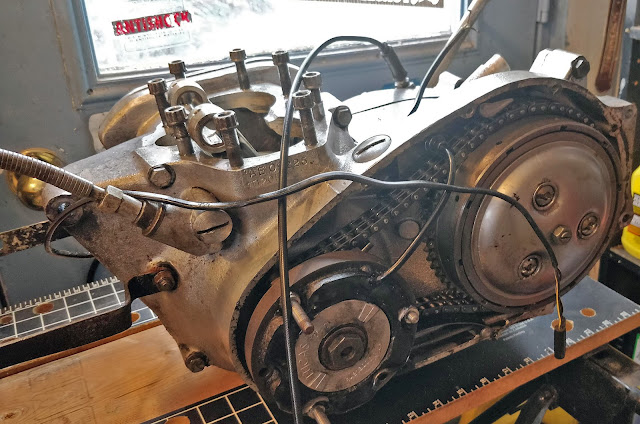
I’ve been working around the edges which has been good for reconnaissance in determining what state the bike is in, but now that I’m committed to doing the bike from the frame up the first job was to remove the bottom end of the motor and clear the way for a frame restoration:
The bottom end was surprisingly light and easy to lift out of the frame and none of the frame to engine bolts caused any problems. Some were quite loose, so a frame up resto is making more and more sense as I don’t trust anything the chopper muppet did to the bike circa 1983.
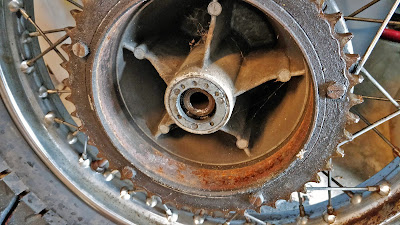
It was my first time into the rear drums and, like the fronts, they were age seized but otherwise not in terrible shape, though whenever I get into the dark places on this bike it looks like a scene out of Indiana Jones.
I’ve left the frame on the bench as I continue to strip it of accessories. The last time I did some coating work on a project bike it was with Fireball Coatings in Elora but seven years on they seem to have evaporated. I’ve been looking for alternate (and hopefully better) options and KC Coatings in Guelph looks promising. I intend to get in touch with them and see if we can shot blast and powder coat the Bonneville frame, I just have to make sure they can do it on a complicated oil-in-frame design like this one. Powder coating adds thickness and can cause problems with fasteners and fitting things back together so I need to find out if KC understands that and can can work with this one so that its mechanical pieces will still fit back together.
Following the frame I’ll sort out both wheels (bearings, tires and inner tubes) before getting the rolling chassis back together and then rebuilding the motor with my swish new 750cc head.
Motor out and on a pop up workbench by the window. It’s lighter than it looks.
I set up the Black & Decker WorkMate by the back door to the garage to give me somewhere to work on the bottom end of the motor. With the engine split and out of the frame, I can lift the parts off the bike around easily. I might put the bench away and make some space while the project is in pieces.
Revco is fantastic at shipping (even during a pandemic) and very transparent and communicative with delivery times. Everything I’ve gotten from them has been expertly packed, is new stock (no old/new tires). They know what they’re doing with motorsport tires.
The ’71 Triumph Bonneville came with 3.25 X 19″ front & 4.00 X 18″ rears and used Dunlop K70 tires as standard equipment.
It looks like there are modern Dunlop options for vintage SAE (non-metric) wheels at Revco where I’ve gotten my last two sets of tires. The handy chart below shows metric and imperial conversions but after some digging I was able to find SAE/pre-metric modern Dunlop K70s that are the exact fit for the bike. Using recent versions of original equipment that give me the benefit of modern rubber durability and grip while still keeping close to the originally engineering intent in Triumph’s tire choice is fantastic. I’m not trying to recreate riding in 1971, I’m trying to start with that technology and update where prudent for 21st Century use.
Tire ChartsMotorcycle Street Tire Size Conversion Charts
Metric
80/90
90/90
100/90
110/90
120/90
130/90
140/90
Alphanumeric
– NA-
MH 90
MJ 90
ML 90
MN90/MP90/MR 90
MT 90
MU 90
Inch-(Series90)
2.75
3.00/3.25
3.25
3.50
4.00/4.25
5.0
– NA-
Inch-(Series82)
– NA-
– NA-
3.60
4.10
4.25/82/4.40
5.10
– NA-
Front Tires:
Metric
80/90
90/90
100/90
110/90
120/80
120/90
130/90
Alpha
MH90
MJ90
MM90
MN90
– NA-
MR90
MT90
Inch
2.50/2.75
2.75/3.00
3.25/3.50
3.75/4.00
4.25/4.50
4.25/4.50
5.00/5.10
Rear Tires:
Metric
110/90
120/90
130/80
130/90
140/80
140/90
150/80
150/90
160/80
180/55
200/60
230/50
Alpha
MP85
MR90
– NA-
MT90
– NA-
MU90
MV85
MV85
– NA-
– NA-
– NA-
– NA-
Inch
4.50/4.75
4.50/4.75
5.00/5.10
5.00/5.10
5.50/6.00
5.50/6.00
6.00/6.25
6.00/6.25
6.80/7.00
7.00/7.25
7.90/8.00
9.50
Size
120/80V16
130/90H16
130/90V16
500S16
MT90H16 3.00
130/90H16 3.00
140/90H16
140/80VB16
140/90H16
150/80V16
160/80H16
160/80H16
200/60VB16
120/80V18
120/90V18
120/90H16
130/80V18
130/70VB18
150/70VB18
140/70V18
170/60VB18
180/55VB18
230/50 X 15
Rim
2.75
3.00
3.00
3.00
3.00
3.00
3.50
3.50
3.50
3.50
4.00
4.00
5.50
2.75
2.75
2.75
3.00
3.50
4.00
4.00
4.50
5.50
7.00 to 8.00
Overall Width
4.7
5.00
5.2
5.2
5.3
5.4
5.8
5.9
6.0
6.2
6.4
6.8
7.9
4.8
4.8
4.9
5.2
5.4
5.9
6.1
6.9
7.0
9.5
Overall Diameter
23.8
25.4
25.0
26.4
25.3
25.6
25.6
24.8
25.8
25.4
26.1
26.1
25.9
25.9
26.4
26.3
26.3
25.4
26.2
25.7
26.0
26.3
25.3
Note: Measurements are based on the given rim widths. A rough rule of thumb: Each additional 1/2-inch of rim width will be approximately 1/4-inch more in each tire width.
The K70s at Revco are just over a hundred bucks a pop and Counteract Balance Beaded inner tubes are actually cheaper than name brand plain old rubber inner tubes. I’ve been using the Counteract beads for years to great effect so they’d be my first choice even if they weren’t cheaper. All in I’m looking at about $320CAN ($250USD) for new rubber for this vintage restoration project, which considering the price of some of the other parts is pretty reasonable.
In order to rebuild the wheels I’ll need to replace the bearings and clean up the brakes before putting new pads and hydraulic brake cylinders back in them. All that and getting the frame sorted out will get me back to a correct rolling chassis ready for the upgraded engine.
Somewhere at the end of all of this will be a road worthy ’71 Triumph Bonneville, but it’s a lot of parts to find and get in and then a lot time in the garage to get there. I’m hoping it’ll be on the road for next year’s riding season. As we thaw out here in Canada I’ll be out on the Tiger and GTR and not spannering so much.
Meanwhile, here are some more motorcycle tire sizing reference charts found on the interwebs:
I was up early, getting ready for my 3rd day of commuting to Milton on the Ninja. The sky was heavy, the roads patchy but still mostly dry. In the 20 minutes it took me to get ready the weather moved in, rain bucketing down, the sky so dark the street lights came back on.
I’m standing there on my porch looking at the bike which I’ve got started, sitting in the driveway with rain tearing off it. I’ve gotten into the safety gear, then the rain gear. I’m hot and dry, but I won’t be for long. The car is sitting there, an easy, comfortable option.
I’m looking for experiences. I could have stripped down and taken the easy way down, but I wouldn’t have felt the rain, or smelled the world as it opened up under it. I wouldn’t have been out in the world as mist rose from the ground and trees emerged from the fog.
I was worried about the 401 but I need’t have. With the rain it was barely moving. By the time I got to Milton I was crawling along at walking speed behind a transport truck. I arrived at the school after an hour in the wet. The worst was in Elora, then I drove out of it and it was only drizzle, but by then I was hosed.
I only lost the back end once while downshifting and a quick hand on the clutch got that back in line. I stopped downshifting after that while in the deep water.
It’s 2pm now. Most of my gear is dry after some time under hand dryers and sitting on a warm lamp stand. In retrospect, today would have been a good day to wear my big cool weather boots – I think they’re waterproof too, unlike the AlpineStar summer boots I had on. I now know my gloves aren’t remotely waterproof. The rain gear did a good job of keeping me warm and mostly dry. The only wet spot on my body was on my stomach. It probably got in under the jacket. I’ll tighten that up next time.
It would have been easier to jump in the car, it would have been more comfortable, but it wouldn’t have left me with an idea of what riding in driving rain feels like; lessons learned.
It’s 6pm now, and trying to dry out wet gear in an air conditioned lab is all but impossible… there is nothing better than some good old sunlight on a hot deck:
I finally found KW Honda today! It’s hidden around back of the big Honda car dealer peddling bland people movers. If you head around back you find Repsol themed race bikes and jewel like VFRs. On a much needed lunch break from Skills Ontario provincial championships with thousands of boisterous teenagers watching a few hundred wonderfully talented ones, I got some head space wandering through the Hondas.
The bike I longed for as a teenager was the VFR750, so I was hoping to find its spiritual successor at the Honda dealer, and I wasn’t disappointed. The white VFR800 they had on the floor was breathtaking. The paint has a subtle pearl iridescence that gives it fantastic depth. Every detail of the machine has a finished quality to it that I’ve found lacking in a lot of other bikes; it’s a bike worthy of desire.
Stealth fighter cool front end on the VFR800…
They had a number of older Hondas as well, including this astonishing 1970s CBX with a massive air cooled six in it! If I had thirteen grand to throw around a VFR would be in the garage right quick. Sitting on it, my legs are about as folded as the Concours, I’m leaned forward more but it’s a substantial bike, I don’t feel like a circus bear on it.
Gudgeon: one who will bite at any bait or swallow anything, credulous or gullible person Mer. V. I. i. 102. (that might apply to this project)
Definition of gudgeon
1: PIVOT sense 1, JOURNAL (we’re getting closer)
2: a socket for a rudder pintle (a rudder pintle?)
Definition of gudgeon pin: WRIST PIN
Definition of wrist pin: a stud or pin that forms a journal (as in a crosshead) for a connecting rod (that’s it!)
They can make up anything! Nobody knows! Well, you need a new Johnson Rod in here!
A few people know, George. Consumer ignorance is expensive, but who has time
to understand the machines they depend on?
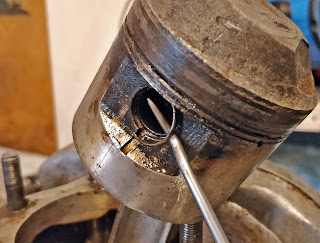
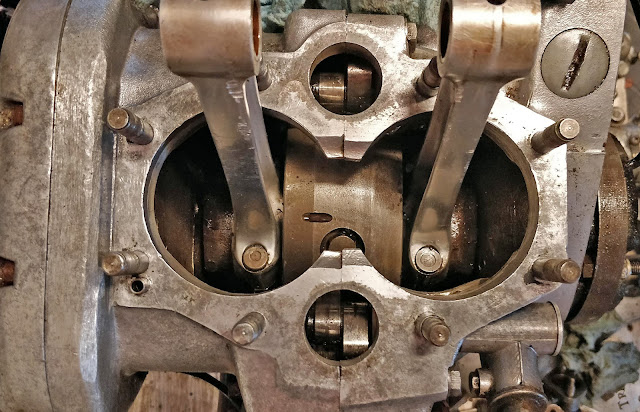
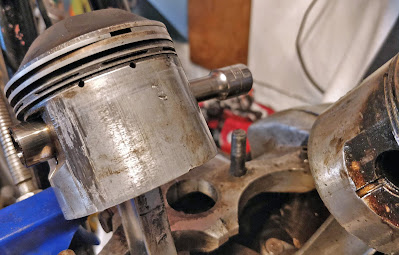
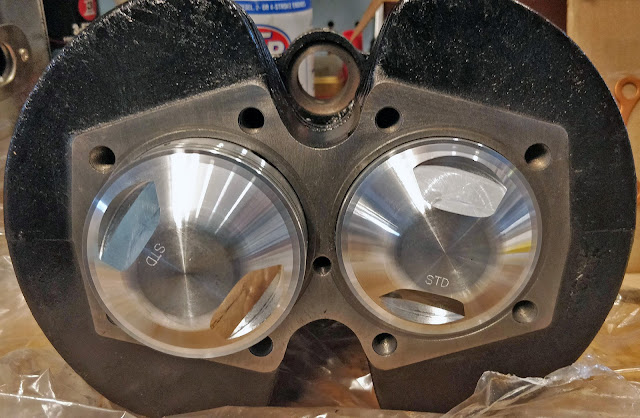
Gudgeon pins? After the massive fight that was removing the seized cylinder head, I was bracing for misery, but I was able to pop the circlips (!) out and tap the gudgeon pins (!) through with no sweating and swearing. Pink Floyd was playing on the computer and I think music from its era calms the old Bonneville down when I’m working on it.
The circlips popped out easily and a 3/8 inch socket extension was the perfect size to tap out the ‘wrist’ pins. I thought the one on the seized side might cause more problems because it had been stuck in place with moisture but it didn’t and both came out easily leaving a motor bereft of its pistons.
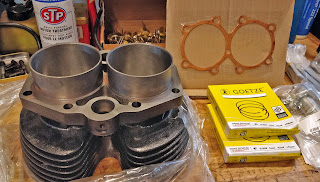
British Cycle Supply Co. delivered my 750cc kit quickly and without any headaches (and also for about $200 less than comparable kits out of the USA), so I got the shiny new bits out and had a look:
You’d think a 750cc head would look significantly different to the stock 650cc unit, but you have to look closely to see a difference in size.
I had a close look at the connecting rods and they appear to be in good shape and the bottom end of the motor moves freely. I think next steps are to remove the rest of the engine from the frame, give the oil-in-frame a deep clean and then recoat it with some quality paint. With the frame cleaned up and sorted I’ll strip the rest of the motor and clean everything out to ensure nothing’s whacky before I begin the great rebuild.
I could just chuck it all back together now and hope for the best, but if it ends up having other niggles rushing things at this point is just false economy. I’m not worried about making the bike look mint, but I do want it to be dependable and that wouldn’t be the case if I haven’t checked it over completely after such a long (30 year?) layoff. An engine out deep restoration was always the intention here and I’m not in any kind of rush since the other two bikes are both five by five and felt fantastic on their first rides of the year this past weekend.
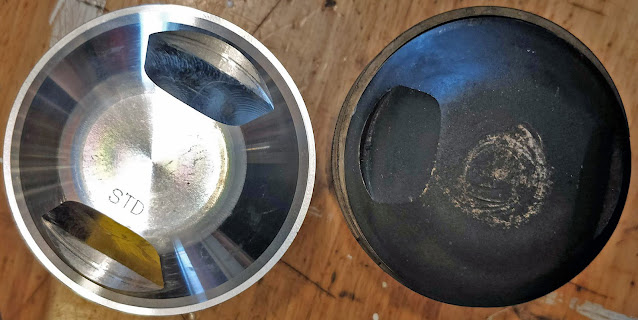
The gudgeon pin itself looks to be in good shape, which is good because the head kit didn’t come with new ones. The circlips came out nicely too but the kit did come with those. It amazes me that even specialized material like that in these cylinders can withstand the extreme forces they operate in. This Bonnie had done at least twenty thousand miles on these cylinders and they’re still in remarkable shape considering they were face to face with more than 17 controlled explosions every second (a spark plug typically fires about 17 times per second at 2000rpm!). You’d think all that heat and violence would cause more wear than I’m seeing in the beating heart of this motor.
This is the 3/8 inch socket extension I used to tap the gudgeon pins out. Nothing grabbed or slowed the process down and I barely had to apply any pressure. I might have even been able to push them out had I been so inclined. I caught the pin as it came loose and the cylinder lifted off the connecting rods easily. Again, considering the extreme conditions the heart of every engine operates under, I’m impressed by the engineering and metallurgy that makes all this possible.
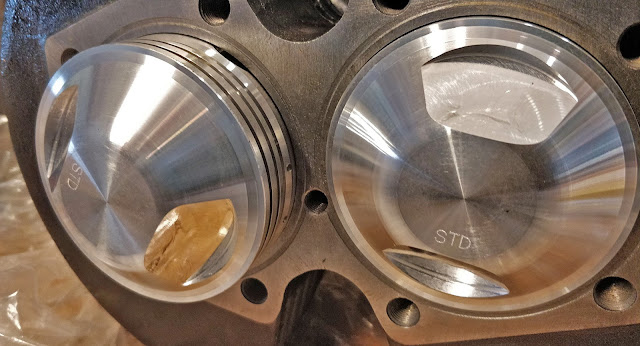
The new cylinders don’t have the carbon build up from all those combustion cycles and look pretty spectacular in their pristine newness:
Here’s the whole kit from British Cycle Supply. It includes the cylinder head, cylinders, piston rings, circlips for the gudgeon pins and a head gasket. I swiped the last one they had in stock for $688.75CAD ($535USD – told you I got a good deal). Unfortunately I might be the last person on the planet to get a 750cc kit that cheap. Prices will be going up on the new stock and probably even higher than that as we’re in an inflationary spiral thanks to Putin overreaching and years of pandemic fueled broken supply chains; we live in interesting times.
Another tool came in that’s interesting. I was reading Practical Sportsbikes last week (highly recommended if you love bikes and getting your hands dirty on them), and editor Chris mentioned an endoscope smartphone camera he was using on a project bike to inspect the internal parts of an engine. I found one on Amazon for under $40CAD and it came in on the weekend. It lets you see parts of the engine that haven’t seen light before. It’s an exciting thing that offers you a look into the secret life of engines. I’m looking forward to using it as i continue to work on the Bonnie.
Through an inspection hole inside the engine – it’s disco in there!
That look on my face after the first ride in a long, long time.
The 12 year old Kawasaki (left) and the 19 year old (!) Tiger (right) were keen to turn a wheel after a long hibernation.
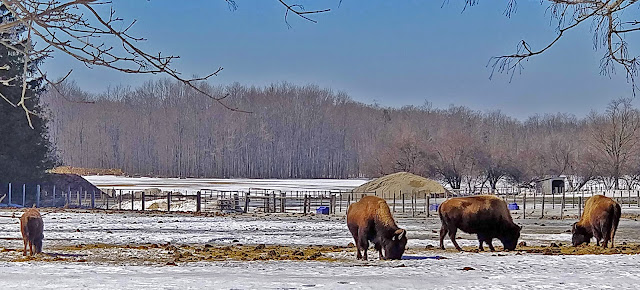
Bison were out bisoning at Black Power Bison Co. when I was out for a ride in balmy 6°C March Sunday.
Imagine having an itch you can’t scratch for 112 days. Riding a motorcycle in Canada is an ongoing act of stoicism.
It was a long one this Canadian winter. I’m usually able to get out for a cheeky February ride, but not this year in Ontario. Winter started later but when it came it clamped down on us like an angry professional wrestler and didn’t offer any breaks from Polar Vortexes and snow. My last ride was mid-November, it’s now March.
T’was -22°C on Friday and tonight we’ve got freezing rain and snow into tomorrow, but it was a balmy 6 today so off I went.
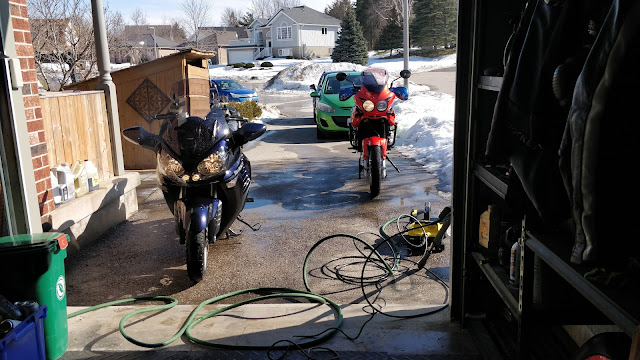
The C14 started on the first touch and was bullet proof on a 30km ride up and down the Grand River:
It was mennonite o’clock as I shook the cobwebs out of the Connie.
The Tiger took a bit more convincing but that wasn’t its fault, I’d had the whole fuel injection system out for a cleaning and it needed to get represussurized. Once it had fuel it took off like a rocket!
The roads were thick with sand and salt so after a cleanup everyone is back under a blanket waiting for the next break. I’d be a year rounder if I still lived in Norfolk (UK).
On the upside, the 750cc cylinder head for the 71 Bonnie project came in so I’ve got other things to do!
If you work in education and leverage technology (so that’ll be anyone in any classroom these days), give this a read and see if it doesn’t make you a bit uncomfortable.
Perhaps you’re thinking that your particular edtech provider isn’t like that, but they’re all coming at it from the same angle:
Apple is into it.
Google is into it.
Microsoft is into it.
And what angle is that? Marketing for the attention economy, of course. Big tech’s focus on a ‘total service environment’ is there to make sure you never leave: whether it’s #tech or #edtech, we’re all living in Hotel California; you can check out any time you like but you can never leave.
Platform agnosticism has been a recurring theme on Dusty World since it began. I’ve been barking at the moon about this for years because we don’t leverage educational technology to teach how technology works, we just let it insinuate itself into all our learning while being illiterate in terms of how it influences us through media and medium. We predicate technology use in education on media illiteracy.
If we taught digital fluency, anyone who became digitally skilled in our education system would be much better at identifying fake news and managing their digital presence. If we taught digital fluency instead of depending on consumerism to do it for us we’d be platform agnostic both in hardware and software in every classroom so students understood how things work and influence their thinking instead of producing blinkered consumers for corporate consumption.
Imagine if our language and social studies teachers got certifications by certain book publishers and then only taught from that publisher’s collection in the way that their particular publisher provided; that’s what we’ve done in educational technology over the past two decades.
“In a social-science class last year, the students each grabbed a Google-powered laptop. They opened Google Classroom, an app where teachers make assignments. Then they clicked on Google Docs, a writing program, & began composing essays.”
We use edtech to indoctrinate students in closed digital ecosystems designed to monetize their attention. It doesn’t matter which multinational edtech ‘solution’ your board uses, they’re all the same, and they’re all playing the #metaverse marketing game:“marketing spin on Big Tech’s increasing reach and power. It’ll be Big Tech—just as problem-riddled as now—but bigger.”
Wouldn’t it be something if we required and taught platform agnostic access to all technology in our classrooms instead of acting as a marketing arm for rich, tax dodging corporations? These organizations are parasitic, our kids deserve better.
The ‘drink from the firehose’ approach to edtech doesn’t end when we’re told what we have to teach with. Many teachers then brand their practice with corporate logos.
The point of that article is that a true metaverse (a shared, non-partisan online space) hasn’t existed since the dawn of the internet. Once the attention merchants got a hold of it they subverted democracies around the world and created a privacy and security nightmare, including in education.
Perhaps the saving grace in this might be that if any of them could get past their greed, educational technology would be the place to make this non-partisan metaverse happen. Instead of demanding control of the technology narrative to generate users, wouldn’t it be something if the technology giants and school systems around the world worked together to create an educational metaverse that was platform agnostic and open to all?
Even Hollywood can only envision a corporate owned future mind-space.
The Concours carburetors weren’t snapping back when I released the throttle. Everything worked, but they wouldn’t close on their own as they should. I removed the carbs, reset the butterflies so they all closed properly and replaced a bent spring. With everything lubed up and working freely, I reinstalled the carbs and ran the throttle cables over and along the top of the frame rather than around the side, trying to have the throttle cables address the carbs as perpendicularly as possible. With the cables properly tightened, the carbs snap shut when the throttle is released as they should.
My to-do list on the Concours is down to a rebuild of the master break cylinder. The part isn’t expensive. I’d purchased a set and did it on the Yamaha XS1100 I had before, so the Concours should be pretty straightforward.
I also have to sort out a rear light and body panels for the back end. I’d asked if they could be done at school in the metal shop, but asking for work to get done there seems to result in it disappearing down a hole. I’d rather do the work myself anyway. The plan is to form the panels for the back end and find a rear brake light with indicators built in and wire it in to the back end.
The last job is going to be reworking the radiator reservoir to somewhere around the battery box. With that done, in theory, the Connie will be ready to begin test riding the kinks out.
Follow-up: rear brake lights were found on ebay – let’s hope they arrive this time.
If they do then ebay is a more dependable shipper than the Amazon Marketplace, which seems pretty bizarre, but there you are.